If you often comment on websites or blogs or are a blogger, then registering a Gravatar WordPress avatar is necessary. You only need to register once, but it helps you make your own mark on the internet community. Let’s learn about Gravatar and add your profile picture!
Benefits of Gravatar WordPress Avatars
- Personal brand identity: When a profile picture with your nickname appears frequently on the website or blog community, gradually, people will become familiar with your personal brand. When you regularly share valuable content and help the community, people will be excited to interact with you every time you appear.
- Create a sense of authority: Like Facebook, a virtual account user without an avatar will not feel as authoritative as a real account.
- Highlight comments—increase attention: Most users comment on the website. Blogs do not have avatars; if you have, your comments will be more attractive and attract more attention.
- Used on hundreds of millions of websites: 41.7% of websites in the world use the WordPress platform (2021). You only need to register your Gravatar profile picture once to comment on many websites – blogs.


Add Gravatar WordPress Avatar
Prepare yourself for a beautiful photo and follow the step-by-step instructions with pictures below.
Step 1: Go to gravatar.com click Create Your Own Gravatar.


Step 2: You will be redirected to the WordPress.com account registration page, sign up for an account.
Use the email you usually use to comment on websites – blogs
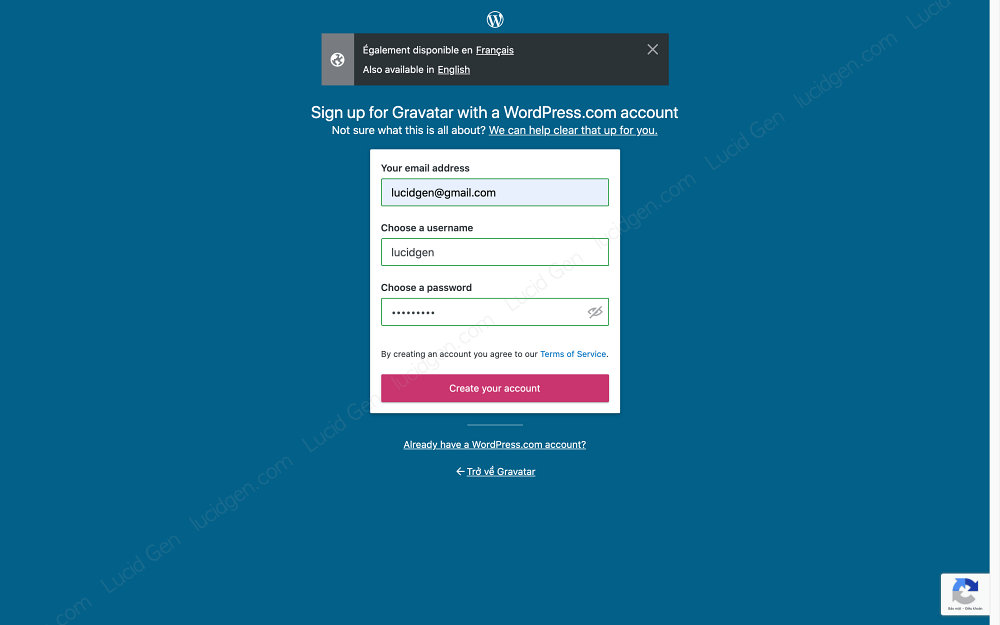

Step 3: You will receive an account activation email > click Activate Account.


Step 4: Return to Gravatar, you click the Sign In.
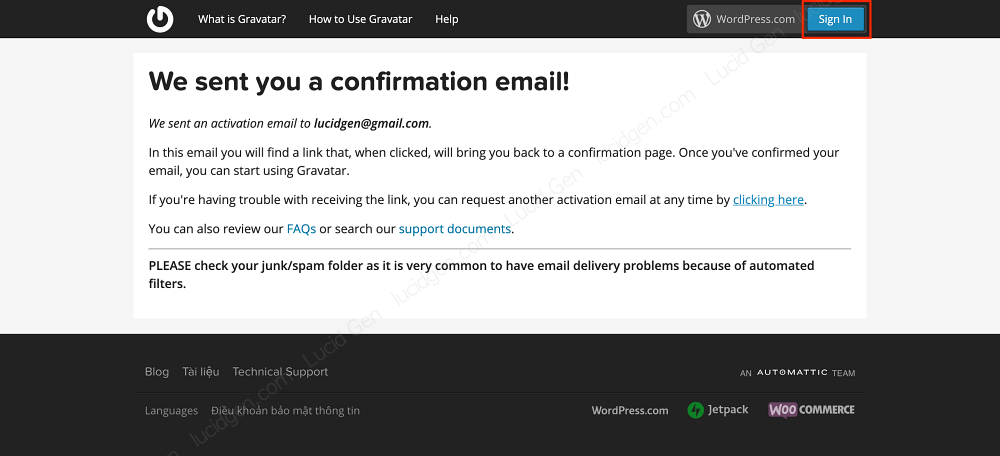

Step 5: You click on the line Add a new image.
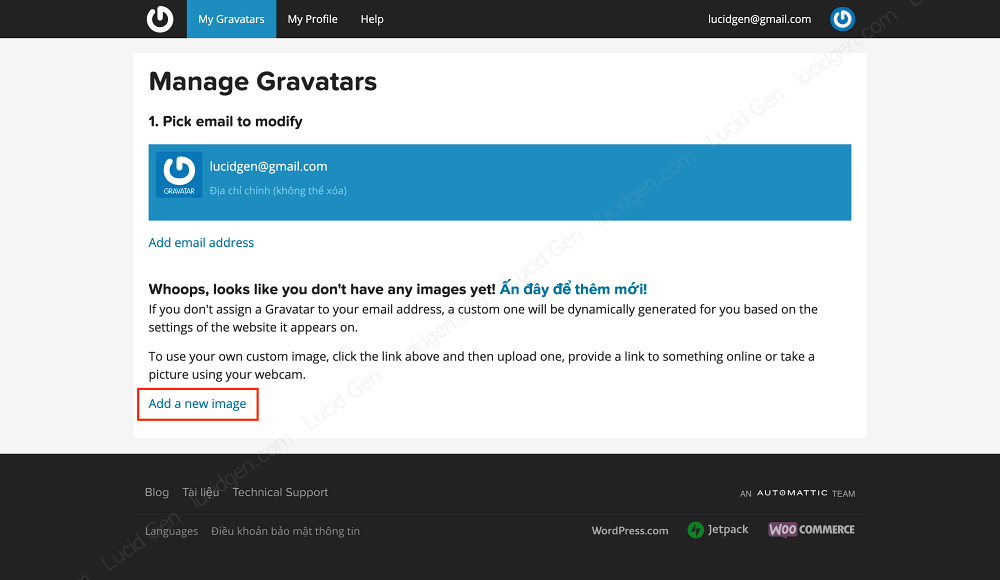

Step 6: Select your image source, usually upload photos from your computer, then select Upload new.
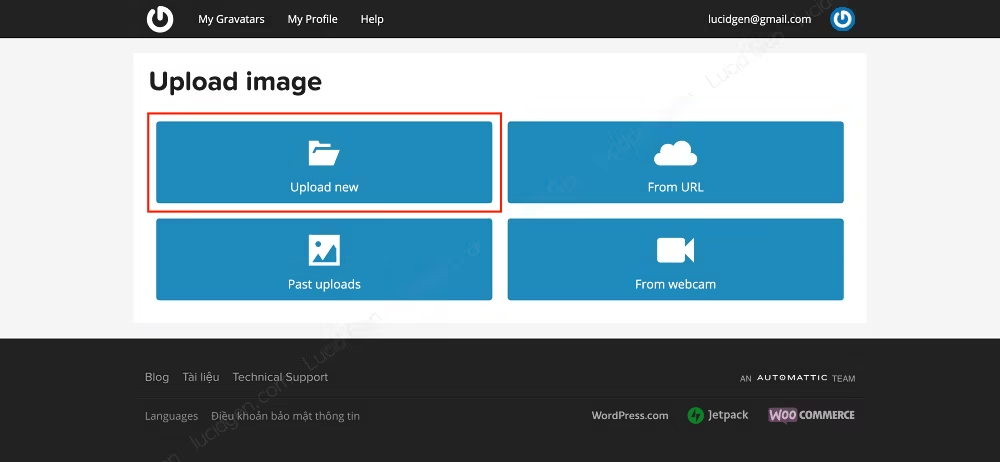

Step 7: You select the image file on your device and then click Continue.
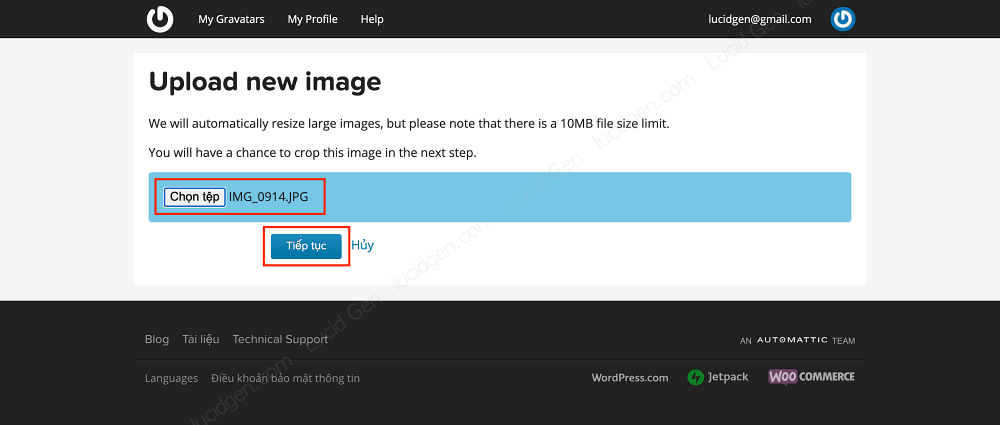

Step 8: You align the position of the avatar, see the preview on the right, see OK, and then click Crop Image.


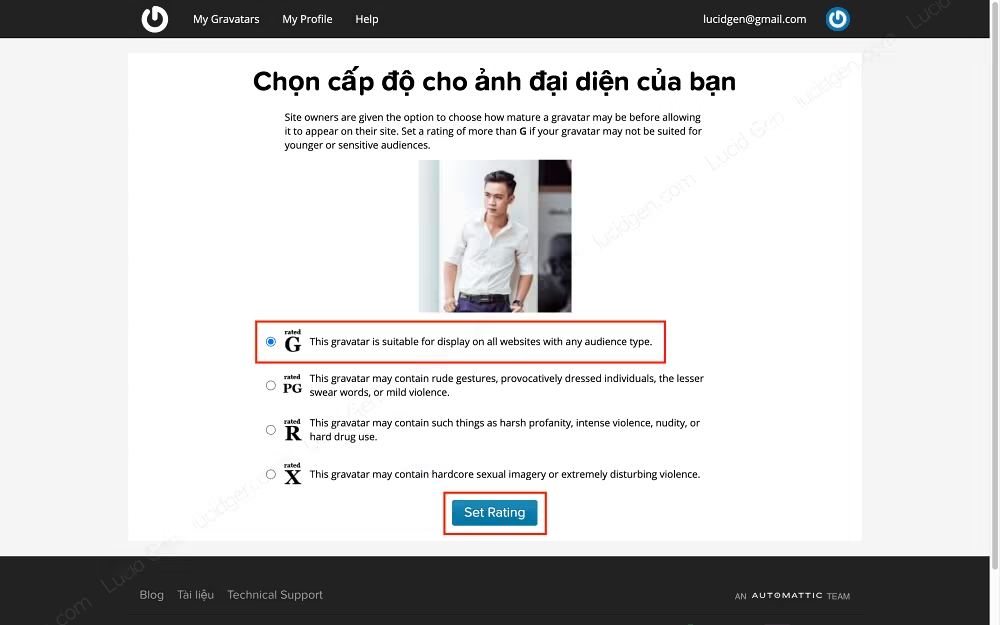
Step 9: You choose the level of avatar we use for the website community – blog is G > click Set Rating to complete.

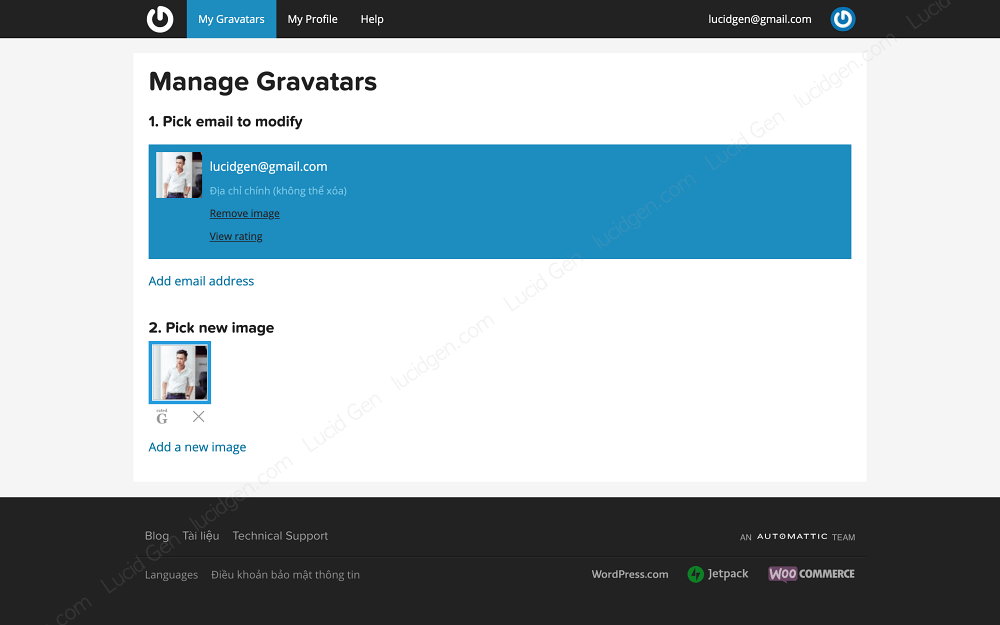
Step 10: Review your profile pictures; you can add multiple secondary emails to share the same profile picture.

Conclusion
Once you’ve created your Gravatar profile picture, don’t hesitate to leave a comment below this article or articles on Lucid Gen to see how your avatar appears!


