

One fine day, you stumble upon a website that uses a lot of images taken from your site. How does that feel? I know that feeling, and I know WordPress has plenty of plugins that protect content and images from copying. However, if you only want to protect your images, you don’t need yet another plugin that has to be updated every now and then. A few lines of code, as shown in this Lucid Gen guide, are enough.
Should I prevent images from being copied on the web?
Why am I asking this? If your website is about education and learning, you should not block image copying. Students who want to download images for studying or presentations won’t be able to, so they will simply leave your site. A photo-sharing website is another case where blocking images makes little sense.
In short, whether you should do it depends on your niche and on how much your visitors need to reuse your photos.
Does this method fully prevent image copying and downloading?
Like every plugin out there, no matter how hard you try, anyone who views the source code can still find your images, so no method is bulletproof. This code works the same way as those plugins:
- Blocks right-clicking on images.
- Blocks dragging images onto the desktop to save them.
- Advantage over plugins: Even if someone selects all your content and pastes it on their website, your images will not show up there. This also saves your website’s bandwidth and resources.
How to prevent image copying on your website
Step 1: Add the anti-copy code to your website.
Step 2: Enable Hotlink Protection in cPanel.
Add the anti-copy code to your website
Copy the code below and paste it into your website by following the instructions in this section.
<script type="text/javascript">
function nocontext(e) {
var clickedTag = (e==null) ? event.srcElement.tagName : e.target.tagName;
if (clickedTag == "IMG")
return false;
}
document.oncontextmenu = nocontext;
</script>
<style>
img {
-webkit-user-drag: none;
user-drag: none;
-webkit-touch-callout: none;
}
</style>For WordPress
If you use a plugin for adding code to WordPress, such as Insert Headers And Footers, open that plugin’s settings and paste the code above into the Footer box, which is placed before the closing </body> tag.
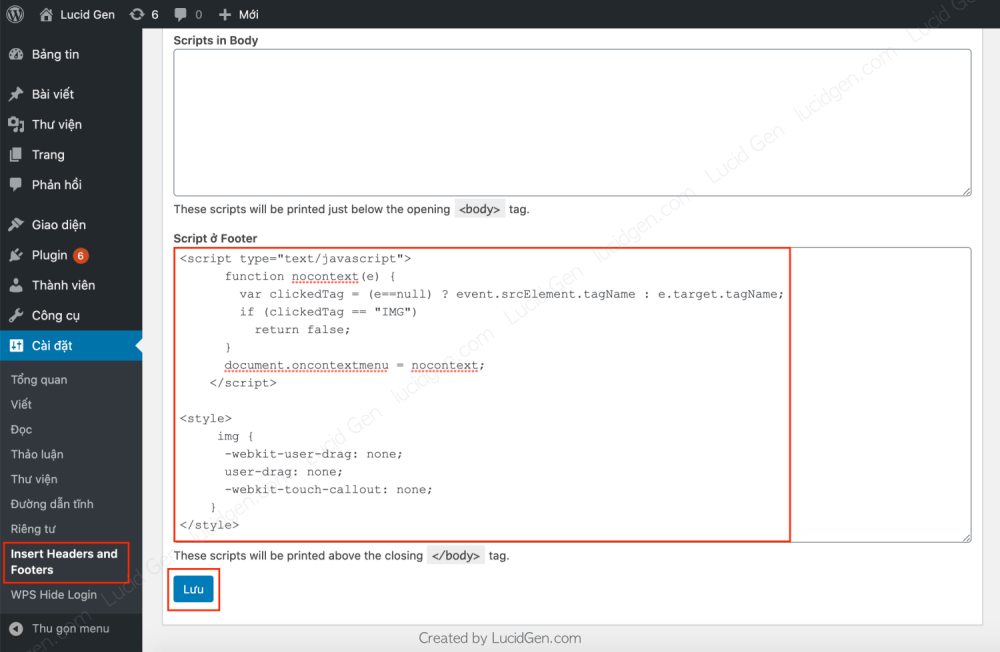
If you don’t have a plugin like that, you can add the code directly to your theme.
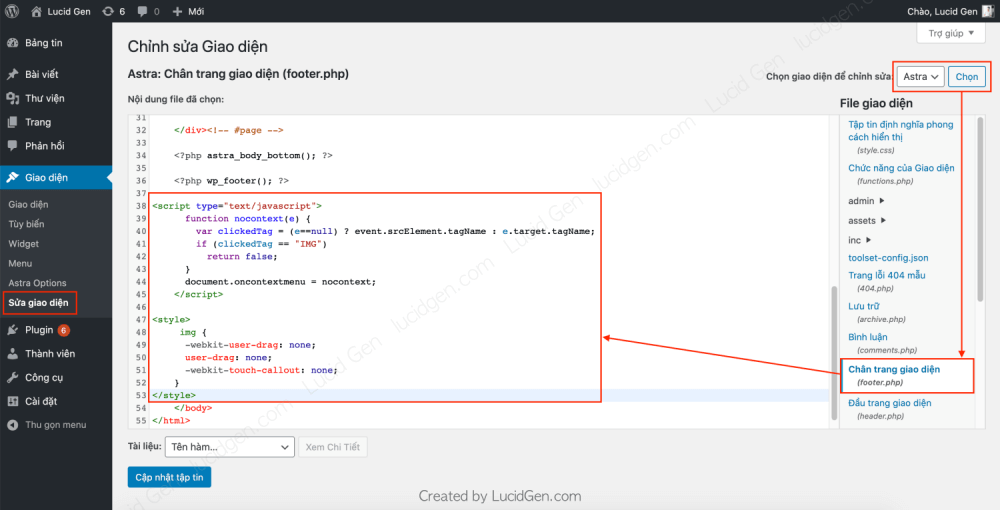
Go to Appearance > Theme File Editor. Select the theme you are using, then open the file named Theme Footer (footer.php).
Paste the code right before </body>, as in my example below.
For HTML and other source code
The principle is the same as with WordPress: paste the code between <body> and </body>. If your website is static, just open the HTML file and add it there.
Enable Hotlink Protection in cPanel
This is an extra layer that stops other websites from embedding your images directly using your original image links.
In other words, your images only display on your own website. If they are embedded on another site or opened via a direct link, the server returns a 403 Forbidden error.
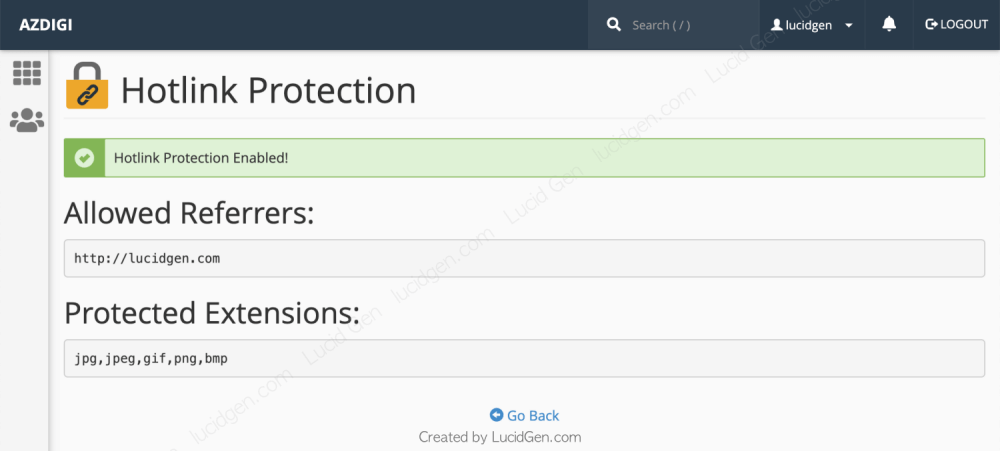
Log in to cPanel and find the Hotlink Protection section.

This page lists the domains in your hosting account. Just click the Enable button.

That’s it. Try opening an image link in an incognito browser window to check whether it returns 403. Your regular browser may still have the image cached, so it might still display it.
Note: If your website caches images, Hotlink Protection may not work as expected.
Conclusion
These 2 steps are enough to protect your website images, no plugin needed. If you still can’t stop the more determined thieves, add a watermark to your photos in bulk and let them advertise for you for free.


