
Two factor authentication for WordPress few people think about, but it’s the best security method I know. WordPress has a lot of plugins available to help you enable two factor authentication for WordPress, and we just need to choose the right one to use. This article, Lucid Gen will guide you through two factor authentication for WordPress using SMS and Google Authenticator.
Consequences of not securing WordPress
- The web is infected with a virus, is installed with malicious code to steal user information on the web, or inserts a bunch of backlinks.
- Get word train when appearing on Google.
- Google Chrome will prevent users from accessing your web.
- Losing control of the web, even destroying the hosting’s data.
Benefits of two factor authentication for WordPress
Benefits that you may not expect when you enable two factor authentication for WordPress…
- Safe and healthy web.
- Peace of mind in your sleep.
- Gain full trust from customers.
- Firmly go to work on the web.
Generally to enhance the security of your WordPress site and that of your clients.
two factor authentication for WordPress bằng Google Authenticator
Google Authenticator is a viral two factor authentication application, and many other platforms use Google for simplicity. Instead of waiting to receive a message, you will open the Google Authenticator app on your phone and have a two factor authentication code. Especially, you don’t need to be online to receive the code still.
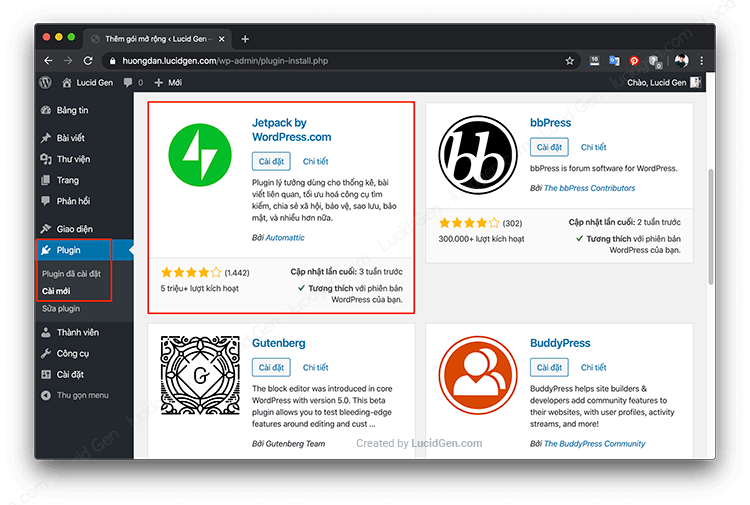
In the WordPress site admin interface, click on Plugins on the menu and select New. Then find the Two-Factor plugin to install.

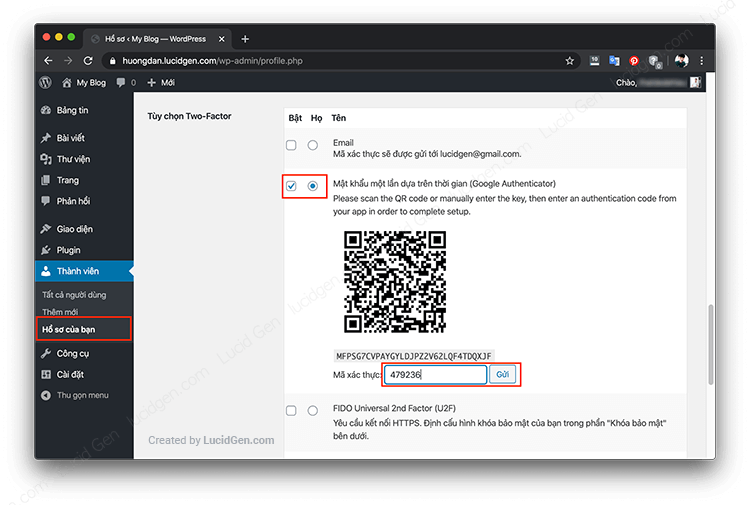
After installing and activating the Two-Factor plugin, go to your Profile section. Please scroll down to see the Two-Factor option, configure it as I instruct.
- Enable the 2 buttons in the Time-based One-Time Password (Google Authenticator) section .
- Using your phone, open the Google Authenticator app, click the plus sign in the app, and select scan code. Scan to your computer screen and then enter the verification code generated from the Google Authenticator app. When done, click send.
You can also use Google Authenticator on your computer instead of your phone.
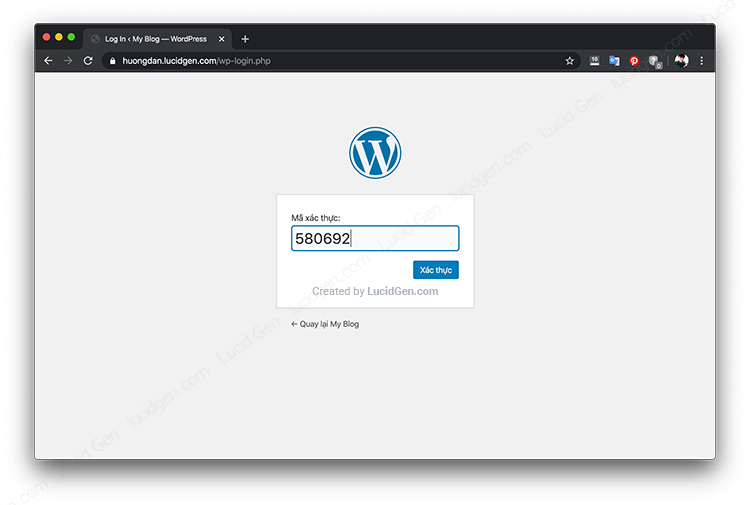
After saving the two-factor authentication for WordPress settings, later, when you log in with the master password, you will see a two-factor authentication request. At that time, open the application to get the code to enter.
Very fast and simple. The 2FA feature is also available on the Wordfence plugin, and you can refer to the Wordfence user guide. However, if you prefer two factor authentication for WordPress by SMS, then see how below.
two factor authentication for WordPress using Jetpack’s SMS
Currently, only WordPress.com supports 2-layer login by SMS. We don’t build websites on WordPress.com, but we can use this feature through the help of the Jetpack plugin of WordPress.com. Besides, Jetpack also helps against brute attacks for you.
If you are new to WordPress.com, click wordpress.com/start/user and create an account for yourself.

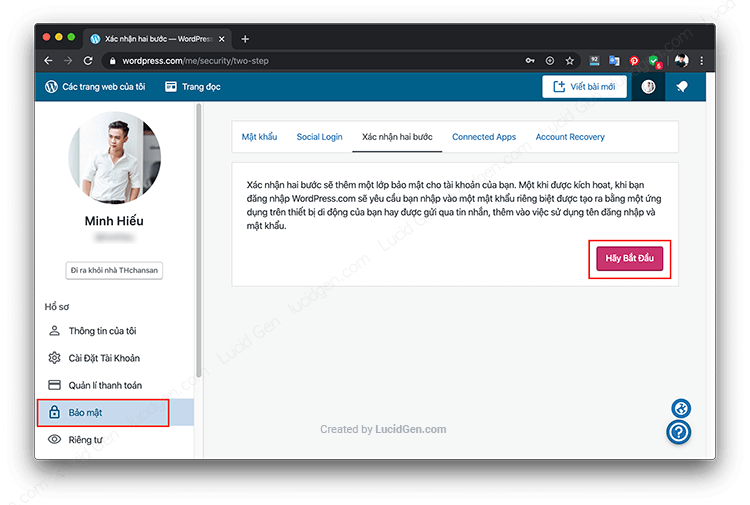
Log in to your WordPress.com account, click Security on the left menu, select 2-Step Verification on the right, and then click Get Started.
(You can quickly open it with wordpress.com/me/security/two-step ) .
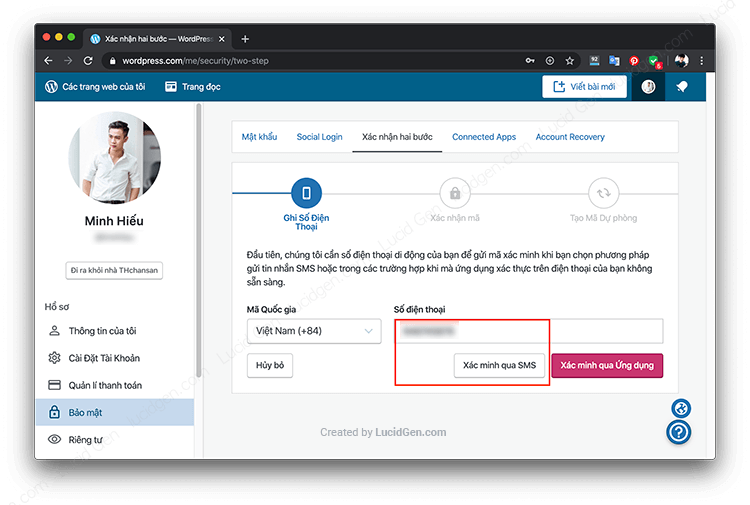
Enter your phone number and click on the Verify via SMS box to receive a verification message. Note: remove the zero in front of your number.
Enter the two factor authentication code received in your phone message and then click Activate.

Check the box I have stored backup code and Done. Some backup codes you can save in case the phone does not receive the message.
(But it doesn’t matter if the phone can’t receive the message, go to the hosting to find the plugin folder to delete Jetpack and log in normally) .

Return to your WordPress site admin interface, select Plugins on the menu, and Install New. Find the Jetpack plugin to install and activate.
The first time you use Jetpack, you need to click on the Set up Jetpack button to connect to your WordPress.com account.

We have already logged into WordPress.com, so now click the Accept button.

Then you ignore the price list. We scroll down below to see the Start with free button to use it for free.

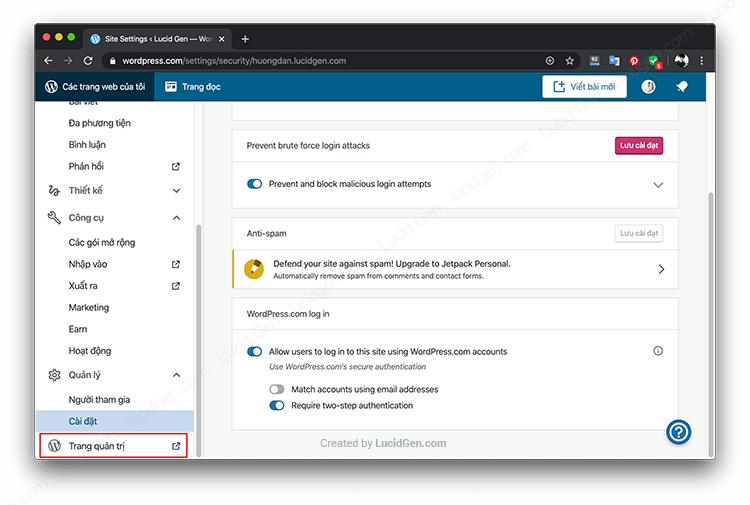
When redirected to the WordPress.com admin interface. You click Manage on the left menu and select Settings. You can turn on 2 options on the right side, as shown in the picture, and if you want the username to email, turn on all 3.
I explain Jetpack’s options to enable two factor authentication for WordPress as follows:
- Allow users to log in to this site using WordPress.com accounts: allows users to log in to your site with a WordPress.com account
- Match accounts using email addresses: only accept email usernames.
- Require accounts to use WordPress.com Two-Step Authentication: two factor authentication is required to login.

Once enabled, the system will automatically save; you need to click on the Admin page on the menu to return to WordPress web administration.
Later if you ever want to change your preferences, you don’t need to dig into WordPress.com; go to Jetpack and select Settings on the menu. Like below.

Then you add this code to the theme’s functions.php file to remove the default login box and instead be logged in with a WordPress.com account. You have 2 options as follows:
Just remove the default login box, leave the login button with WordPress.com.
/*Chỉ xóa ô đăng nhập mặc định*/
add_filter( 'jetpack_remove_login_form', '__return_true' );Go straight to WordPress.com when accessing the login page
/*Di chuyển thẳng qua WordPress.com*/
add_filter( 'jetpack_sso_bypass_login_forward_wpcom', '__return_true' );
add_filter( 'jetpack_sso_new_user_override', '__return_true' );
add_filter( 'jetpack_sso_match_by_email', '__return_false' );
add_filter( 'jetpack_remove_login_form', '__return_true' );
add_filter( 'jetpack_sso_require_two_step', '__return_true' );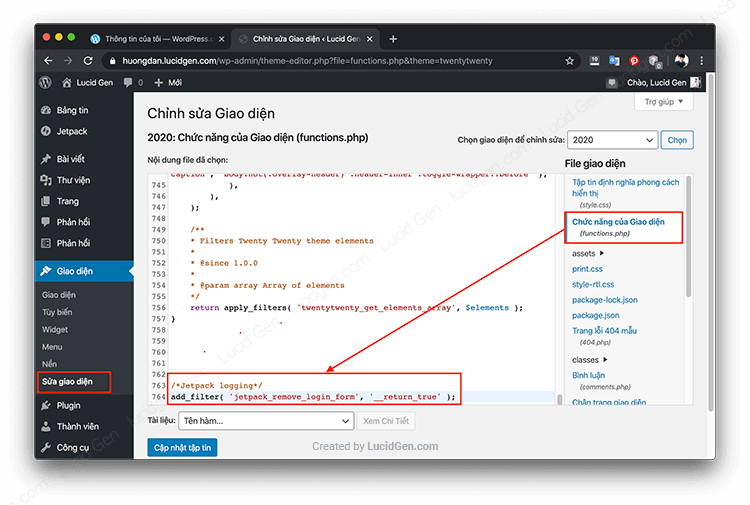
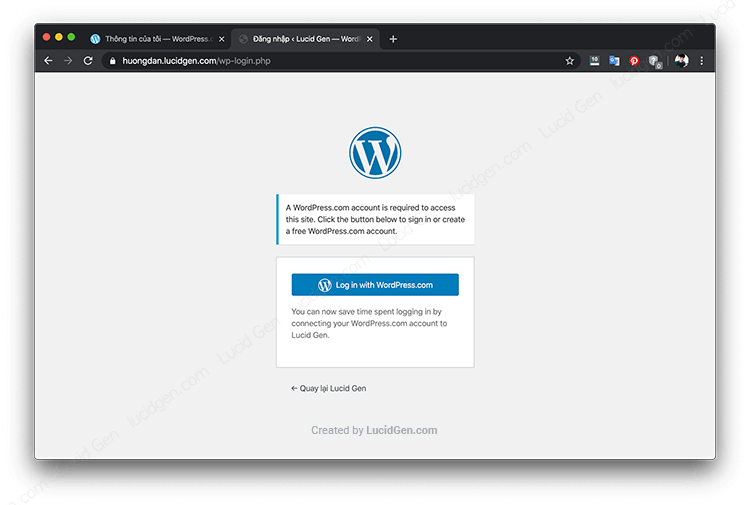
This results when you go to the login page, no more than the usual login box. From now on, you need to click the Log in with WordPress.com button and log in with your WordPress.com account.
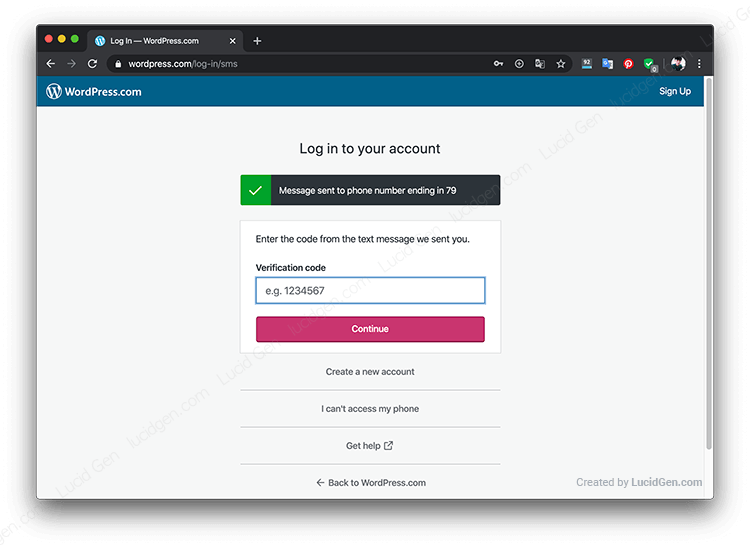
When you enter the correct password, you will immediately receive a text message on your phone. Enter the two factor authentication for WordPress code and click Continue to log in.
Currently, Lucid Gen also uses Jetpack’s 2-step login with SMS. I see the message very quickly, very OK. But it would help if you continued reading the content below to know more ways to increase the security of your website.
Simple but effective way to secure WordPress
It’s really “simple” guys. It’s nothing terrible; remember the notes below and combine them with two factor authentication, and you can rest assured.
Remember 4 nos to secure your website
- Do not install pirated plugin.
- do not install many strange chrome extensions.
- Do not give login to many people.
- Don’t watch “cool” movies.
Enhance security at login stage
- Login to your hosting admin and login to WordPress.
- Change the website login link to another extension.
- Set SSL for the website and switch from HTTP to HTTPS to avoid increased security.
Conclusion
Did this article help increase the security of your website? Leave your comment below to share your opinion. Check out more articles about WordPress on LucidGen.com; maybe something is good for you.


