
When using Google APIs, you will need to create Client Secret file (client_secret.json) to authenticate your Google account. This article will guide you step by step in creating a Client Secret in Google Cloud, from creating a project to configuring the OAuth consent screen, creating an OAuth Client ID, and obtaining the Client Secret file. The content is aimed primarily at Google API users, so it will not include the review steps like an application developer. The result will help you be ready to use Python libraries like google-auth, google-api-python-client or simple-drive smoothly.
What is Client Secret?
A Client Secret is a unique, random string of characters that is generated when you register an application (also known as a client) to access Google Cloud Platform (GCP) services. This string of characters acts as a “security key,” authenticating your application to Google, ensuring that only your application can access authorized resources.
Why is Client Secret important?
- Security: Client Secret protects your account and data from unauthorized access.
- Authentication: An essential component of OAuth 2.0 authentication, ensuring your application is securely identified.
- Access Management: Use Client Secrets to control your application’s access to Google Cloud resources.
When is Client Secret needed?
- Using APIs: Whenever an application calls Google Cloud APIs to perform operations such as reading, writing, or deleting data, the Client Secret authenticates the request.
- OAuth 2.0 Process: The Client Secret is a secure key that allows users to grant access to their Google accounts to your application.
Create Client Secret
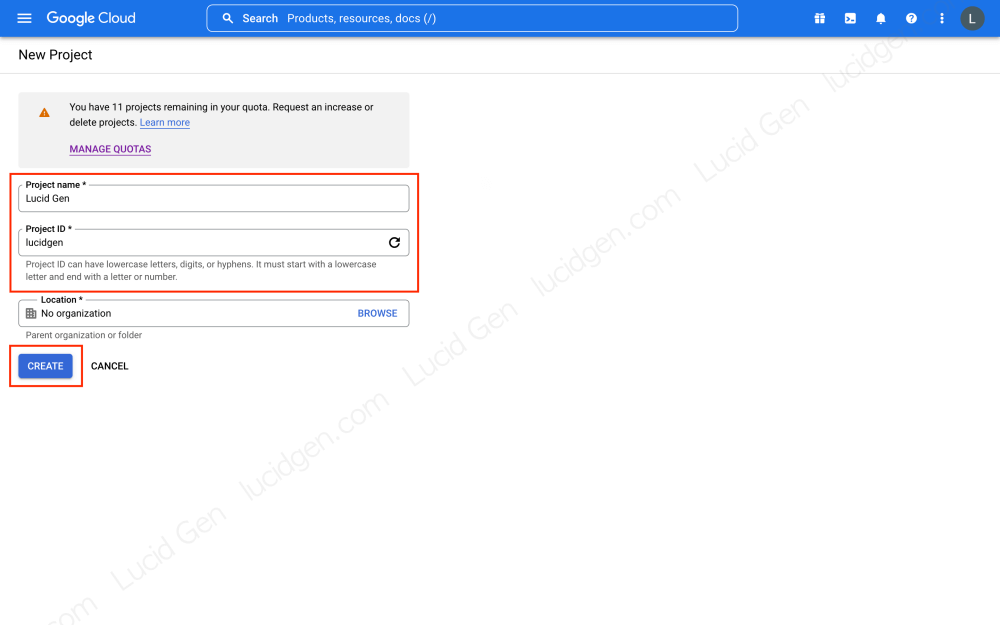
Step 1: Create a Project on Google Cloud. Go to console.cloud.google.com/projectcreate to create a new Project.
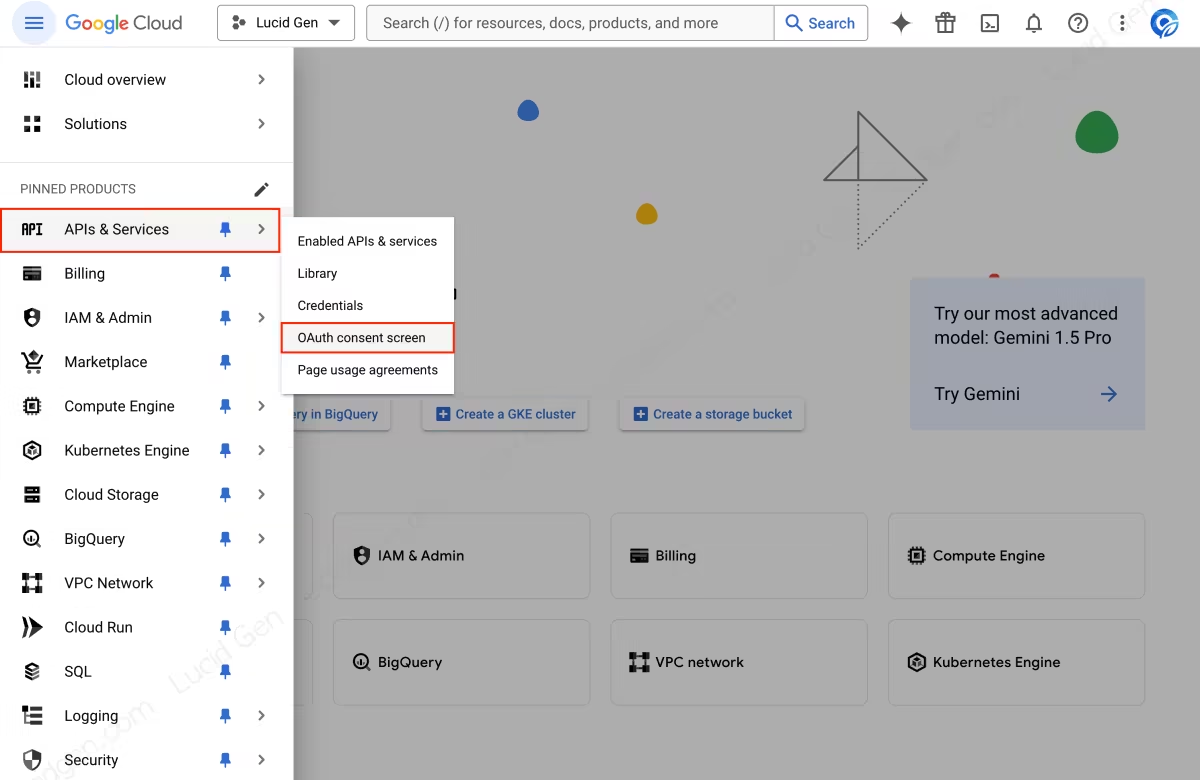
Step 2: Go to the OAuth consent screen page. You need to configure the OAuth consent screen before creating a Client Secret.
Step 3: Select User Type. Based on the description below, select the User Type that suits your purpose. For example, For personal use with Python, select External.
- External: If you only use Google API for personal use (no review required) or developing a public application (review required).
- Internal: If you’re developing an app for a company using Google Workspace. No review is required.

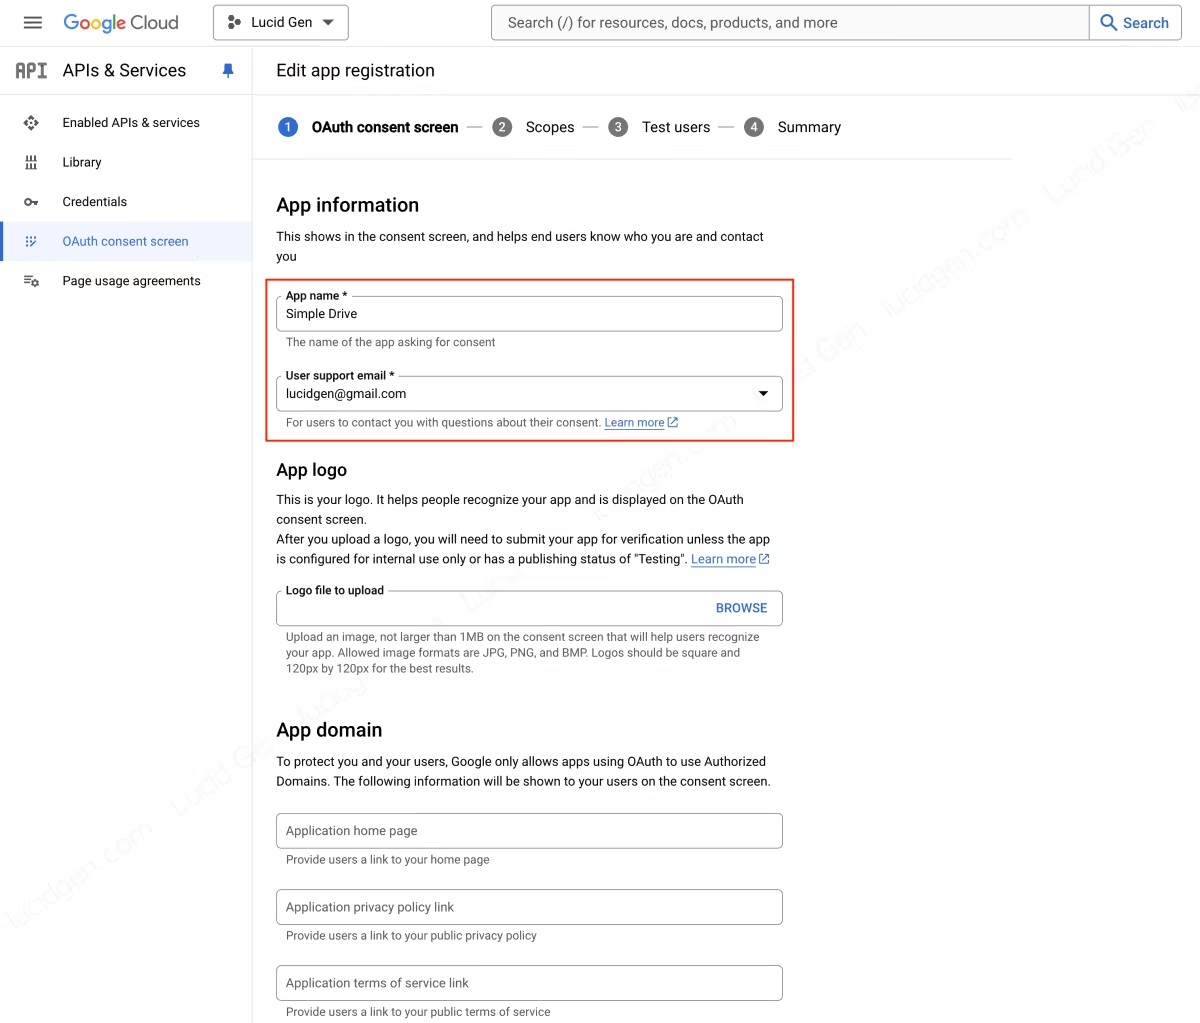
Step 4: Fill in the essential information for the application. Since the application does not need to be reviewed, you only need to fill in the required information (marked with an asterisk).
- App name: Any name.
- User support email: Enter your email.
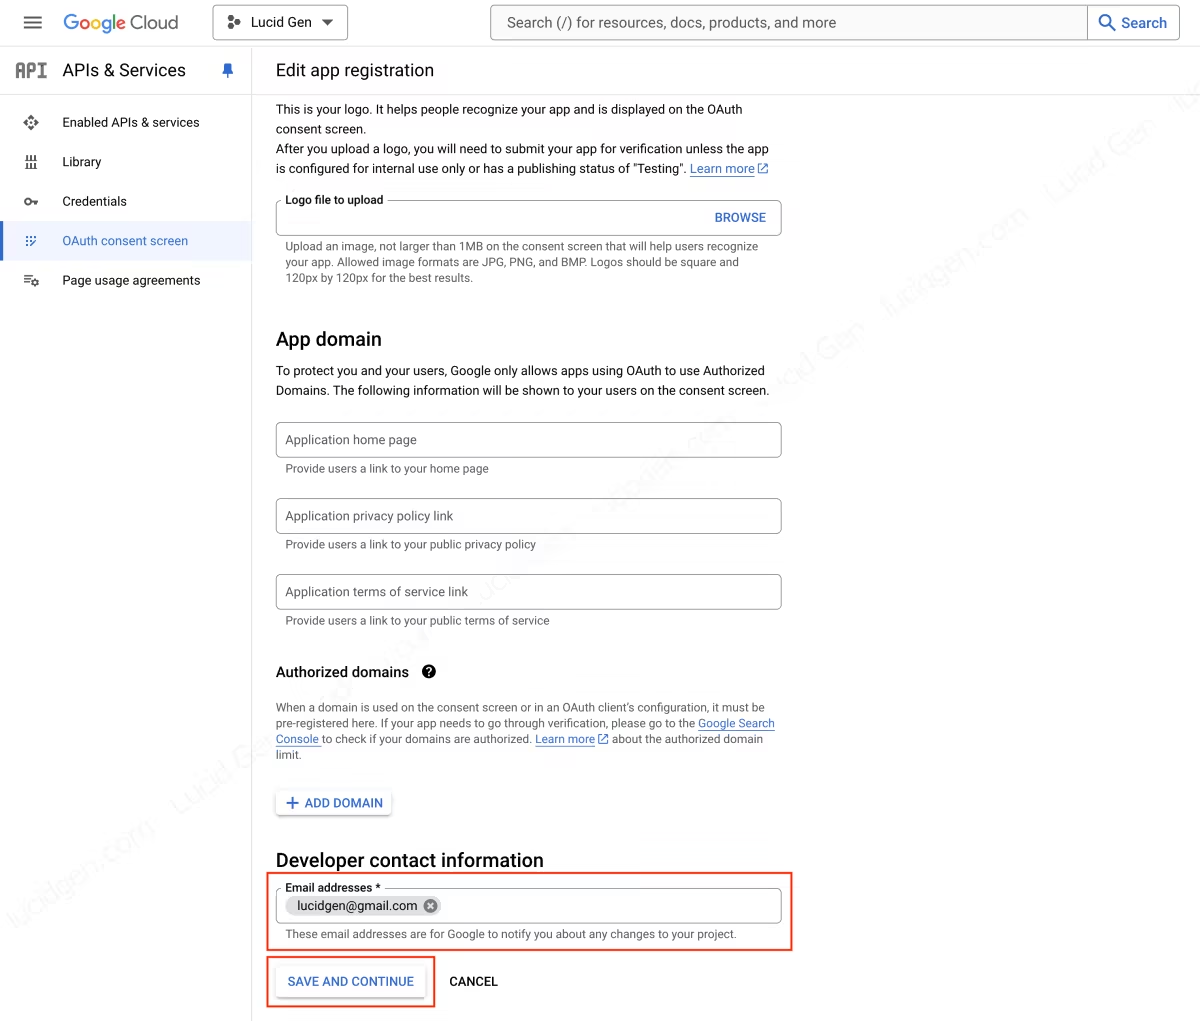
- Developer contact information: Fill in your email.
Leave the rest blank; it is only used when you need to review a public application.
Step 5: Select Scopes for your application. Click the ADD OR REMOVE SCOPES button to add the API permissions you need. For example, if you want to use Google Drive API in Python, search for “Google Drive API” and check each permission you need. If you only use it for personal purposes, just select all of them to save your head.
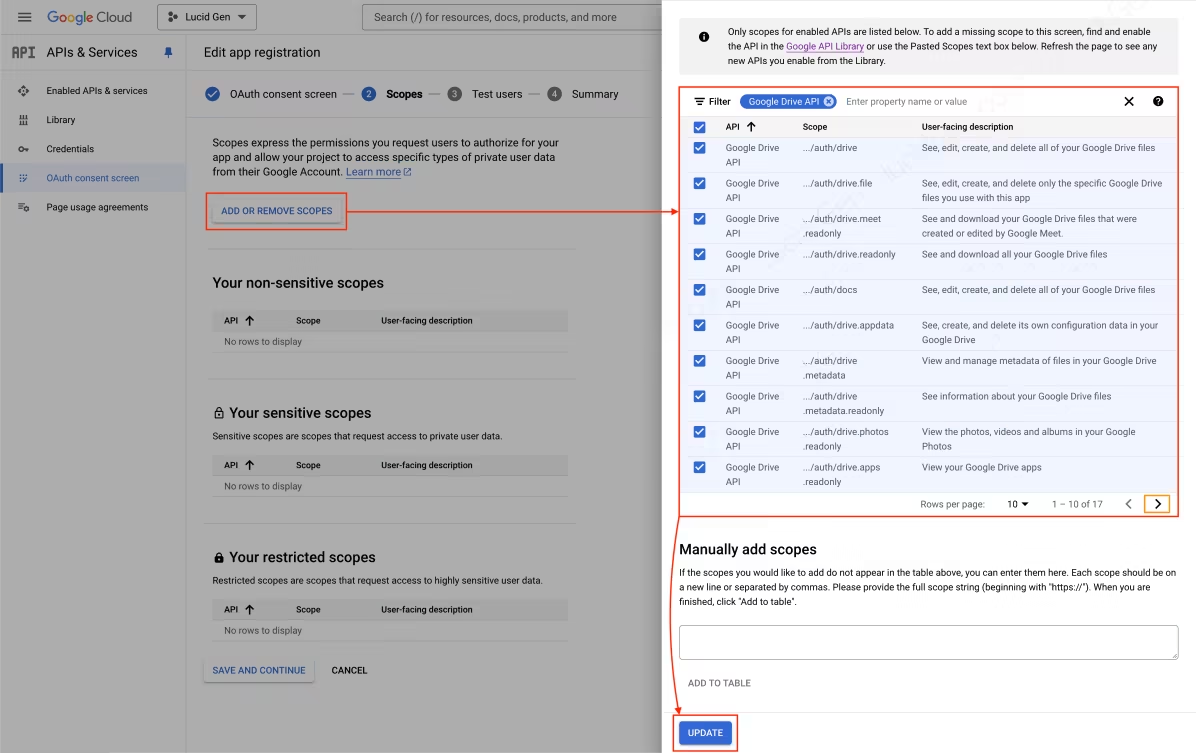
Developers of public apps will need to submit for review for sensitive scopes. Individuals and organizations using Google Workspace do not need to.
I have reviewed several web applications; here is my experience for those who want to refer.
- The information must be filled in completely.
- Select only the scopes that are really needed.
- Describe why the permission is needed and how the user will use the application in as much detail as possible.
- Prepare a video of the user using that permission.
- Prepare a test account on the app for the Google review team to test.
- If it is suitable, it is approved. If not, it must be re-submitted for approval with a more detailed description and video.
- It takes anywhere from one to several weeks to review a scope, but it is possible to review multiple scopes simultaneously.
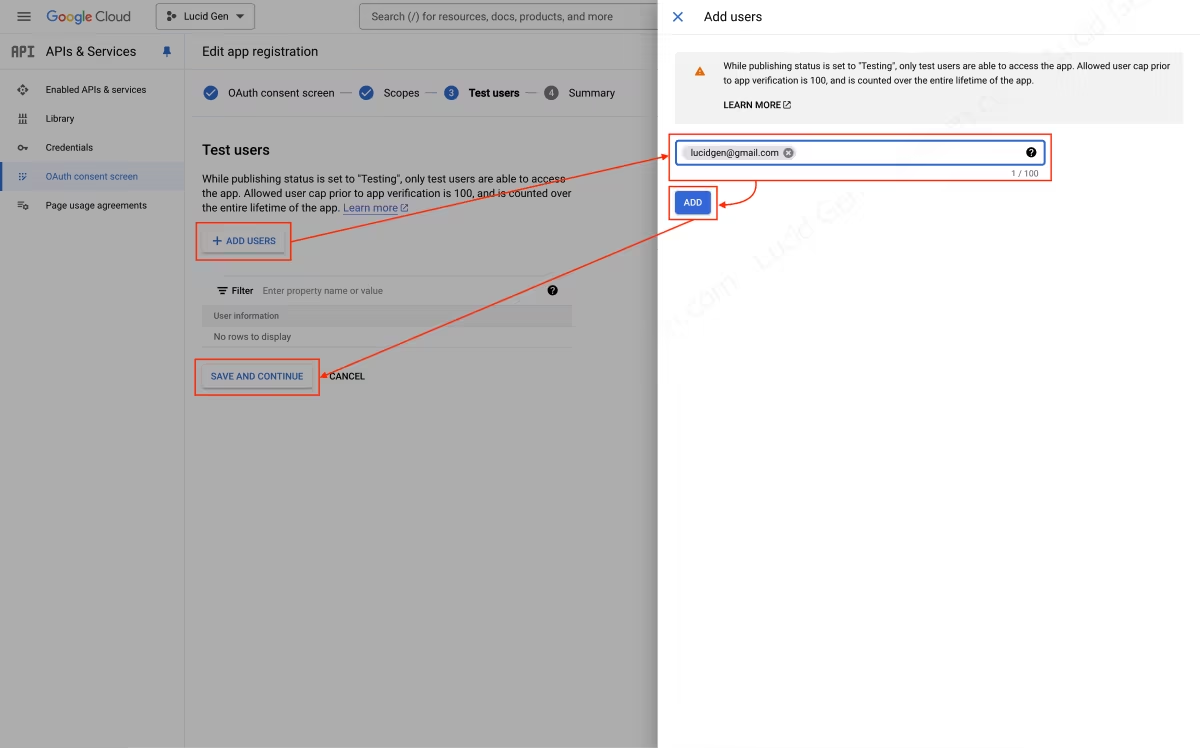
Step 6: Add emails that are allowed to use the app in beta. This step is important for personal use because apps that are not publicly reviewed can only be used in beta.
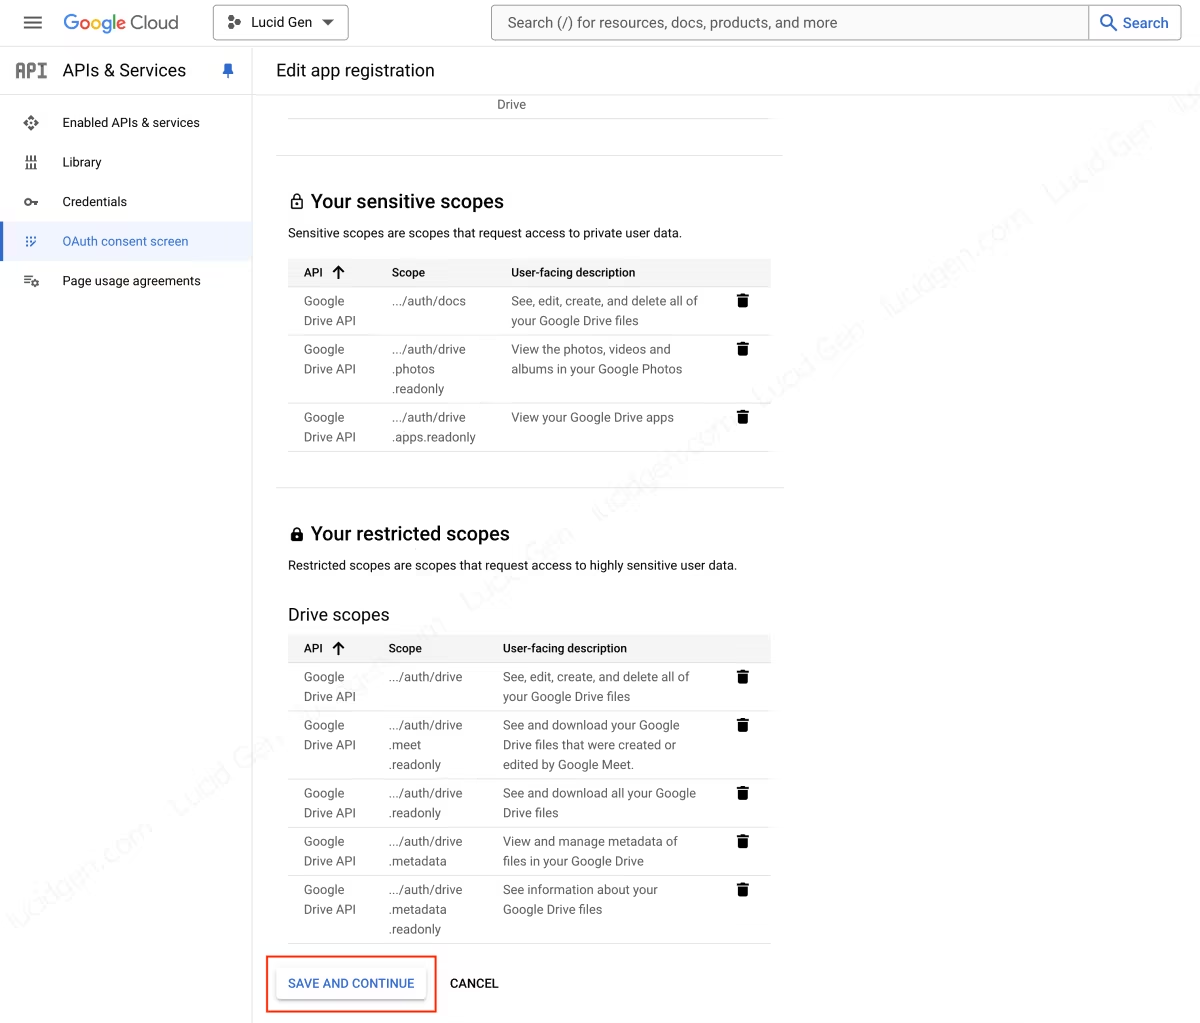
Step 7: Complete the OAuth consent screen configuration. Review the information and return to the dashboard.

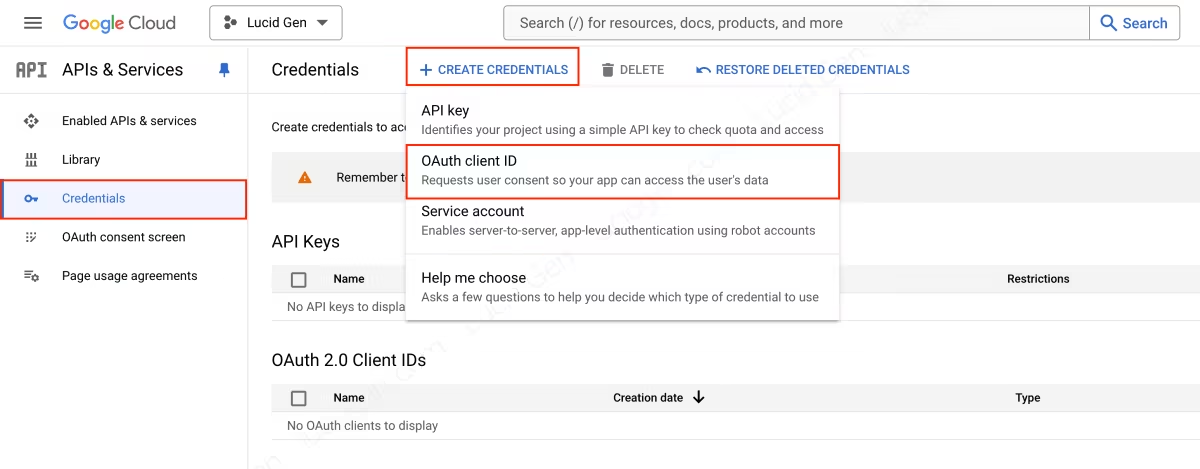
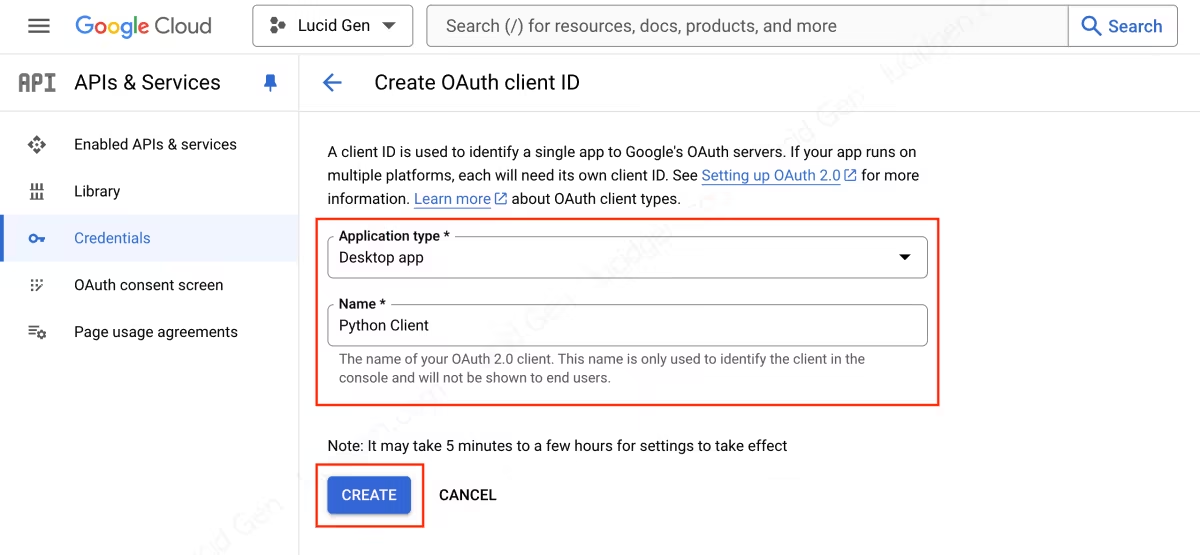
Step 8: Create Client Secret via OAuth client ID. Go to Credentials, click the CREATE CREDENTIALS button, and select OAuth client ID.
Step 9: Select the Application type and enter the client ID name. Below are the supported types.
Types for personal Google API usage:
- Desktop app: Simple for using Google API. For example, the purpose of creating your Client Secret is to use libraries in Python.
- Web application: Selectable if your application requires Authorized JavaScript origins and Authorized redirect URIs. For example, some website plugins require this type and will instruct you to fill in this section.
Types for application development: Including the above types and the following types.
- Android.
- Chrome Extension.
- iOS.
- TVs and Limited Input devices.
- Universal Windows Platform (UWP).
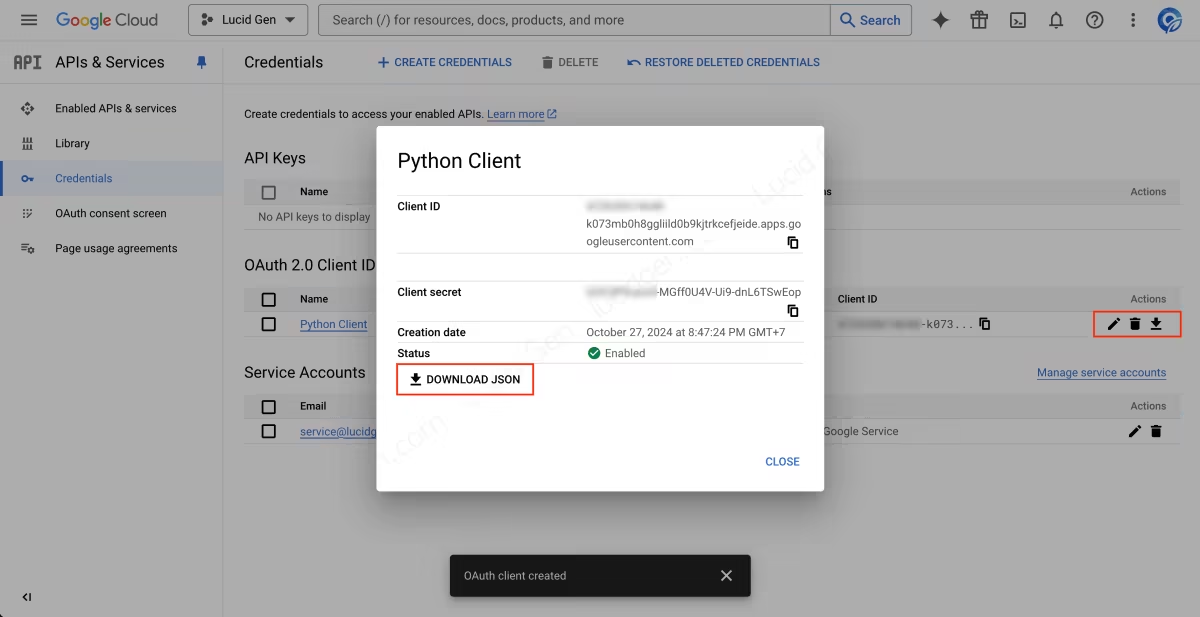
Step 10: Download the Client Secret JSON file. Click the DOWNLOAD JSON button to download.
Enable API for the project
After creating a Client Secret and Client ID in Google Cloud, you must enable API in Google Cloud to use APIs.
Security Note for Client Secret
- Do not store Client Secret in public source code: Avoid committing Client Secret to a public repository (like GitHub) if using a version control system.
- Use environment variables or secret configuration files: Store the Client Secret in an environment variable or .env file for added security.
- Periodically create Client Secrets: If the Client Secret is exposed or at risk, generate a new one and update the application configuration.
Conclusion
Through the above instructions, you have mastered the process of creating a Client Secret as well as configuring an OAuth consent screen in Google Cloud for the purpose of using Google API for individuals or organizations using Google Workspace. Don’t forget to keep the Client’s Secret information confidential to avoid data risks. Now, you can fully exploit the services from Google Cloud to bring better work performance.


