
There are two types of computer users in the world. One is the supporter, and the other is the supported person. For the two to interact, they must install TeamViewer for Mac, Windows, and even phones (well, there are also some other applications). Windows is relatively easy to install TeamViewer; even when you first buy a computer, you already have TeamViewer pre-installed on your computer. As for the Apple family, after manually downloading and installing TeamViewer for MacBook, you also have to give TeamViewer access permission for it to work. Follow this tutorial to use TeamViewer on your Mac!
| Application | TeamViewer 15 and up |
| Chips | M1, M2, Intel |
| Grant access | Screen Recording and Accessibly |
| Version | Free |

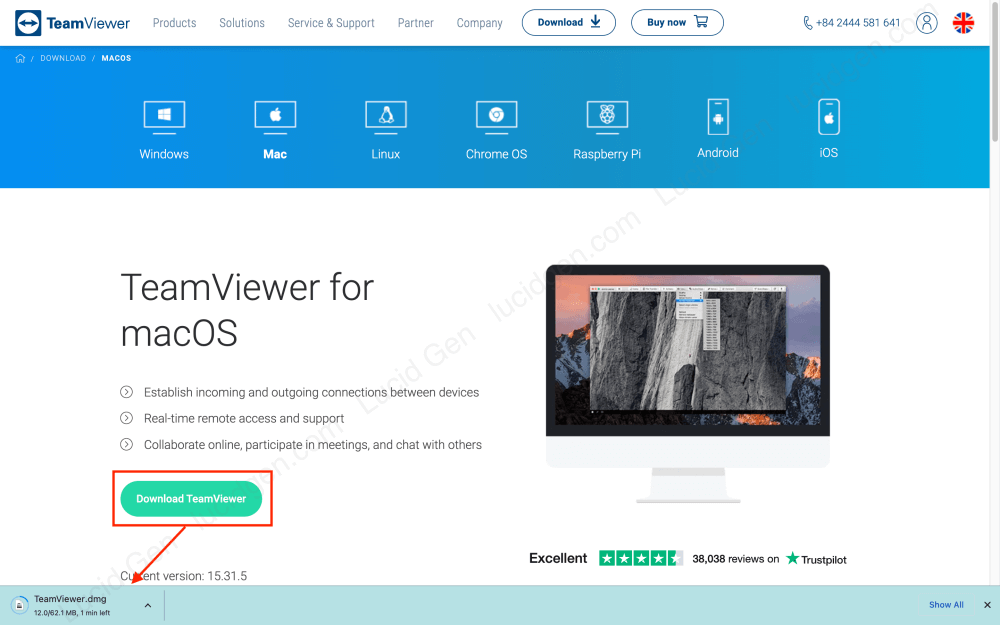
How to download Teamviewer for Mac
There are many different ways to download Teamviewer, as long as the link is genuine. Please choose one of the following methods. When downloaded, it will be a file with the extension dmg.
- Link 1: https://www.teamviewer.com/en/download/mac-os/
- Link 2: https://download.teamviewer.com/download/TeamViewer.dmg
- Link 3: http://download.teamviewer.com/
How to install Teamviewer for Mac
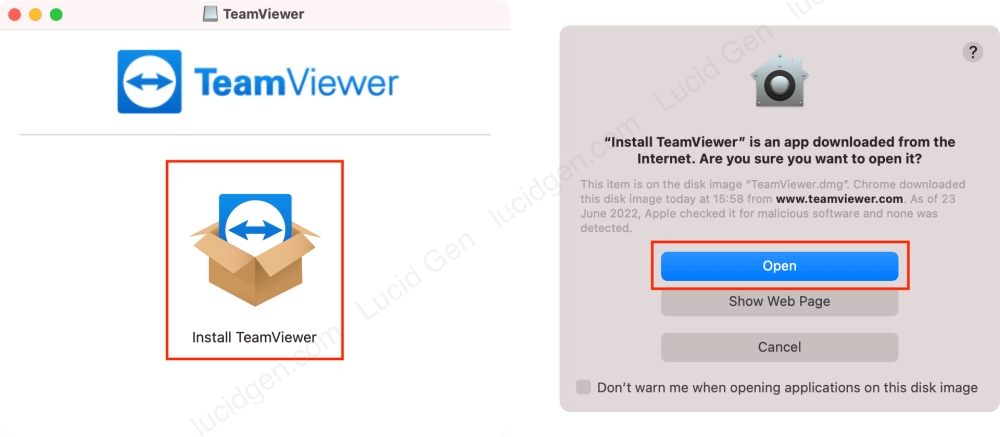
After downloading Teamviewer for Mac, follow these instructions to install Teamviewer for Mac.
Step 1: Open the TeamViewer.dmg file and double-click the Install TeamViewer icon. If there is a confirmation dialog box, select Open.
Step 2: You tick the line I accept the EULA and the DPA and then select Continue. If there is a dialog box asking for permission to access the Downloads folder, select OK.

Step 3: In the TeamViewer for Mac installation window, leave the default options and click Continue. If there is a confirmation dialog, enter your password or scan your fingerprint (depending on your device).

Step 4: When installing TeamViewer for Mac, click Close. If a dialog box asks if you want to delete the TeamViewer installation file for Mac, select Move To Trash to delete.

Step 5: Create a TeamViewer account or log in to the TeamViewer account you already have. In the past, we didn’t need an account to still use it. Now, we have to log in.

Step 6: Log in to your TeamViewer account; remember to tick Keep me signed in so you don’t have to log in again next time.

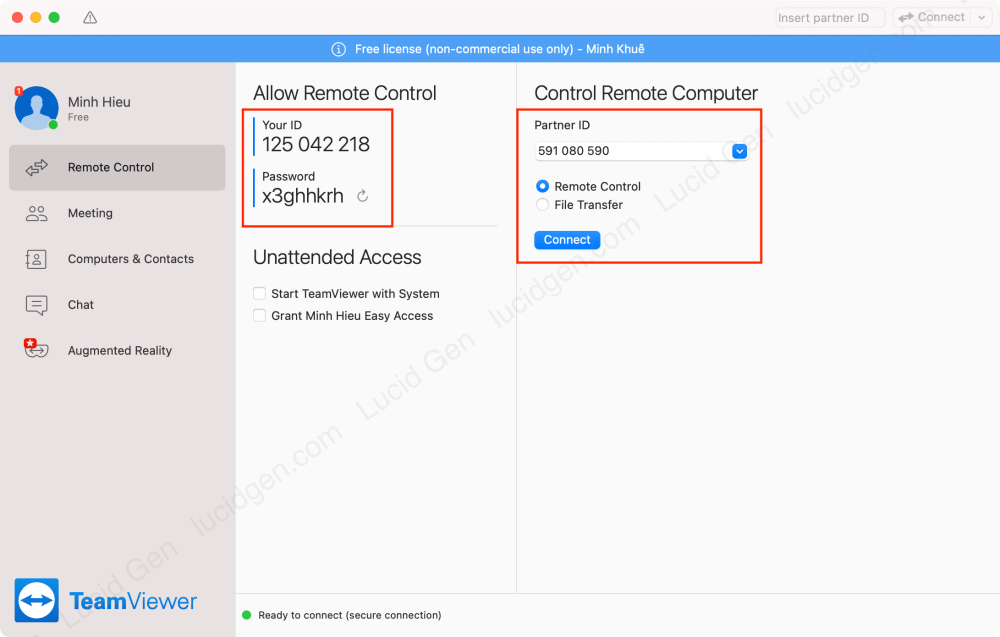
You can now connect to other people’s computers with Partner ID to control them. But if you want others to control your computer, you need to perform additional actions to grant TeamViewer access. I have instructions right below,
How to allow TeamViewer access on Mac
You need to give TeamViewer access on Mac if you want to have someone else control your computer. We will grant Screen Recording and Accessibility permissions to TeamViewer.
- Screen Recording: This is Mac’s screen recording permission. This permission allows the operator of your machine to be able to see your screen.
- Accessibility: This is the right of access. This permission allows your machine operator to manipulate the mouse and keyboard on your device.
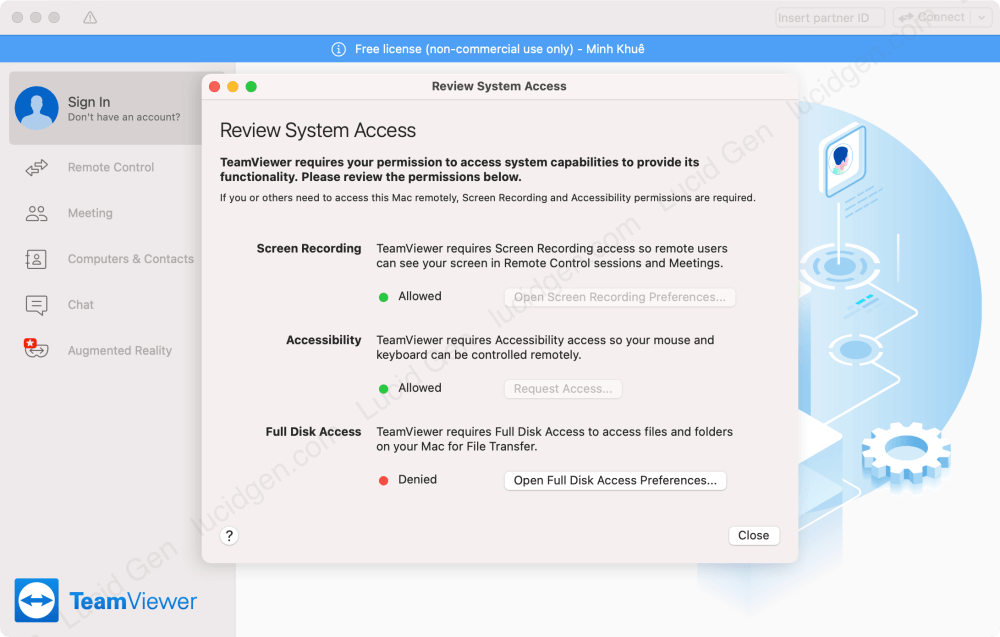
Step 1: You click the exclamation button above TeamViewer > click Request Access in two permissions Screen Recording and Accessibility.

Step 2: Click the padlock icon to unlock it > check TeamViewer to grant Accessibility permission.

Step 3: Like the above, you continue to integrate TeamViewer in the Screen Recording section to grant TeamViewer permissions.

After granting TeamViewer access on Mac, you will see two green ticks, as shown below. Note that we do not need to grant Full Disk Access permission because this permission is only used to transfer files on the machine to another machine.
How to install Teamviewer for phones
You can completely use TeamViewer on your phone to control your Macbook with iPhone and Android.
Step 1: You download TeamViewer from the App Store> accept the terms> go to the login section.

Step 2: Log in to your TeamViewer account; you may need to confirm via email as shown below.
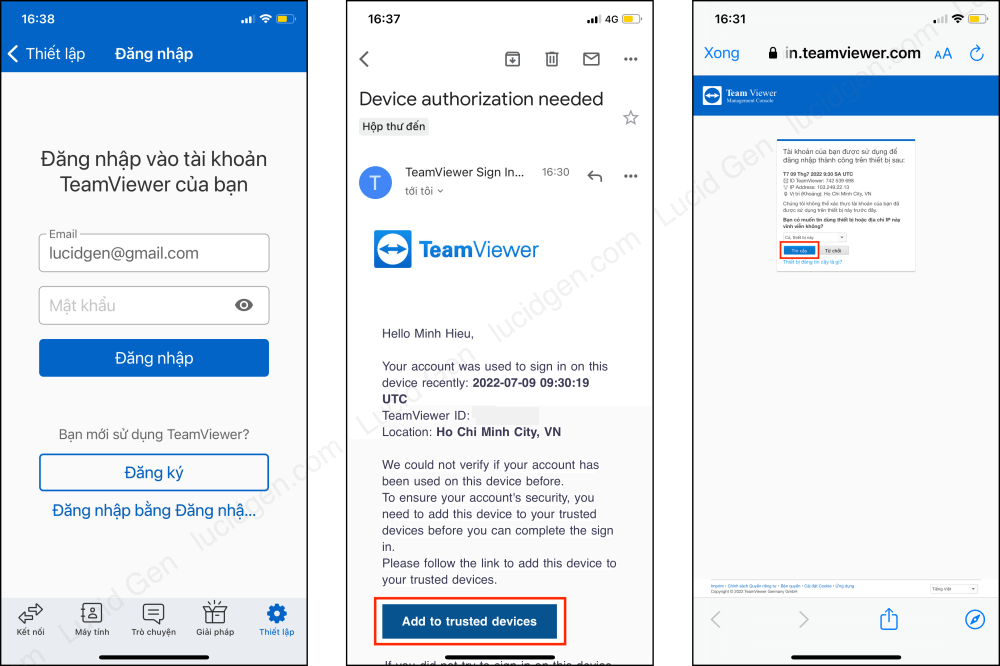
Step 3: Enter the partner ID to connect and control their computer.

Teamviewer upgrade price list
Below is the price list of TeamViewer. If you often use TeamViewer to support others, please refer to upgrade. If you do not have enough economic conditions, please read more below.
| Feature | One User | Multiple Users | For Groups |
|---|---|---|---|
| Describe | 1 licensed user can initiate a device connection one session at a time | Includes 15 licensed users, allowing 1 user to open 1 remote session at a time | Includes 30 licensed users, allowing 3 users to open 1 remote session at a time with each user |
| Channels | 1 channel | 1 channel and 5 channels support | 3 channels and 10 channels support |
| License | 1 | 15 | 30 |
| Managed Devices | 200 | 300 | 500 |
| Number of people participating in the meeting | 10 | 10 | 10 |
| Customizable Device Information | Yes | Yes | |
| User Access Report | Yes | Yes | |
| TeamViewer Web Client | Yes | Yes | |
| Mass Deployment | Yes | ||
| Device Access Report | Yes | ||
| Complement with third-party integrations | Yes | ||
| Price | 49$ / month | 99$ / month | 199$ / month |
Alternative solution Teamviewer
On Windows, the most popular TeamViewer replacement software is UltraViewer. Unfortunately, UltraViewer is not supported on Mac. But there is a name that is gradually being used by many people: AnyDesk for Mac; this software is available on Windows, Mac, IOS, Andoird. Lucid Gen has both TeamViewer and AnyDesk installed for backup.
Conclusion
This article overviews how to download and install TeamViewer on Mac and phone. During the installation process of TeamViewer for Mac, if you encounter any problems, don’t hesitate to ask questions in the comments section below!


