

When buying an iPhone or MacBook, you want to be sure the device is genuine, new, and still covered by Apple’s warranty. To do that, we check the activation date or the warranty period of the iPhone and MacBook. Even when buying a used device in like-new condition, it is worth checking when it was first activated and how much warranty is left. This article shows you how to check using Apple’s official tools.
Things to know before checking the activation date
- Checking the iPhone and MacBook activation date: You must sign in to your Apple account.
- Checking the iPhone and MacBook warranty: You can use your Apple account or the device’s serial number (no sign-in needed).
- Interface: The screenshots in this article were taken in 2020. Apple’s pages may have changed since then (as of October 2026), so if things don’t look exactly the same, look for the section with a similar name.
Sign in with your Apple account
Go to mysupport.apple.com to sign in with your Apple account. This must be the account that is signed in on the iPhone or MacBook you want to check. Enter your Apple ID and password to sign in.

You will be asked to enter a verification code to sign in. Check the device where you are signed in to receive the code. Remember that the device must be connected to the internet to receive it.
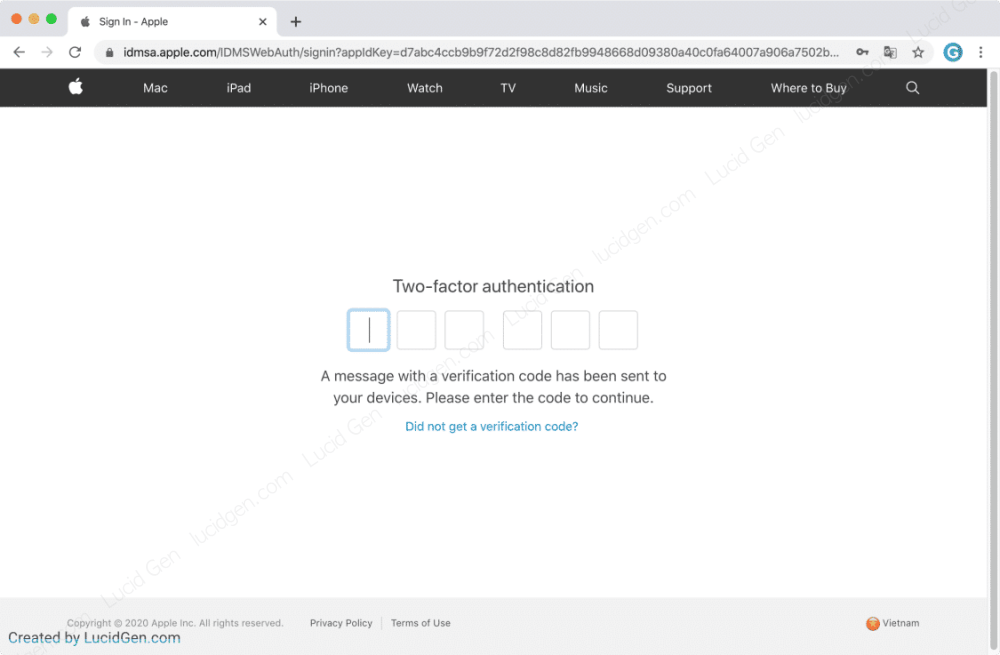
For example, if that Apple ID is used on a MacBook, your computer will immediately show a message like this. Click Allow.

You will then receive a 6-digit verification code. Enter it on the My Support page to sign in.

If you use an iPhone, you will also get a similar Apple ID sign-in request like this. Tap Allow and you will get a 6-digit verification code. Use it to sign in to My Support.

Once you are signed in to My Support, follow the instructions below to check the activation date of your iPhone and MacBook.
How to check iPhone activation date
For this guide, I have prepared 2 devices, an iPhone and a MacBook, signed in with the same Apple account. Let’s click the iPhone first.

You will immediately be taken to the details page for that iPhone. The Date of Purchase is the iPhone’s activation date. In this example, it is 07/28/2018.
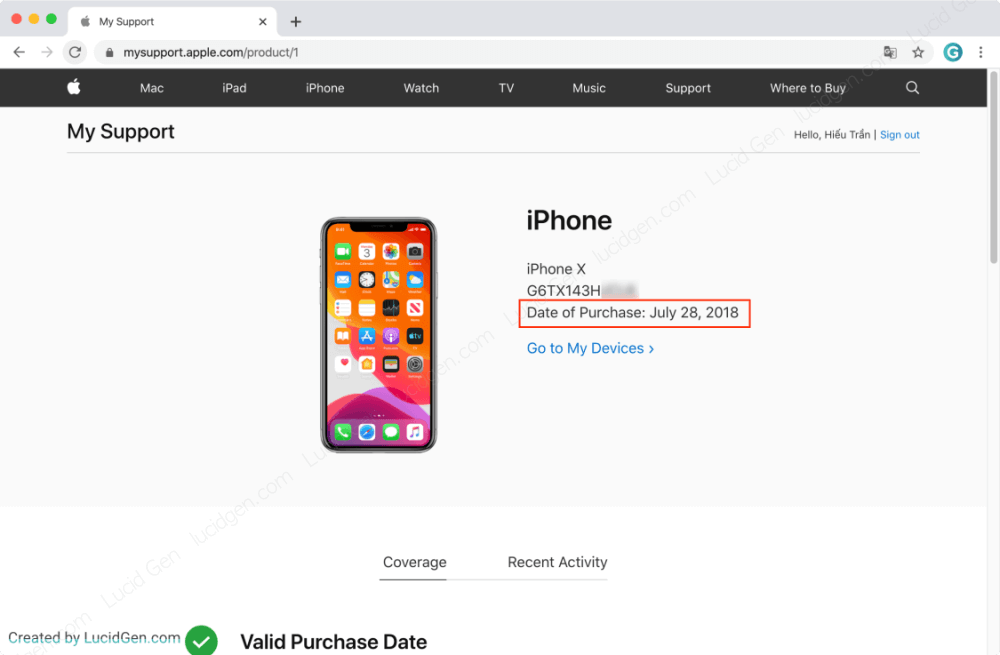
Very simple, right? Next, let’s see how to check the iPhone warranty.
How to check iPhone warranty
Check iPhone warranty with Apple account
If you are signed in to My Support and have checked your iPhone activation date, just scroll down a little to see that iPhone’s warranty period.
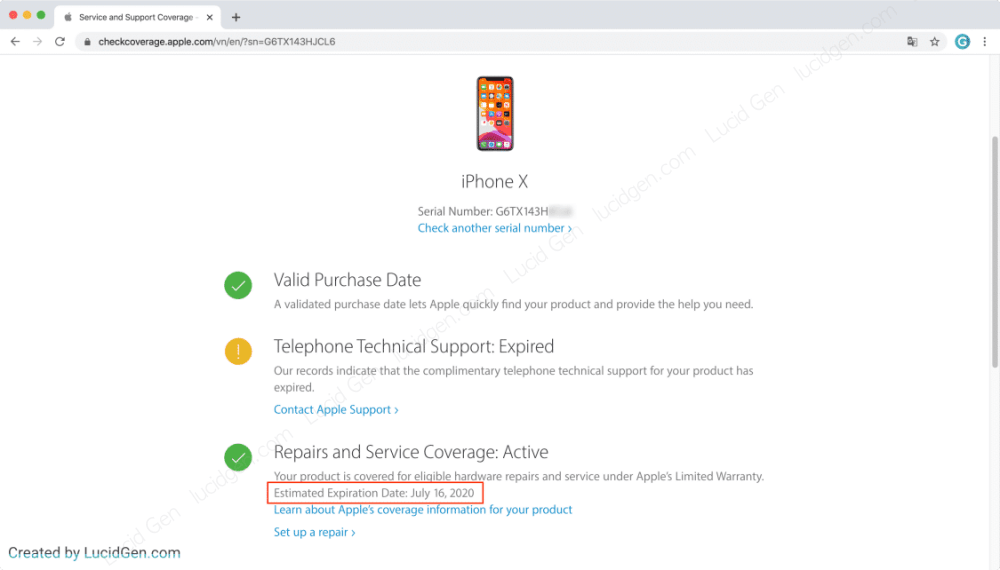
In the Repairs and Service Coverage: Active section, the Estimated Expiration Date is when the iPhone’s warranty ends. In this example, it is July 16, 2020.

If you are not signed in with your Apple ID, use the method below.
Check iPhone warranty by serial number
On your iPhone, open the Settings app and go to General > About. You will see the Serial Number field. Write it down somewhere, or tap and hold the serial number to copy it.
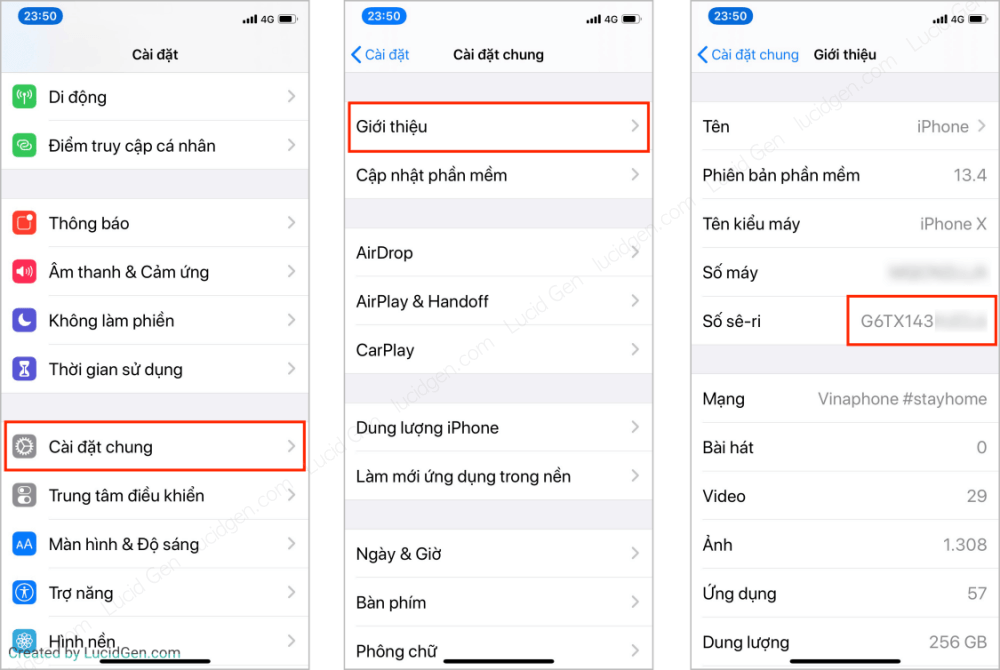
Once you have the serial number, visit checkcoverage.apple.com. Enter the serial number in the Enter your serial number box, type the Captcha code in the box below, and click Continue to run the check.

You will immediately see the iPhone warranty results, including the Estimated Expiration Date. Since it is the same device, both methods show the same date. In this example, it is 07/16/2020.
How to check MacBook activation date
Now let’s switch to the other device, the MacBook. First, sign in to Apple My Support as shown above. Then click the MacBook you want to check.
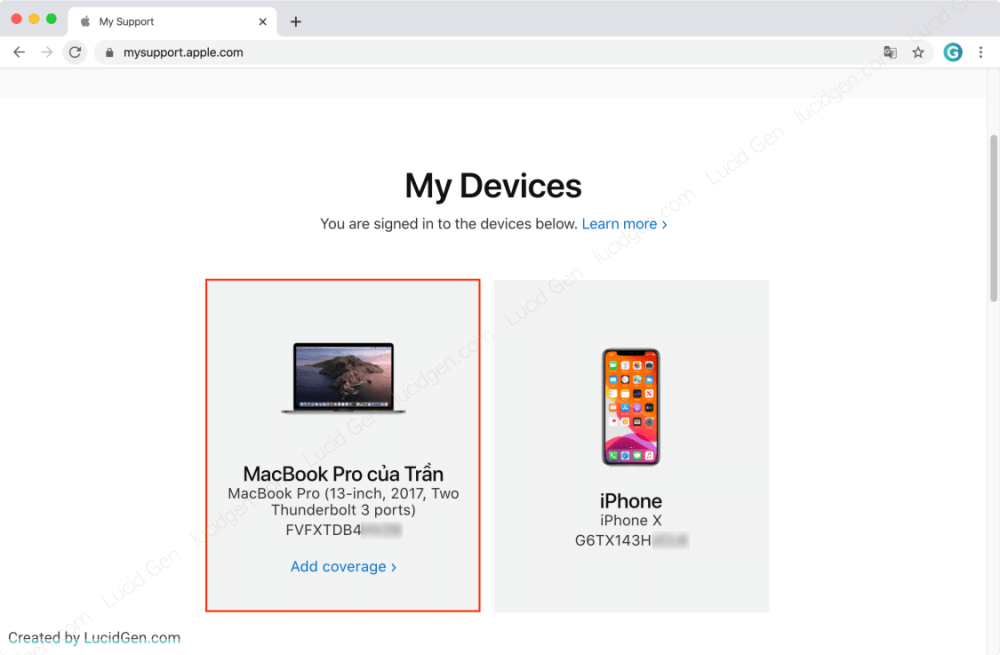
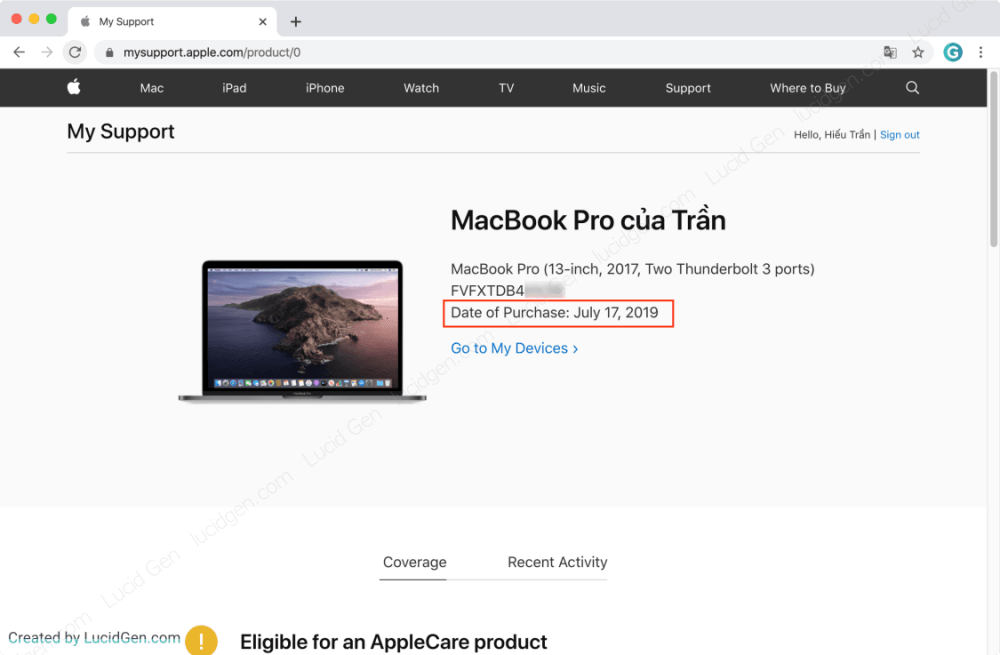
You will immediately see the device’s details, and the Date of Purchase is this MacBook’s activation date. In this example, it is 07/17/2019.
How to check MacBook warranty
Check MacBook warranty with Apple account
If you are signed in to Apple and have checked the MacBook’s activation date, just scroll down and you will see its warranty period. The Estimated Expiration Date is the date your warranty expires.

If you are not signed in to Apple on that MacBook, that’s okay. Use the method below.
Check MacBook warranty by serial number
On your MacBook, click the Apple icon in the upper left corner and select About This Mac.

An overview window appears. Copy the serial number for the next step.
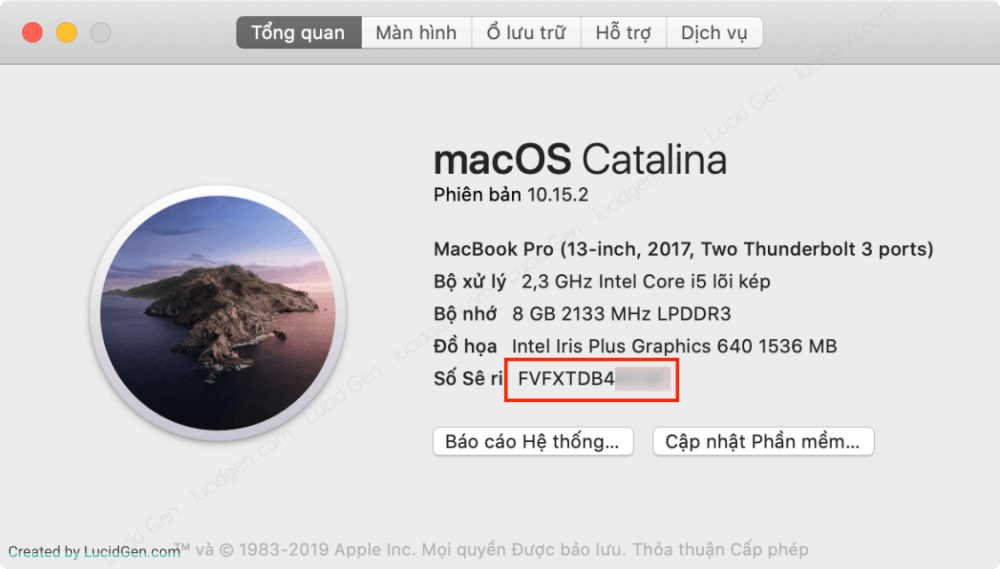
Visit checkcoverage.apple.com to check your MacBook warranty. Enter the serial number in the Enter your serial number box. Next, enter the Captcha code and click Continue to run the check.

A summary of that MacBook will appear, and you only need to look at the Repairs and Service Coverage section. If the device is still under warranty, the Estimated Expiration Date line shows when Apple’s warranty ends.

Conclusion
Checking the activation date and warranty works much the same on iPhone and MacBook. The only difference is how each device gets the verification code and shows the serial number.
Keep in mind that the Date of Purchase is an estimated purchase date based on the data Apple has, usually the date the device was sold or first activated. If the seller says the device is brand new but this date is several months back, be suspicious, because it may have been activated and used before. If you see no purchase date, or the page asks you to validate the purchase date, it doesn’t necessarily mean something is wrong. A device that has never been activated may not show a date yet. Apple also notes that the estimated date can be incorrect, in which case you can send Apple your original receipt to update the purchase date.
If there is no warranty date, the warranty may simply have expired or been voided. If you have any questions about this, leave a comment below.


