Table of Contents
Take a screenshot on Mac is what Lucid Gen usually does when writing tutorials for you. Then today, I will guide you in detail on how to take screenshots and settings when shooting to make our work more convenient, more like you guys. Please pay attention to the first 3 shooting methods that we will use the most, the sections below, and you can see if necessary for you, then apply.
Take a screenshot of the entire Mac screen
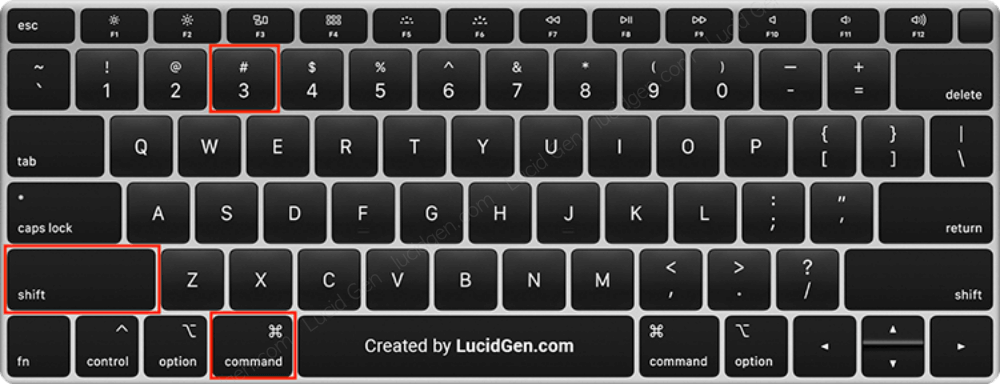
You use a key combination that is Command Shift 3 will instantly capture your entire Mac screen.
Find the captured image on your Mac screen; it’s the default save location; you can change the save location according to the instructions below.
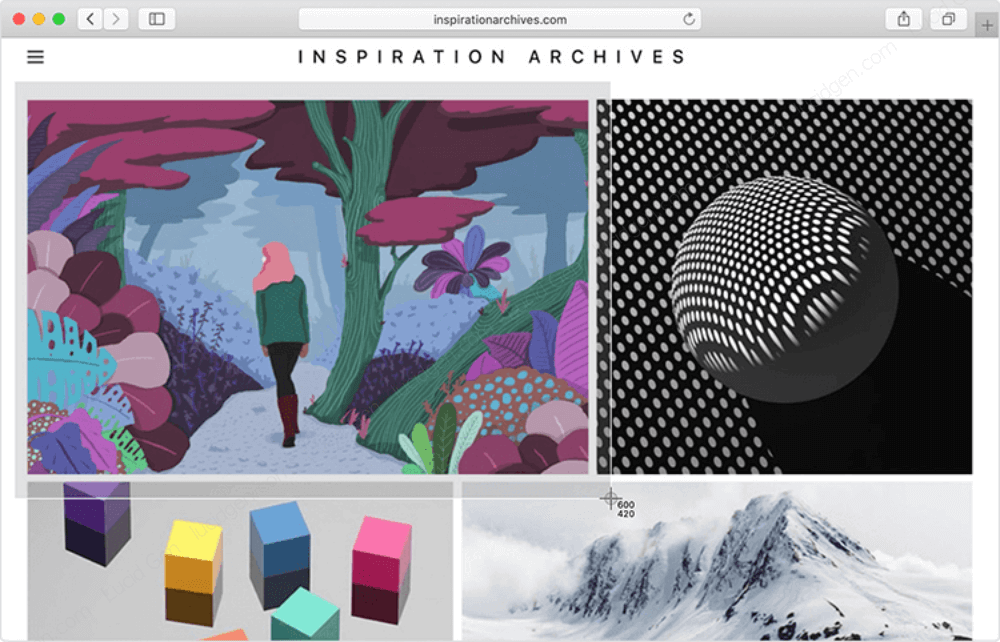
Take a picture and drag select an area of the Mac screen
You use the key combination Command Shift 4, then you move the mouse pointer, click and drag an area to capture.

The illustration when taking a screenshot of an area will look like this.
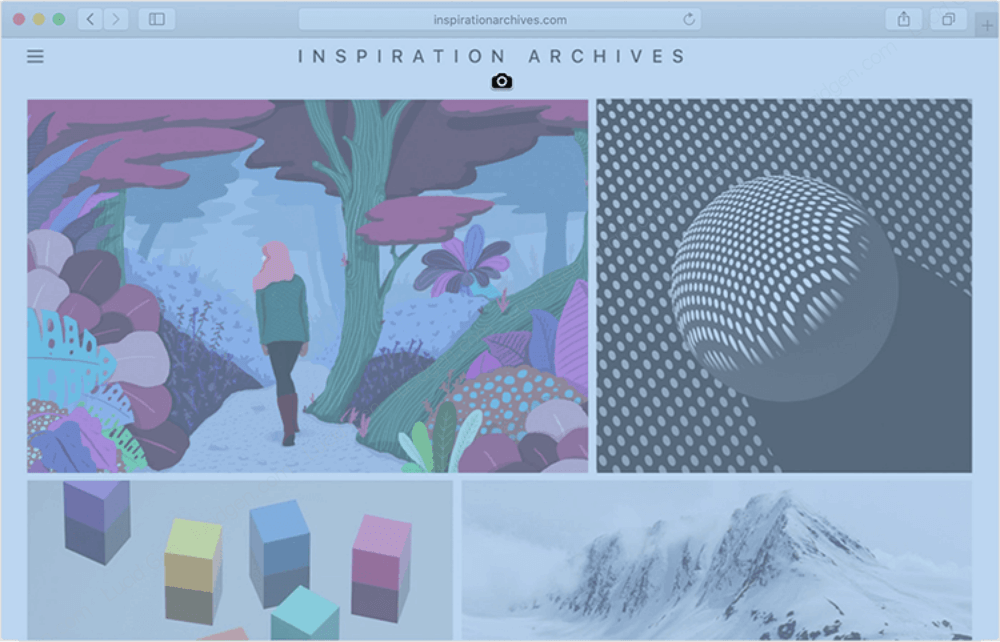
Take a picture of a running window on Mac
You use a key combination Command Shift 4 but add Space and then move the cursor to the running application window to capture that window.

When the cursor is in a running application window, the selected window will light up green. You need to click, and it will capture immediately.
Multiple photography options on Mac
If you want to select the shooting style gradually, use the key combination Command Shift 5, then select the shooting method you want.

Still the same 3 shooting styles as the instructions above, just your choice. Besides, there are always 2 screen recording buttons.

Take a screenshot on Mac and add it to the clipboard yourself
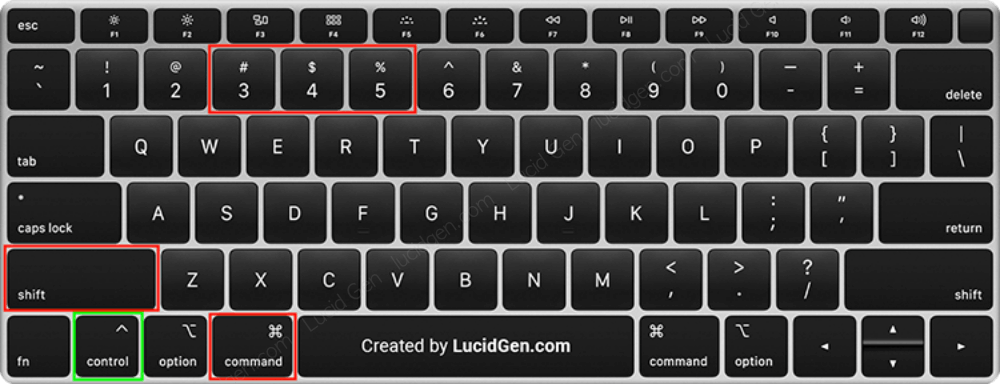
Let the screenshot just taken be added directly to the clipboard. You need to press the button Control before clicking the number keys above.
Settings help take a screenshort on Mac as you like
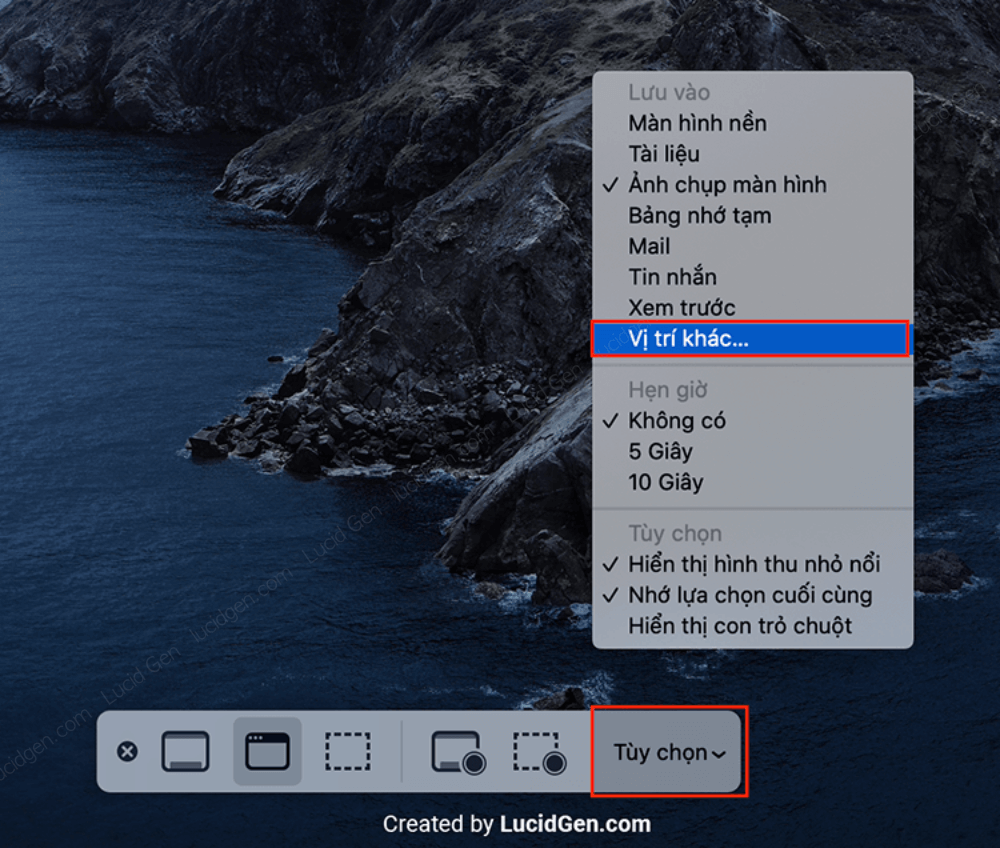
Change photo save location
By default, the captured image will be saved directly on the screen. If you don’t like it, change the save location to another location.
You click the Command Shift 5 key combination, then click Options. In the Save to section, select Another location… Then navigate to the folder you want to change.
Change image format
The default screenshot is in PNG format. If you want to change it to another format, open Terminal by clicking Command Space and finding Terminal.

Then you paste this command line into Terminal and then Enter to change the image format.
Note: Edit [format] to one of these formats bmp, pdf, jpg, jp2, tif, pict, tga, png before entering.
defaults write com.apple.screencapture type [format]Change default image file name
If you don’t like the default names of the screenshots, you can change them by pasting this command into Terminal. Please change [file name] to the name you want before Enter.
defaults write com.apple.screencapture name [file name]Turn on and off the shadow effect when capturing the window
I find that having a shadow effect when snapping a window is more beautiful and shows Mac’s quality, but if you don’t like it, you can turn it off by pasting this command into Terminal and then Enter.
defaults write com.apple.screencapture disable-shadow -bool trueIf you want to re-enable the shadow effect when capturing the window, paste this command into Terminal and then Enter to turn it back on.
defaults write com.apple.screencapture disable-shadow -bool falseHow to draw on screenshots to get attention
If you take a screenshot to guide someone, after taking it, you can draw more on the photo like the ones Lucid Gen used to draw the red lines in that article.
Open the photo you just took, then click the pencil button near the search bar. Then use the drawing tools to design the image you want.

Epilogue
I wrote a lot, but basically, we only use 3 ways to take a screenshot on Mac first. Note that Mac screenshots will be very sharp and have a high resolution (twice as much as a normal computer screen), so the file will be a bit heavy. If you want to send it to anyone, please reduce their size before sending it (in the drawing area on the image, there is a 2-way arrow button to resize). If you find this article good, please comment and communicate with Lucid Gen!