Gatekeeper and System Integrity Protection (SIP) are two security barriers equipped by Apple for macOS; they help prevent malware and increase system security. However, they make it difficult to install applications outside the App Store, especially those you want to use “for free”. Lucid Gen will guide you to disable Gatekeeper (turn on the Anywhere option) and disable SIP on Mac simply in the easiest way to understand.
What is Gatekeeper
Gatekeeper is a security feature that authenticates apps outside the App Store before allowing them to run. This feature helps reduce the possibility of accidentally executing malicious software. Apple introduced Gatekeeper from macOS X Leopard (10.7.3).
What is System Integrity Protection (SIP)
SIP, sometimes called rootless, is a kernel-based security feature. This feature helps protect system files, prevents file editing by programs without root privileges (sudo), and is sometimes blocked by programs with root privileges. This feature debuted with macOS X El Capitan (10.11).
How to disable Gatekeeper on Mac
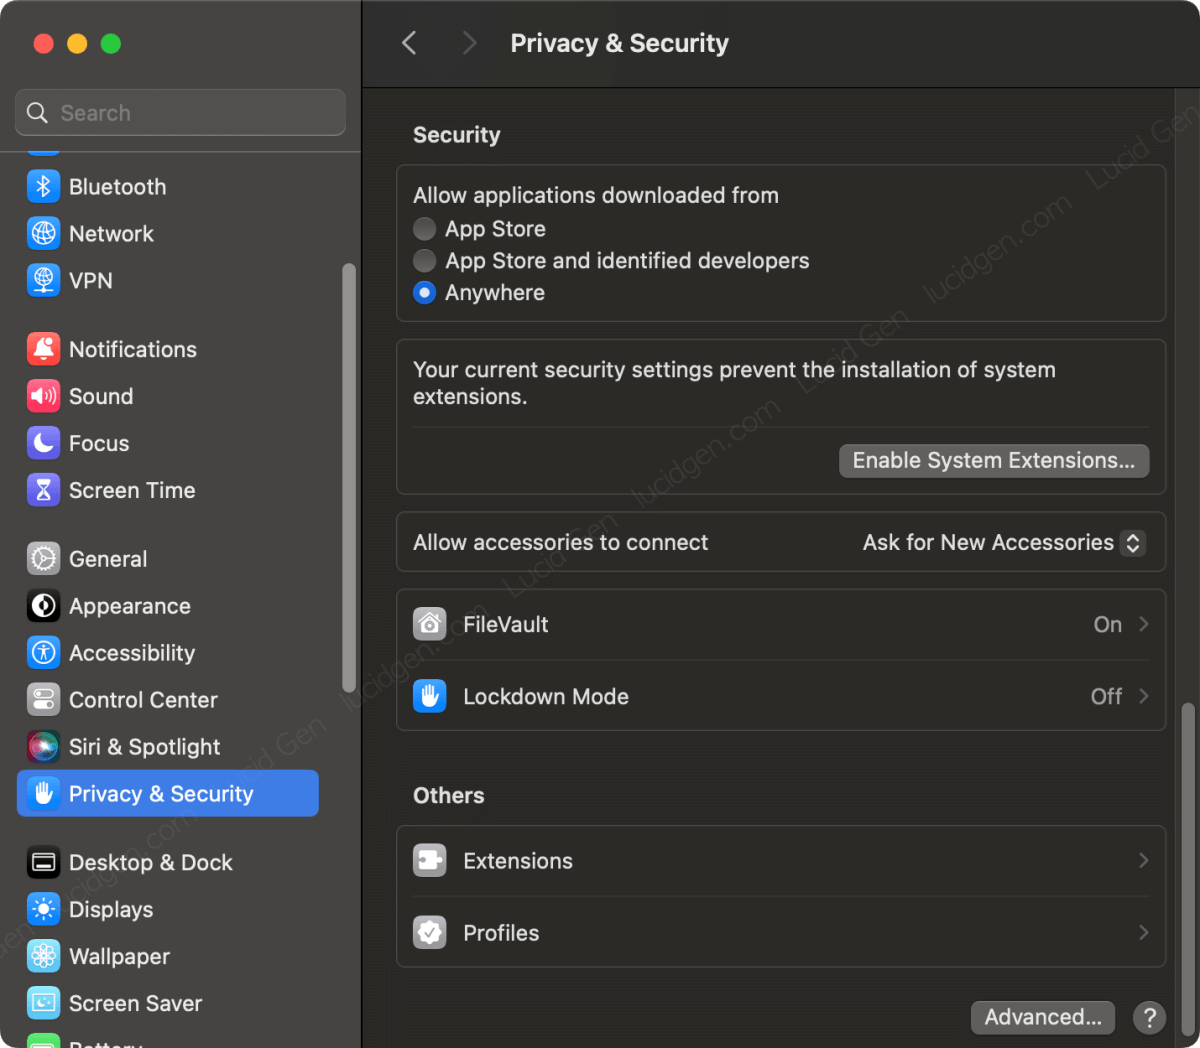
Disabling Gatekeeper on Mac will enable the Anywhere option in the Security section, allowing you to open applications downloaded outside the App Store.
Step 1: Open the Terminal application (this is an application available on macOS) and type this command line to request to disable Gatekeeper.
sudo spctl --master-disableThe system will ask for a password to continue; please enter the password to open your computer. Note that no characters will appear while you enter the password, so you must enter it correctly and then Enter.
To ensure Gatekeeper is turned off, you can use this command line to check. If the returned result is “assessments disabled”, then you have successfully disabled it.
spctl --status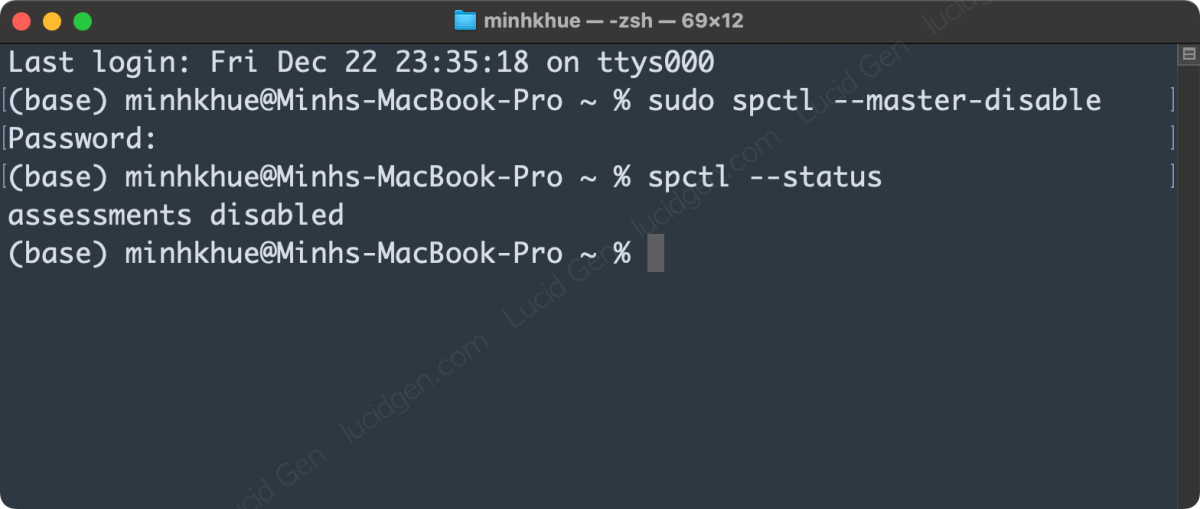
Step 2: We will enable the Anywhere option for Mac by opening Settings, going to the Privacy & Security section, and checking the Anywhere option. From now on, you can open applications downloaded online.
How to enable Gatekeeper on Mac
Re-enabling Gatekeeper does not appear to affect apps you have previously successfully installed, so you can safely re-enable it. To turn on Gatekeeper, enter this command line into Terminal; we will also enter the password to open the device when the system requests.
sudo spctl --master-enable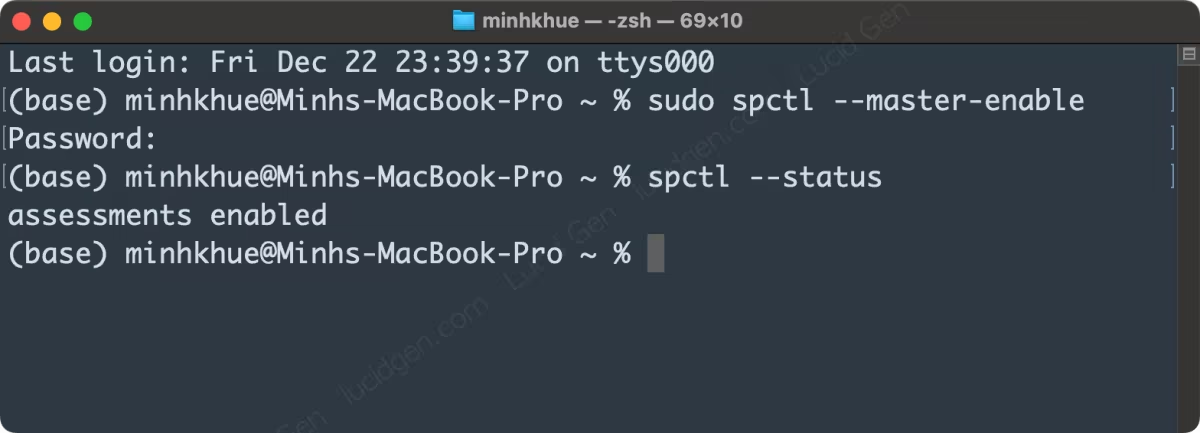
How to disable SIP on Mac
To use “free” some copyrighted applications like Adobe on MacBook, you need to disable SIP on Mac. This allows installation packages to interfere with the system profoundly, for example, changing the host file’s content.
Step 1: Enter macOS recovery mode. Depending on whether your computer is an Intel or ARM chip (M1, M2, M…), there will be different ways to enter recovery.
- ARM chip: Turn off the device completely, press and hold the power button until the screen displays the words “Loading startup options”, then release the power button.
- Intel chip: Click the Apple icon on the menu bar, select Restart, then press Command R and hold until the startup screen appears.
Step 2: Open Terminal from the menu bar above. Suppose you do not immediately see this screen when entering recovery. In that case, you may have to go through steps such as selecting Options, selecting User, and entering the password to open the device.
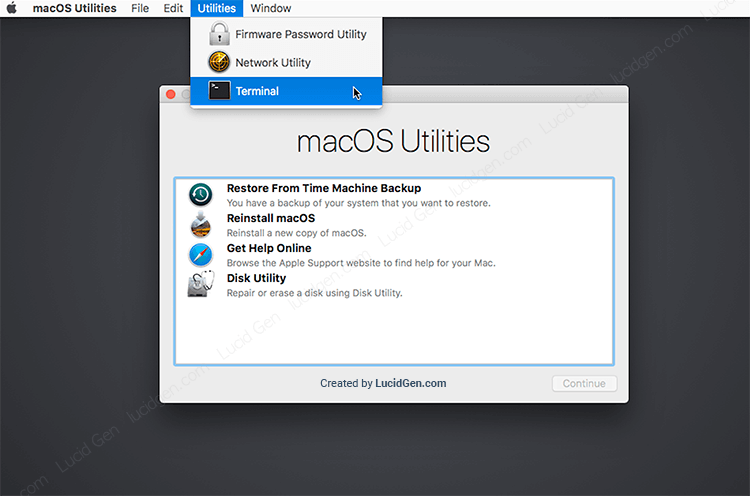
Step 3: Enter this command line into Terminal to disable SIP on Mac. The system may ask for a password to disable SIP; enter your device’s password and then Enter.
csrutil disableYou may be asked by the system, “Allow booting unsigned operating system and any kernel extensions for OS Macintosh HD? [y/n]” , then you need to enter “y” and then Enter to continue.

Step 4: Check the results returned by the system. If you see “Successfully disabled System Integrity Protection” or “System Integrity Protection is off” in Terminal, you have successfully disabled SIP on Mac. Now enter the reboot command and then Enter to reboot the device.
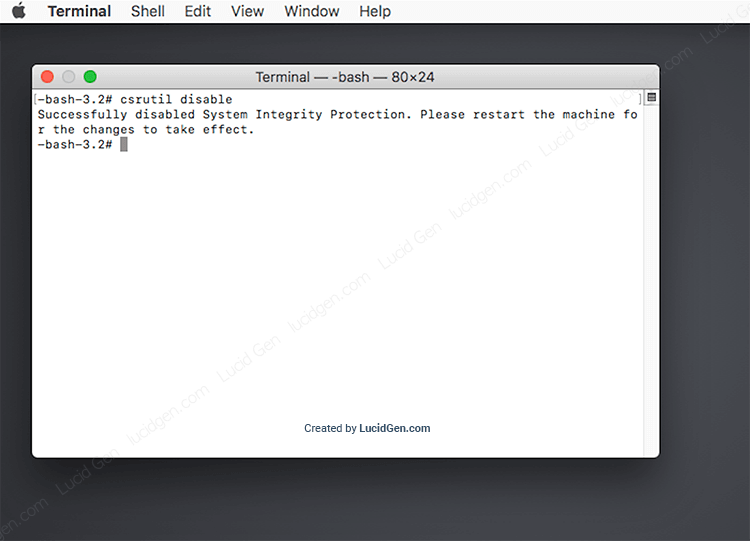
According to Lucid Gen, disabling SIP will not negatively affect your Mac if the applications you download online are from reputable sites. Lucid Gen has been disabling SIP on Mac without problems for many years.
How to enable SIP on Mac
To enable SIP on Mac, go to recovery as instructed above, open Terminal, and enter this command line.
csrutil enableAfter checking that the result of turning on SIP on Mac is successful, enter the reboot command to restart the computer.

Note that some apps outside the App Store may malfunction if you turn SIP back on. You can try turning it back on and check if your app is still working fine or not.
Conclusion
Disabling Gatekeeper and SIP on Mac poses hidden risks for those who frequently download applications online. If you rarely download applications online, there is no need to worry; you need to choose the right reputable source. Lucid Gen hopes this tutorial will help you; please leave your results or questions in the comments below the article. Good luck!


Hi! Some of the files seem to be damaged. Is there a way to solve this?
Hello, what is the file you got damaged? Try to download it again. Maybe network problem when you downloading.
Disregard my last comment, i followed the guide to re-disable gatekeeper and it worked. thank you!
Nice!
Hi! Thank you so much for your help.
I disabled Gatekeeper and SIP to install some Adobe Creative Cloud apps, but know I can’t enable SIP.
this message appears on terminal:
Failed to update security configuration for Macintosh HD: the signing server declined the personalization request
What should I do?
thank you!
Hello, I have not enabled SIP yet. So I have no idea =))
Hi, still working in November 2024??
Yes
Hello, while I’m trying to disable Gatekeeper by typing spctl –master-disable I get “Permission denied”….
Hello, you need type “sudo ” at the begin.
OK, thanks! In the end I disabled neither Gatekeeper nor the SIP, but it worked, I was able to download Ps. :))