

Zipping and unzipping files on a Mac is something we do all the time when sending or receiving lots of files. Of course, macOS has this feature built in, but it does not fully meet users’ needs. Here are the problems with the default Zip feature you may run into when you first get a MacBook:
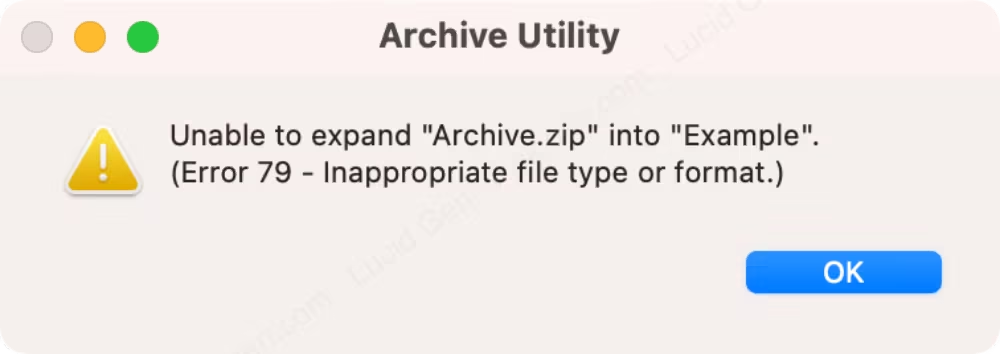
- Errors when unzipping a Zip file.
- You cannot add a password to a Zip file on Mac.
- Zip files created on a Mac contain the hidden files __MACOSX and .DS_Store.
So in this article, I will show you how to zip files on Mac cleanly and unzip them without errors.
How to unzip files on Mac
Use the built-in unzip feature on Mac
Normally, you can use the built-in unzip feature on Mac in two ways:
- Double-click the Zip file to extract it.
- Right-click the Zip file > Open with > Archive Utility.
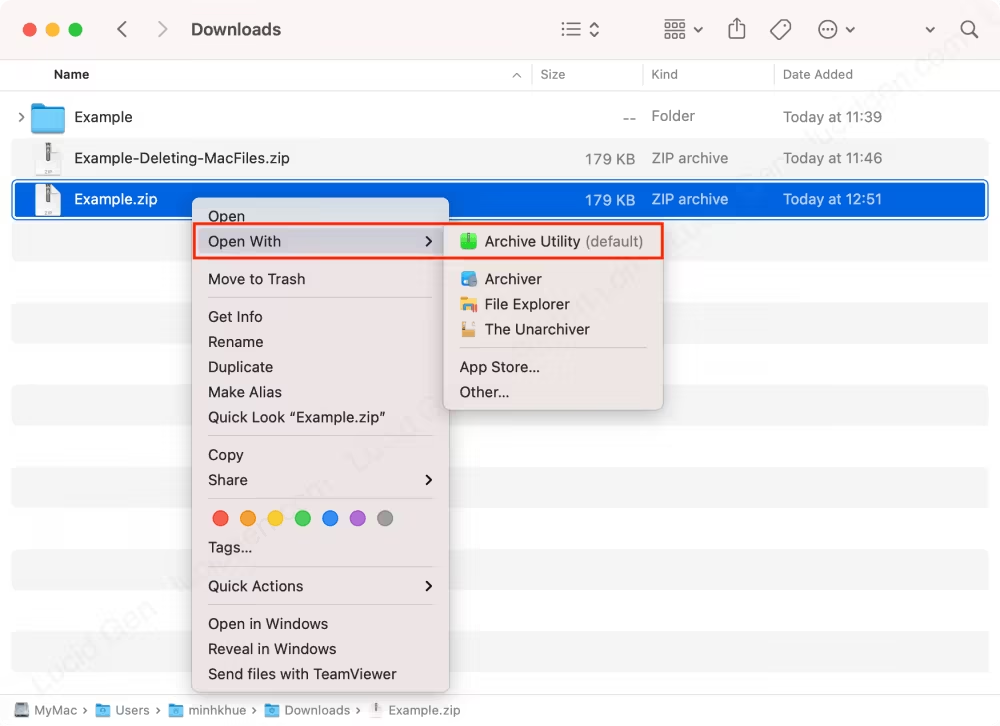
But if you get an error and cannot unzip a Zip file on your Mac, you need to use a different app to unzip it.
Use an app to unzip files on Mac
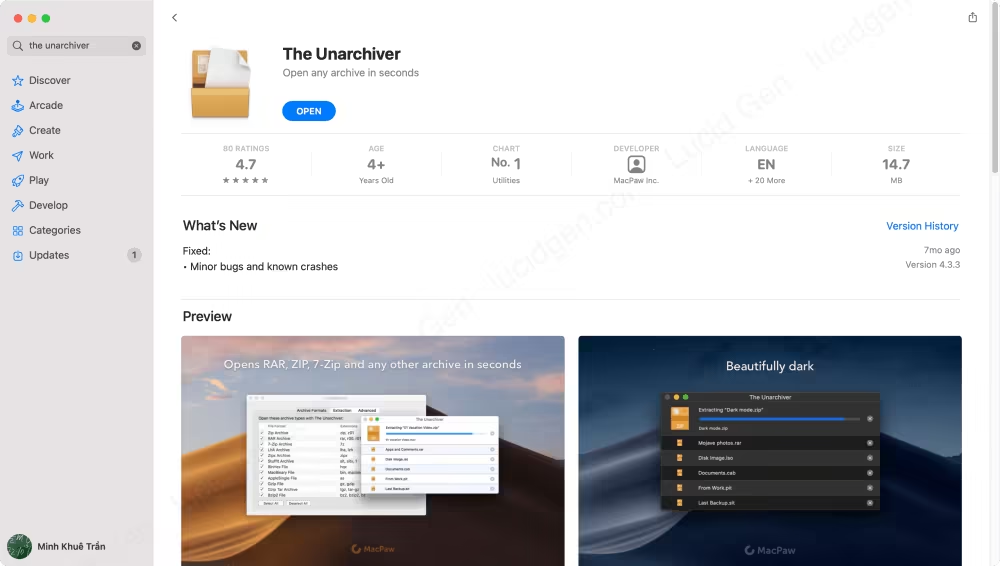
Beyond Zip files, we need an app that can extract every type of archive on the computer. I have tried many apps on the App Store and picked The Unarchiver as the one most worth using, for these reasons:
- Available on the Mac App Store, so it has gone through Apple’s review and is easy to install and keep updated.
- Completely free, with no ads and no prompts to upgrade to Pro.
- Extracts all common archive formats.
- Simple to use.
After downloading The Unarchiver, just right-click the Zip file > Open With > The Unarchiver.
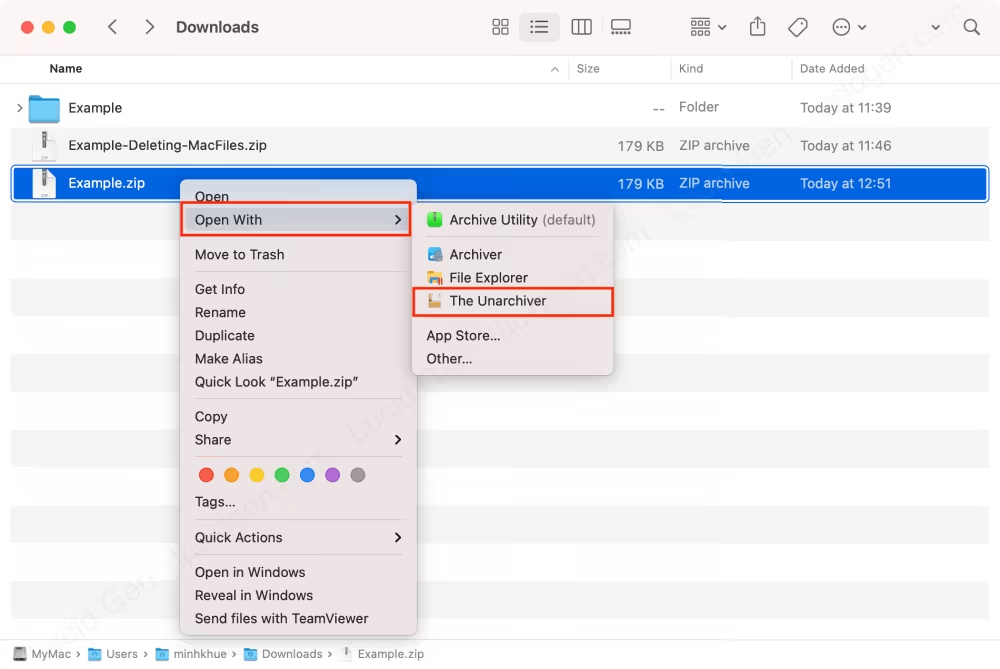
With The Unarchiver, you can extract many types of files without the errors you get with Mac’s Archive Utility.
How to zip a file on Mac
Use the built-in zip feature on Mac
To zip files on Mac, select one or more files > right-click > Compress.
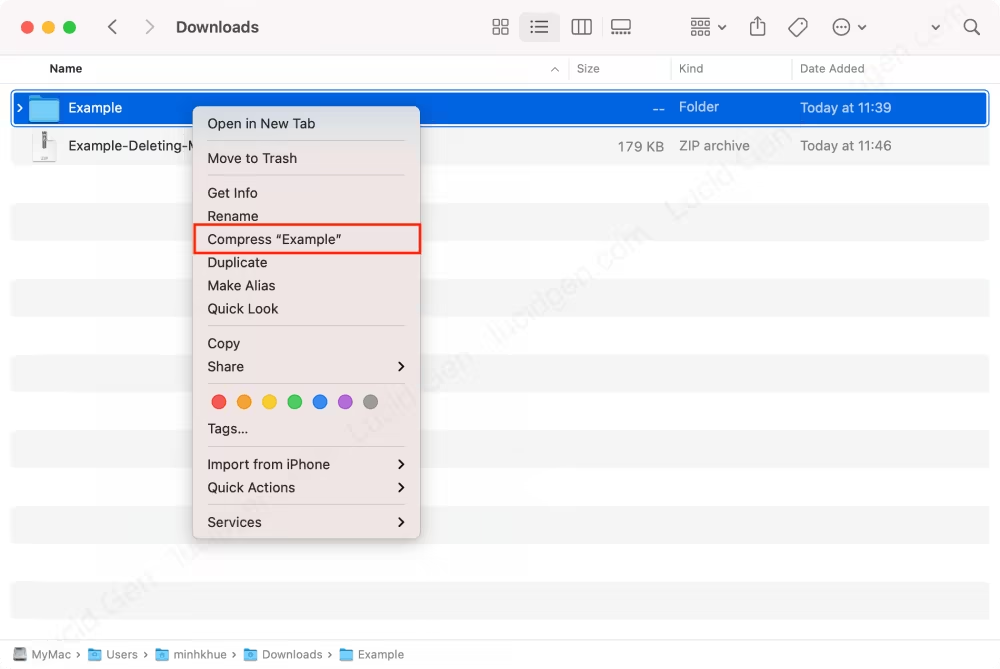
The problem is that this Zip file also contains Mac’s default hidden files, such as __MACOSX and .DS_Store. If you unzip it on a Mac, you won’t see them, but on other operating systems like Windows or Linux, these files show up.
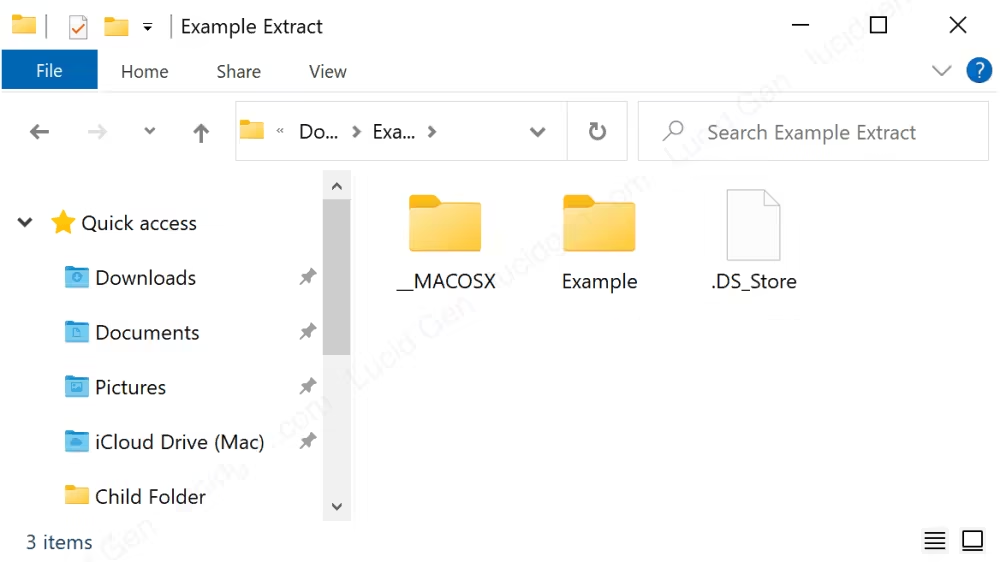
This can confuse or annoy the people who unzip your files. So follow the steps below to remove __MACOSX and .DS_Store from your Zip file.
Step 1: Copy the path of your Zip file. There are two ways:
- Select the Zip file > Command + Option + C.
- Turn on the path bar (Command + Option + P) > right-click the Zip file in the path bar > select Copy as Pathname.
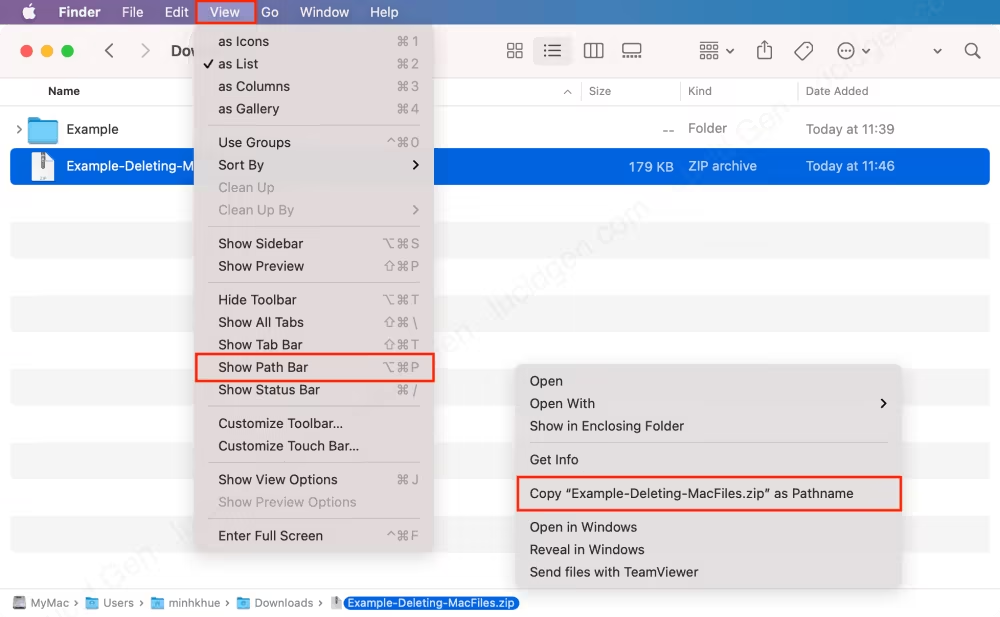
Step 2: Run the command to remove the hidden files from the Zip file. Replace /Users/username/Folder/File.zip in the code below with the path of your Zip file > paste the finished command into Terminal (Command + Space, then search for Terminal) > press Enter.
zip -d "/Users/username/Folder/File.zip" "__MACOSX*" "*.DS_Store"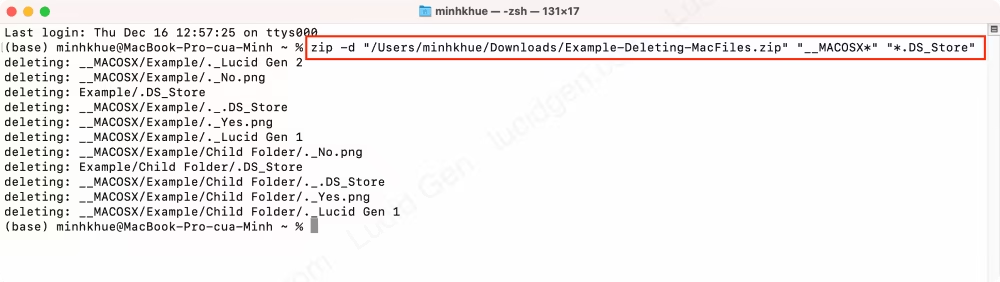
Now when you send Zip files to people on other operating systems, they will no longer see Mac’s hidden files when they unzip them.
Use an app to zip files on Mac
If you zip files often, the method above gets tedious, because every time you zip something you have to run the command to remove the hidden files. So I would like to introduce a lightweight yet powerful app for compressing files on Mac: Archiver. Here is what I like about it:
- A simple, easy-to-use interface with no complicated settings; just drag and drop.
- Automatically removes Mac’s hidden files when compressing.
Note: Archiver is a paid app. When I wrote this article (12/2021), it cost about 20 USD. The price may have changed, so check the official website before you buy.
Step 1: Install Archiver. Download the installer from archiverapp.com, open the DMG file > drag and drop the Archiver icon into the Applications folder.
Step 2: Create Zip files with Archiver. Open Archiver > drag and drop the files and folders you want to compress into the window.
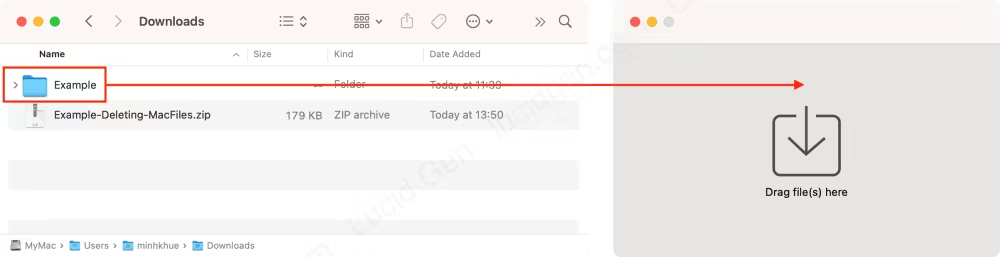
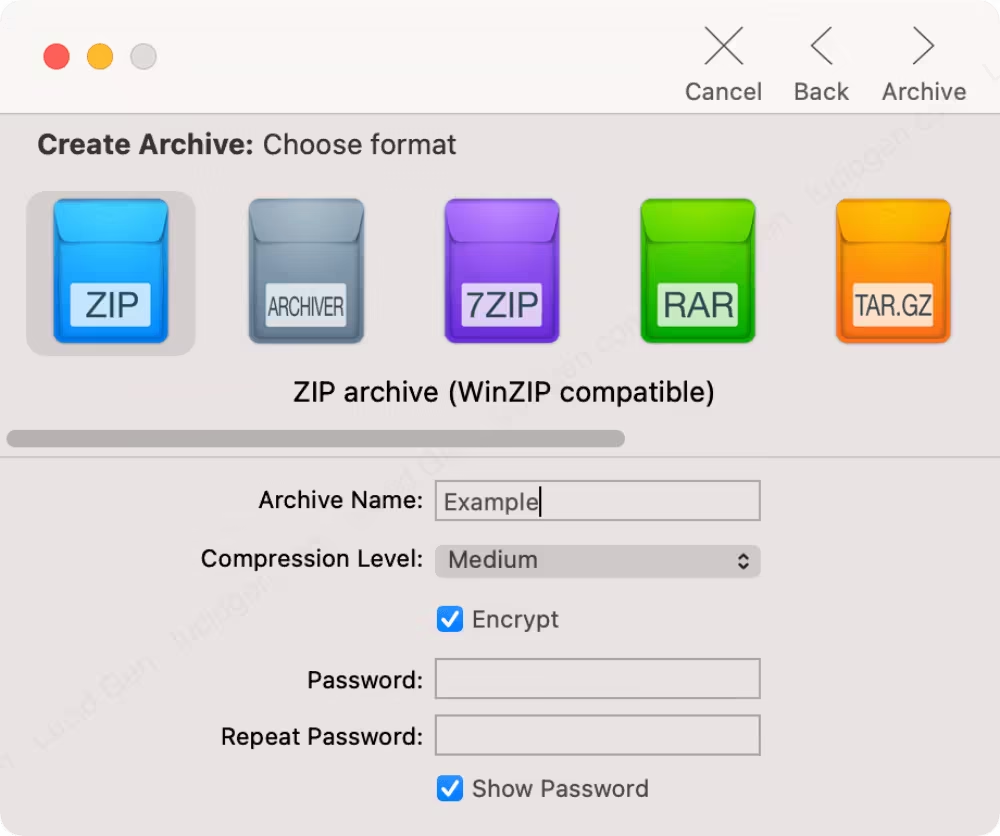
Click the Archive button in the upper right corner > choose a format, for example Zip > name the file > turn on Encrypt if you want to add a password > click the Archive button to create the archive.
Archiver can also extract all kinds of archives. Just right-click the compressed file > Open With > Archiver, the same way as the unzip methods above.

Conclusion
I hope you now have a clean, reliable way to zip and unzip files on your Mac. As for the two apps I introduced, pick the one that fits your needs: choose Archiver if you often compress files to send to others, or The Unarchiver if you mostly unzip files and rarely create them.
If you found this article helpful, leave a comment below and let me know what you think.


