
For content creators, having the Adobe suite on Mac is essential. Adobe forced previous versions to buy, but we can continue using it for free with Adobe 2025 and macOS 13 or later. In this update, Lucid Gen will guide you through installing Adobe Photoshop, Illustrator, Lightroom, Premiere, Audition, Animate, After Effects, Media Encoder, and many other Adobe applications.
Download the complete Adobe suite for Mac
Here’s what you need to know to install Adobe for Mac. Note that macOS versions lower than 13 won’t work with this tutorial.
| macOS | 13 (Ventura) and up |
| Adobe Version | 2025 |
| Chip | Intel and ARM |
| SIP and Gatekeeper | Force shutdown |

Download CleanMyMac, and AdobeCreativeCloudCleanerTool first. These are the tools you need to install Adobe for Mac for free.
- AdobeCreativeCloudCleanerTool: Helps you safely uninstall old Adobe applications on Mac.
- CleanMyMac: Helps you clean up any leftovers after uninstalling old Adobe on Mac.
The list of installation files that Lucid Gen shared includes the following Adobe applications for Mac:
- Adobe Acrobat
- Adobe After Effects
- Adobe Animate (coming soon)
- Adobe Audition
- Adobe Bridge
- Adobe Character Animator (coming soon)
- Adobe Illustrator
- Adobe InCopy
- Adobe InDesign
- Adobe Lightroom
- Adobe Media Encoder
- Adobe Photoshop
- Adobe Premiere
Prepare before installing Adobe
Please note that this part is essential; it determines whether you will install Adobe for MacBook smoothly. So you need to follow it completely. This tutorial is done on macOS Sequoia (15.2) and is 100% successful.
Turn off Gatekeeper
Not only Adobe but to install any application outside the App Store without paying, you must disable Gatekeeper. If you cannot disable Gatekeeper on macOS Sequoia, the installation process will require more steps; I will guide you thoroughly.
Clean up anything related to old Adobe
If you have installed any Adobe applications on your Mac before, then to install Adobe applications for Mac, you need to remove and clean up everything related to the old Adobe.
Step 1: Open AdobeCreativeCloudCleanerTool and click on the Clean All button. This is a safe way to uninstall all Adobe applications completely. However, you must manually restore the hosts file on Mac because the Fix Host File feature does not work well.

Step 2: Remove any remaining Adobe sync applications using CleanMyMac. Go to Uninstaller and search for Adobe to remove all remaining applications.

Step 3: Delete empty folders related to old Adobe. Although you have used the two tools above, you must manually delete anything associated with Adobe in the folders below if you find it.
- /Applications
- /Applications/Utilities
- /Documents
Step 4: Restart your computer.
If you complete all the above preparation steps, Lucid Gen believes that 90% of you will successfully install the entire Adobe suite for Mac. Now, we must go through the installation steps for each Adobe application.
Get Adobe for Mac for free
Step 1: Install Adobe Creative Cloud on Mac. In version 2024, we cannot install Creative Cloud but must use AntiCC. But in version 2025, we will use Creative Cloud.
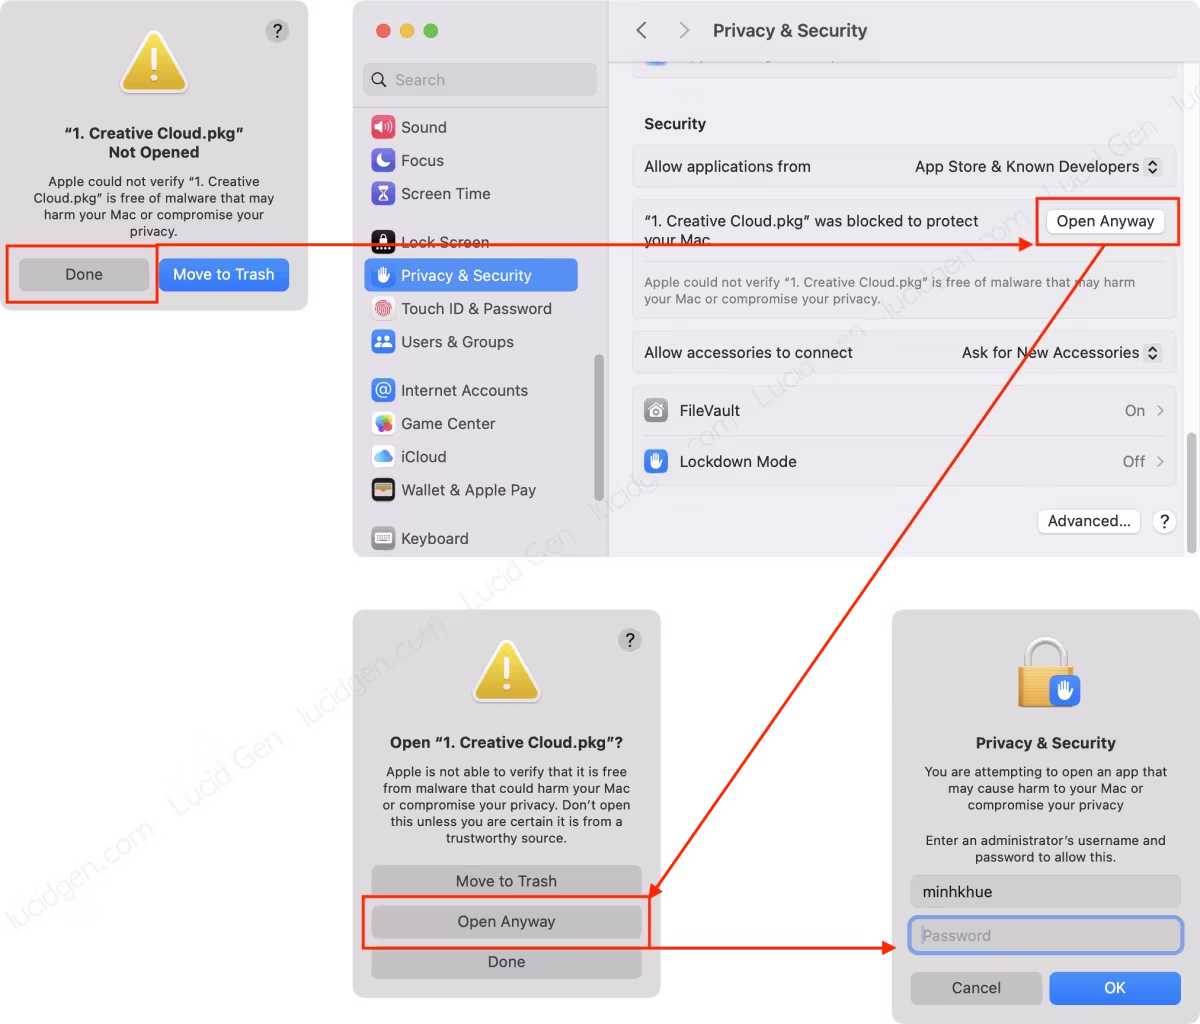
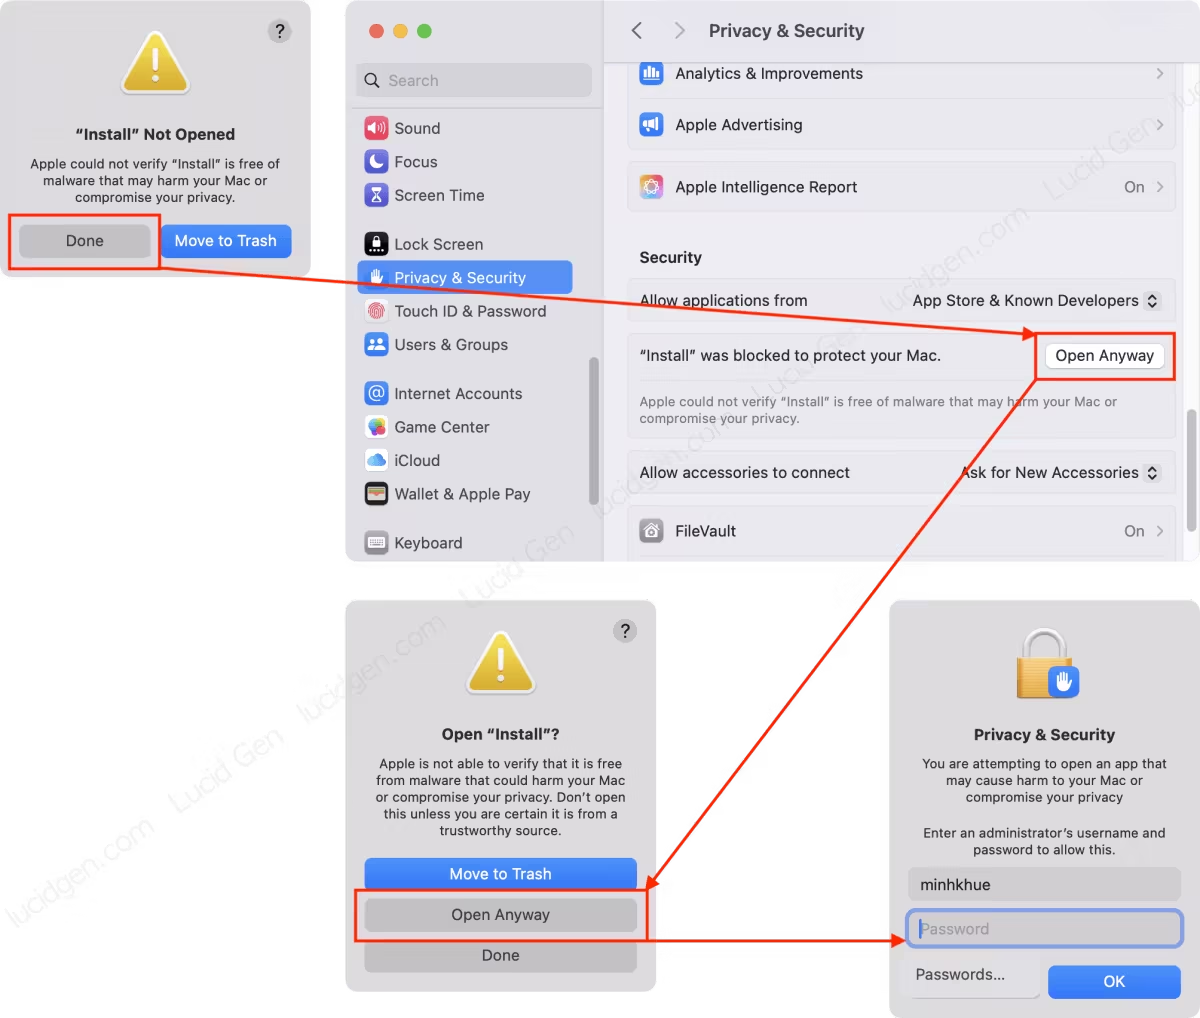
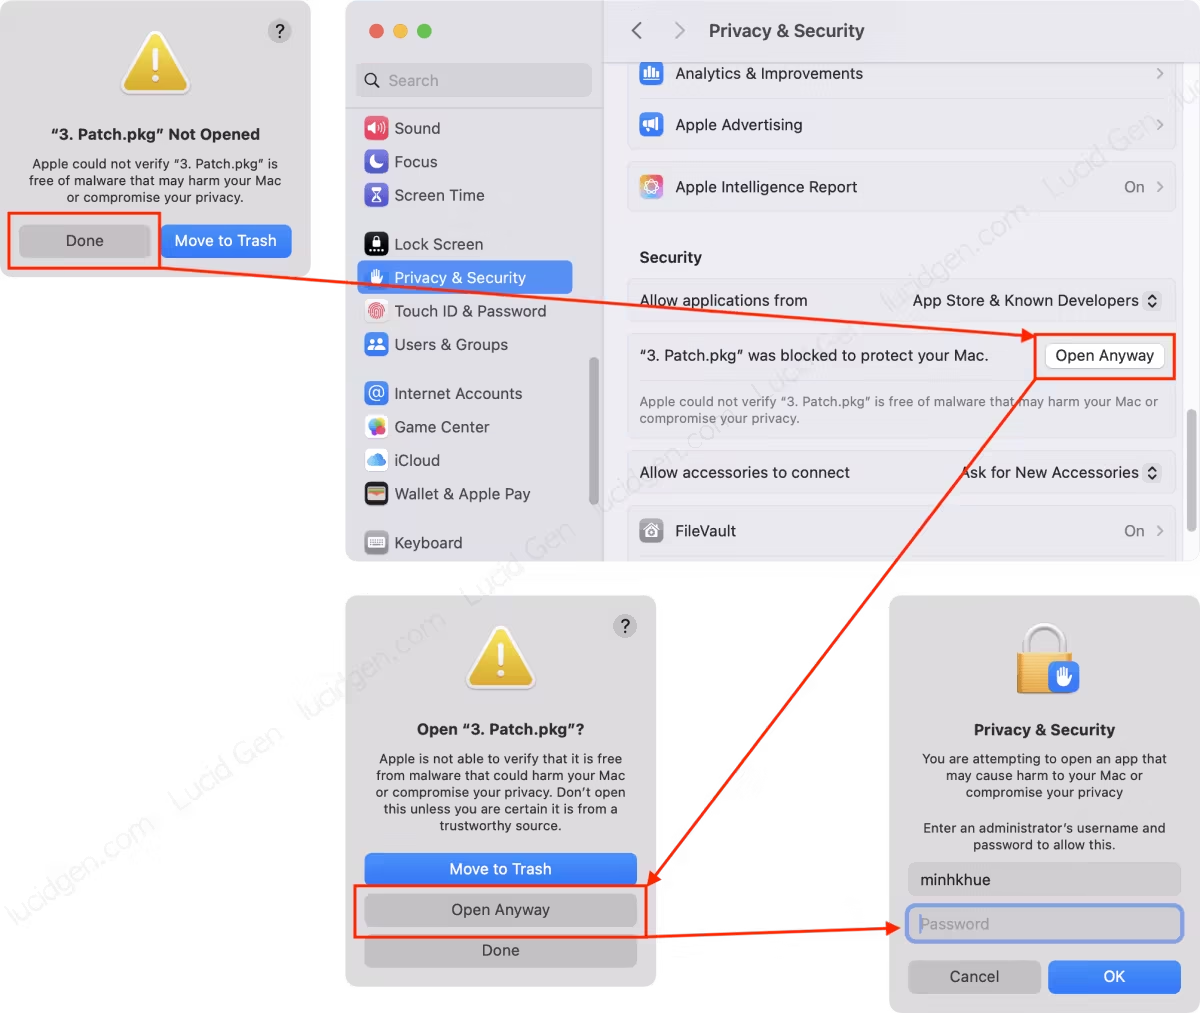
Step 2: Grant permission to open the Adobe Creative Cloud installation file. If you have successfully disabled Gatekeeper with macOS lower than Sequoia, it will not be as complicated as this.
- Click Done with a warning; do not Move to Trash.
- Open Settings > Privacy & Security > Security. Click the Open Anyway button.
- Click Open Anyway on the new warning.
- Enter the password to unlock the device and OK.
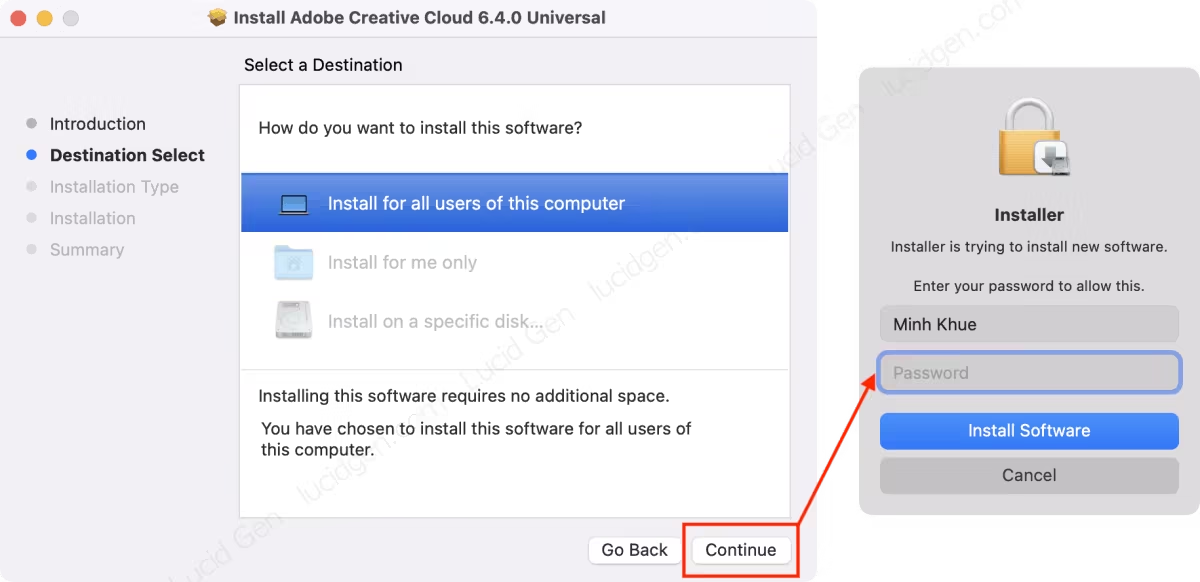
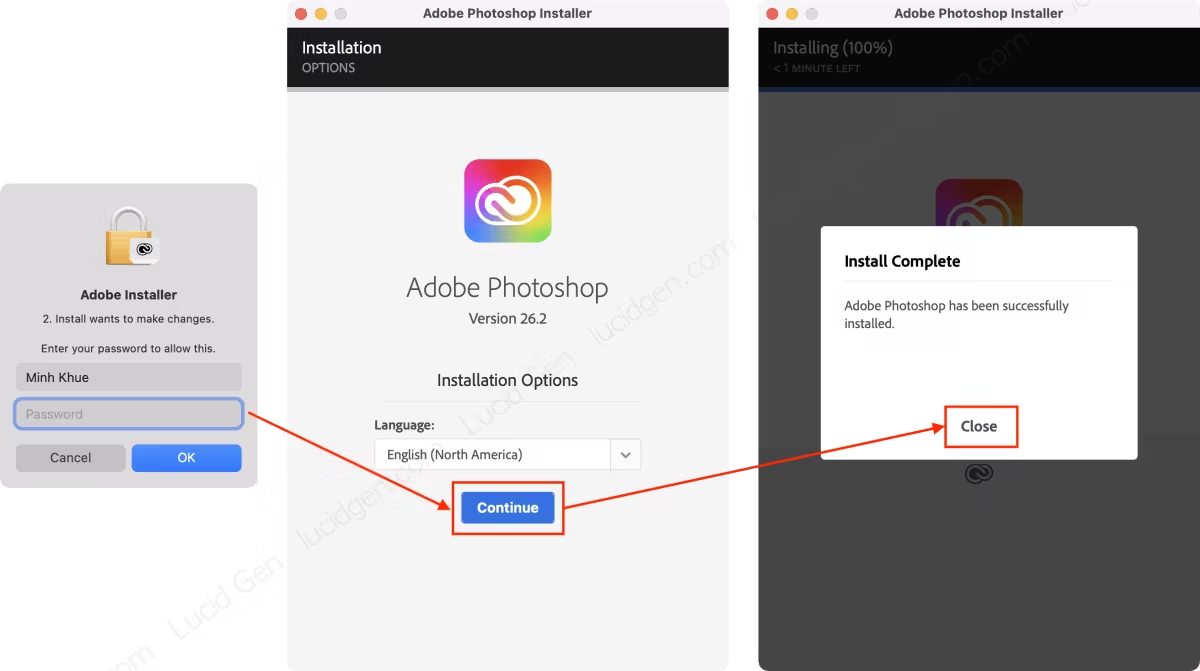
Step 3: Install Adobe Creative Cloud as usual. Click the Continue button, and enter the password to unlock the device when prompted and OK. You need to install it; opening the application to log in is unnecessary.
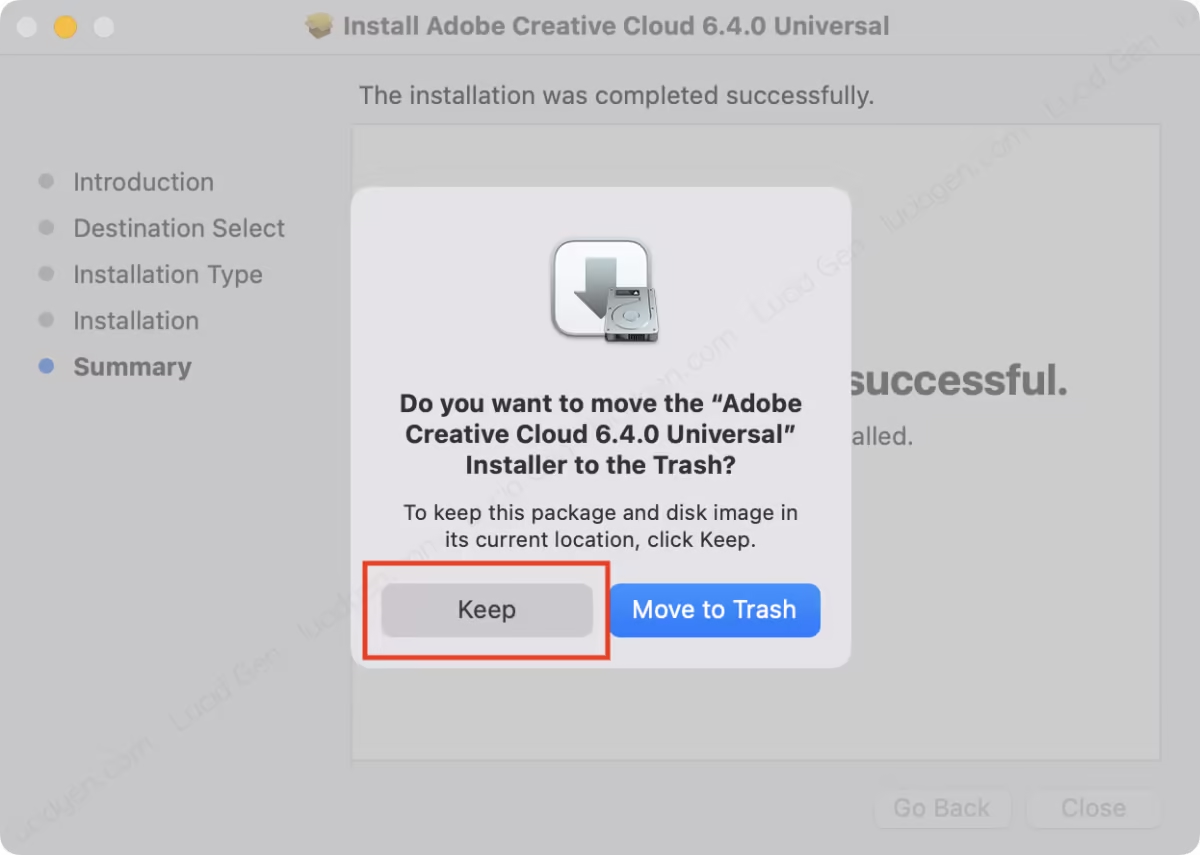
During the installation process, select Keep to keep the installation files. We will delete them manually after everything is done.
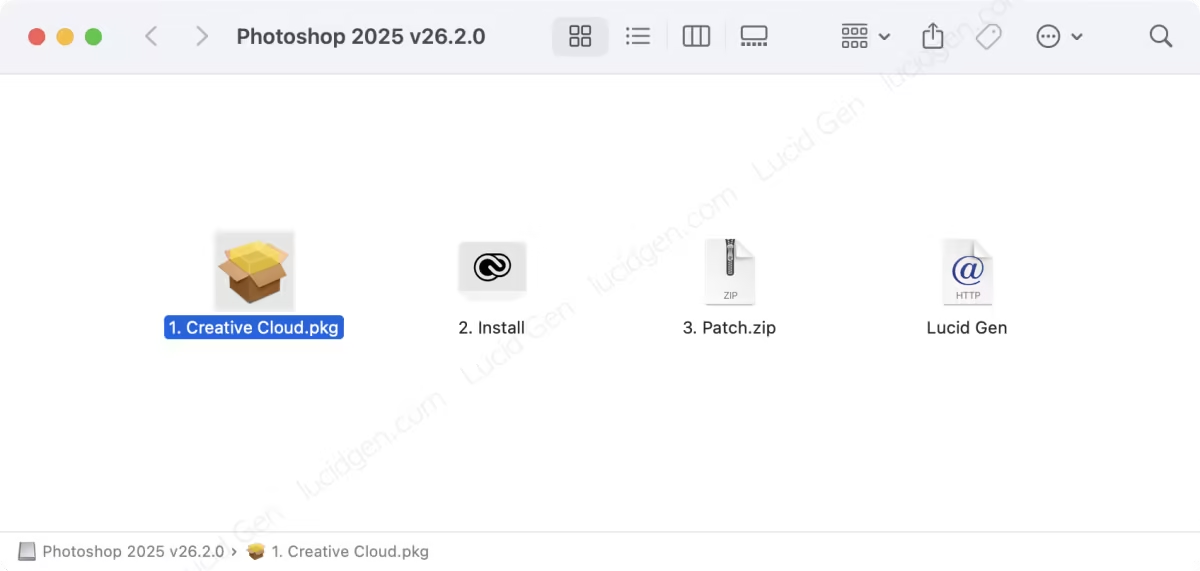
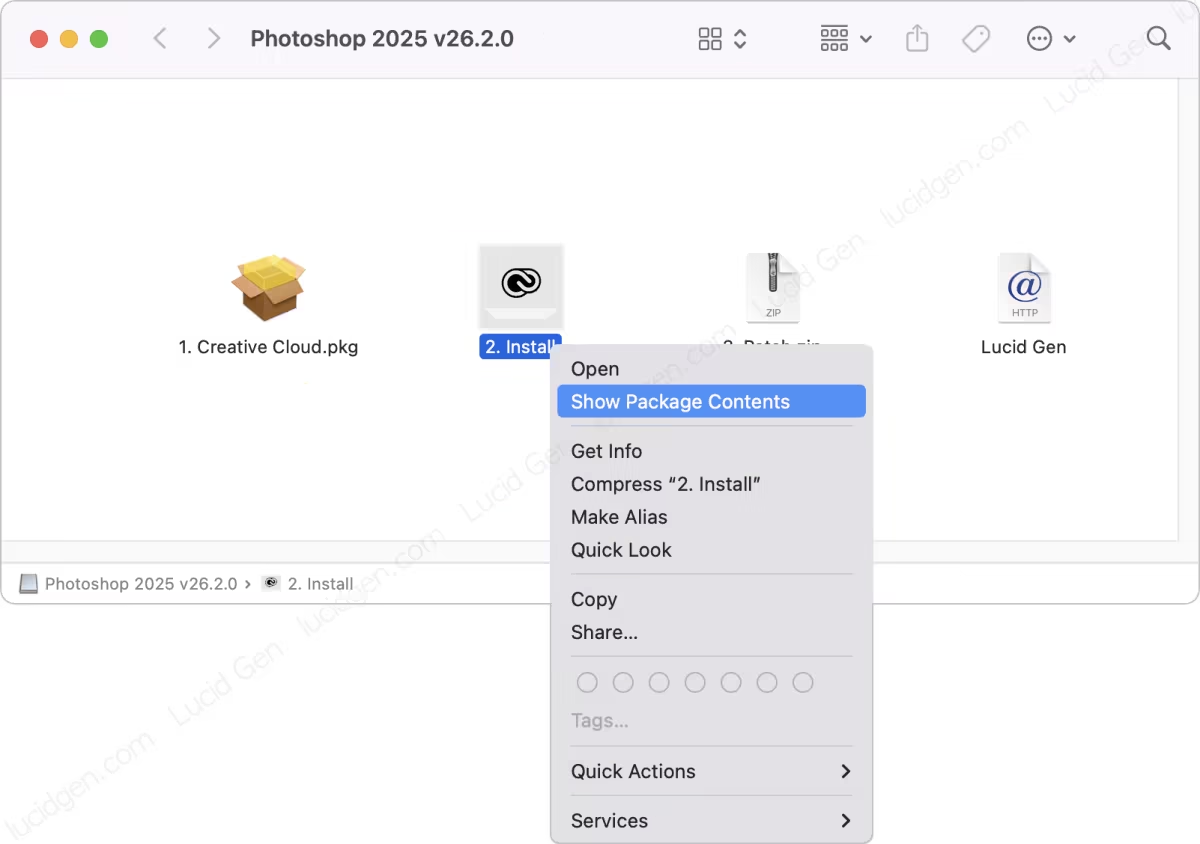
Step 4: Open the installation file of an Adobe application. Right-click on the Install file and select Show Package Contents.
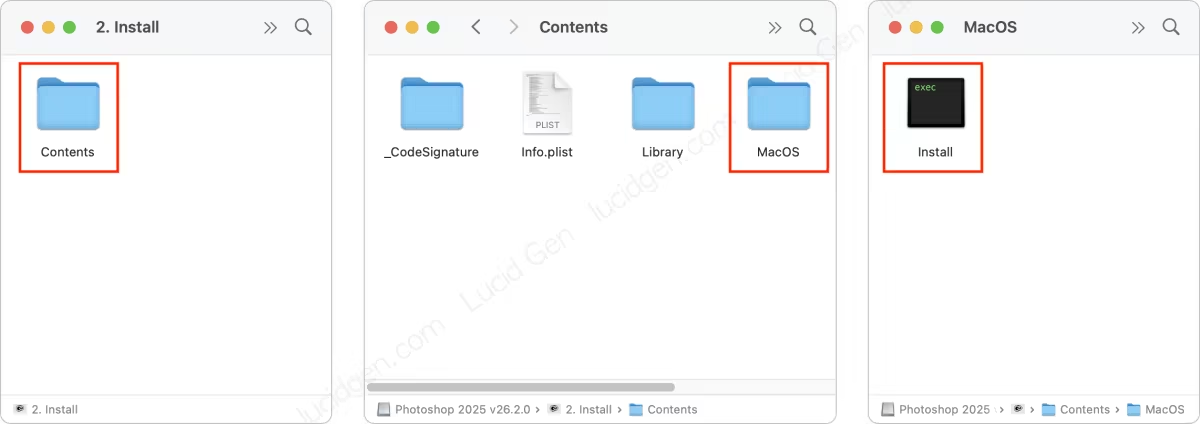
Browse through the Contents > MacOS folder and open the Install file to install.
Step 5: Grant permission to open the Adobe application installation file. The steps are similar to step 2.
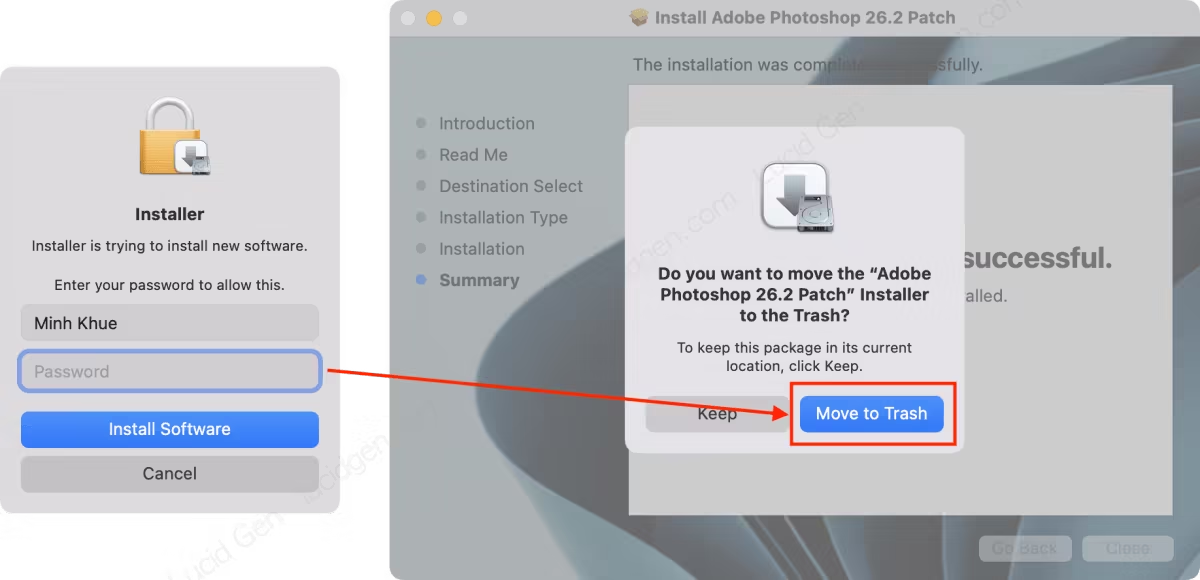
Step 6: Click Continue to install Adobe on Mac; after installation is complete, click Close. If there is a warning, enter the password to unlock the computer and OK.
Once you’ve installed an Adobe app for Mac, you don’t need to open it yet.
Steps specific to Lightroom (click to view)
Lightroom requires opening and logging into any account.

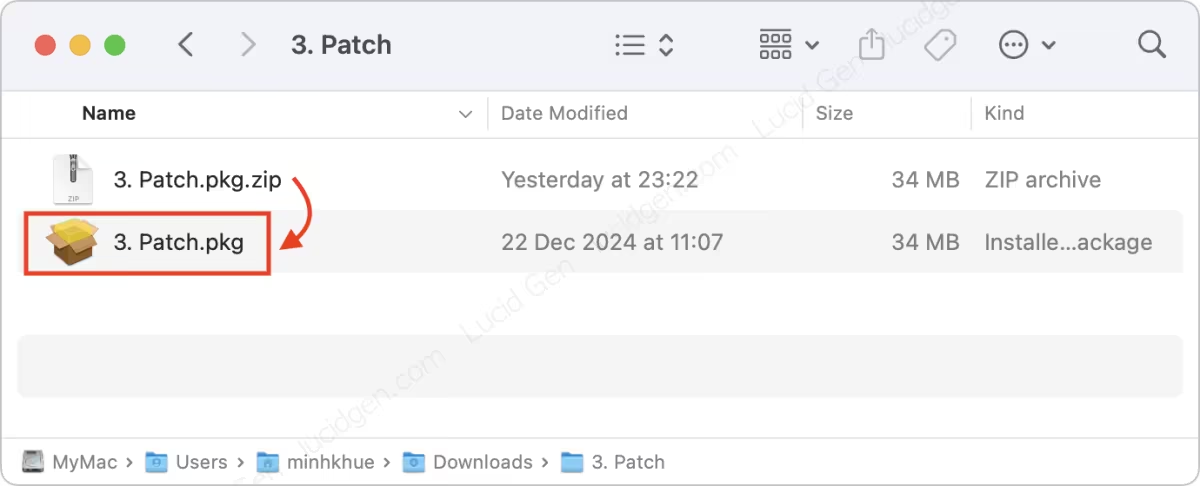
Step 7: Open the Patch file. You may need to unzip the zip file on your Mac.
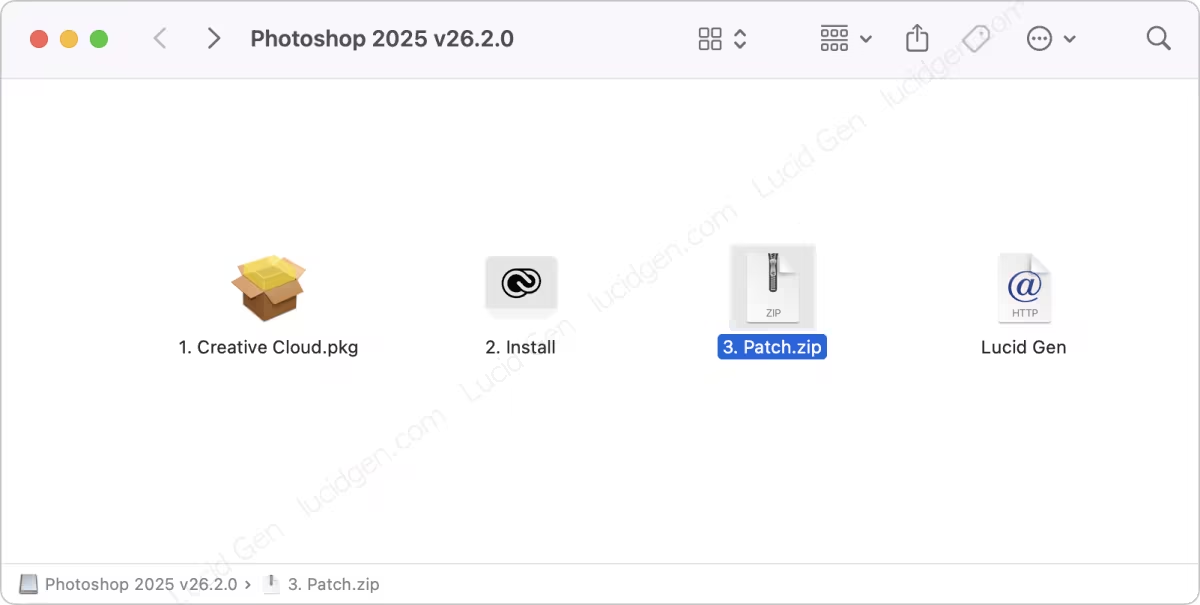
Open the Patch.pkg file
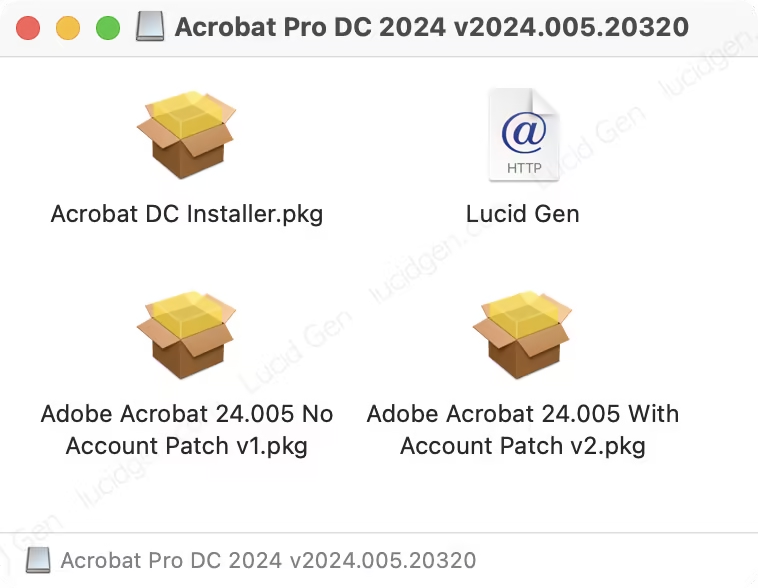
Steps specific to Acrobat (click to view)
Acrobat will have 2 Patch files:
- No Account Patch V1: No need to log in to an account; you can use it offline.
- With Account Patch V2: You must log in to an Adobe account but can use AI features.
Step 8: Grant permission to open the Patch file if you have problems disabling Gatekeeper.
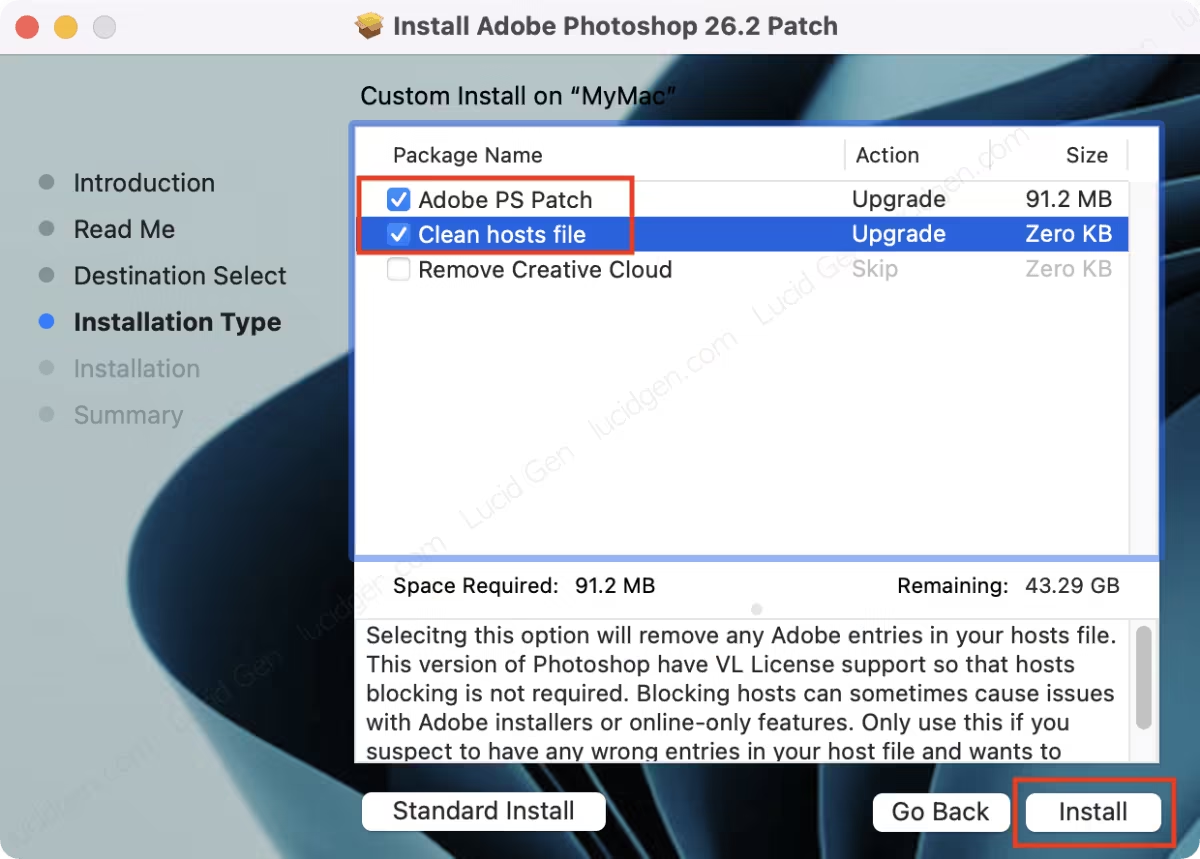
Step 9: Proceed to patch Adobe. Check the name of the Adobe application you are installing. Select the Clean Hosts file if you have previously patched another Adobe application.
After patching, you can select Move to Trash and delete the remaining installation files on your device.
Once you have installed Adobe for Mac, you can delete all downloaded installation files and enjoy Adobe applications on your MacBook.

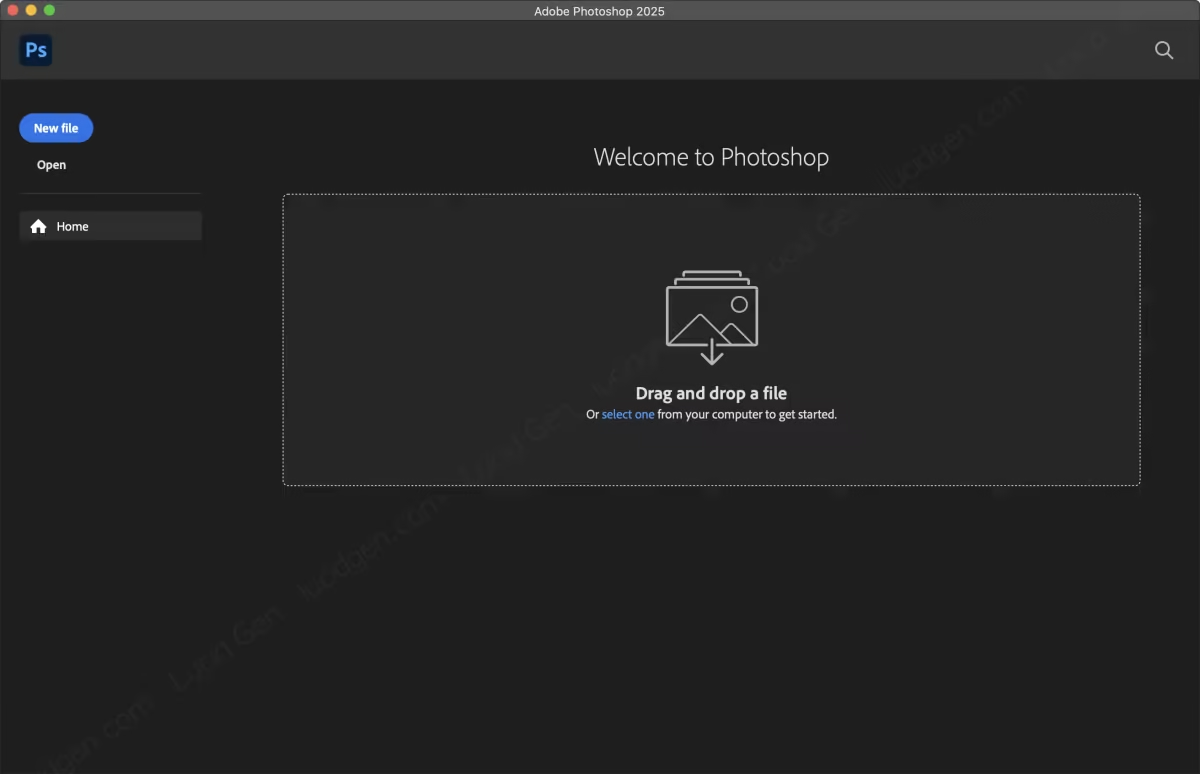
Go to the Welcome interface and start your design work.
Steps specific to Lightroom (click to view)
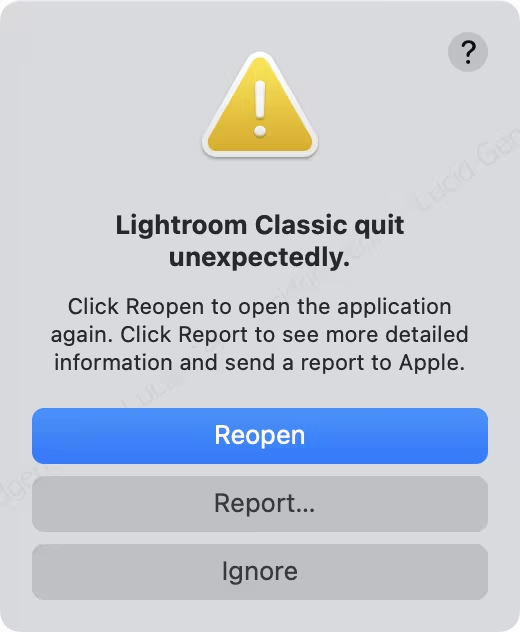
Lightroom may give an error warning after patching, but only for the first time must you click Reopen or reopen Lightroom.
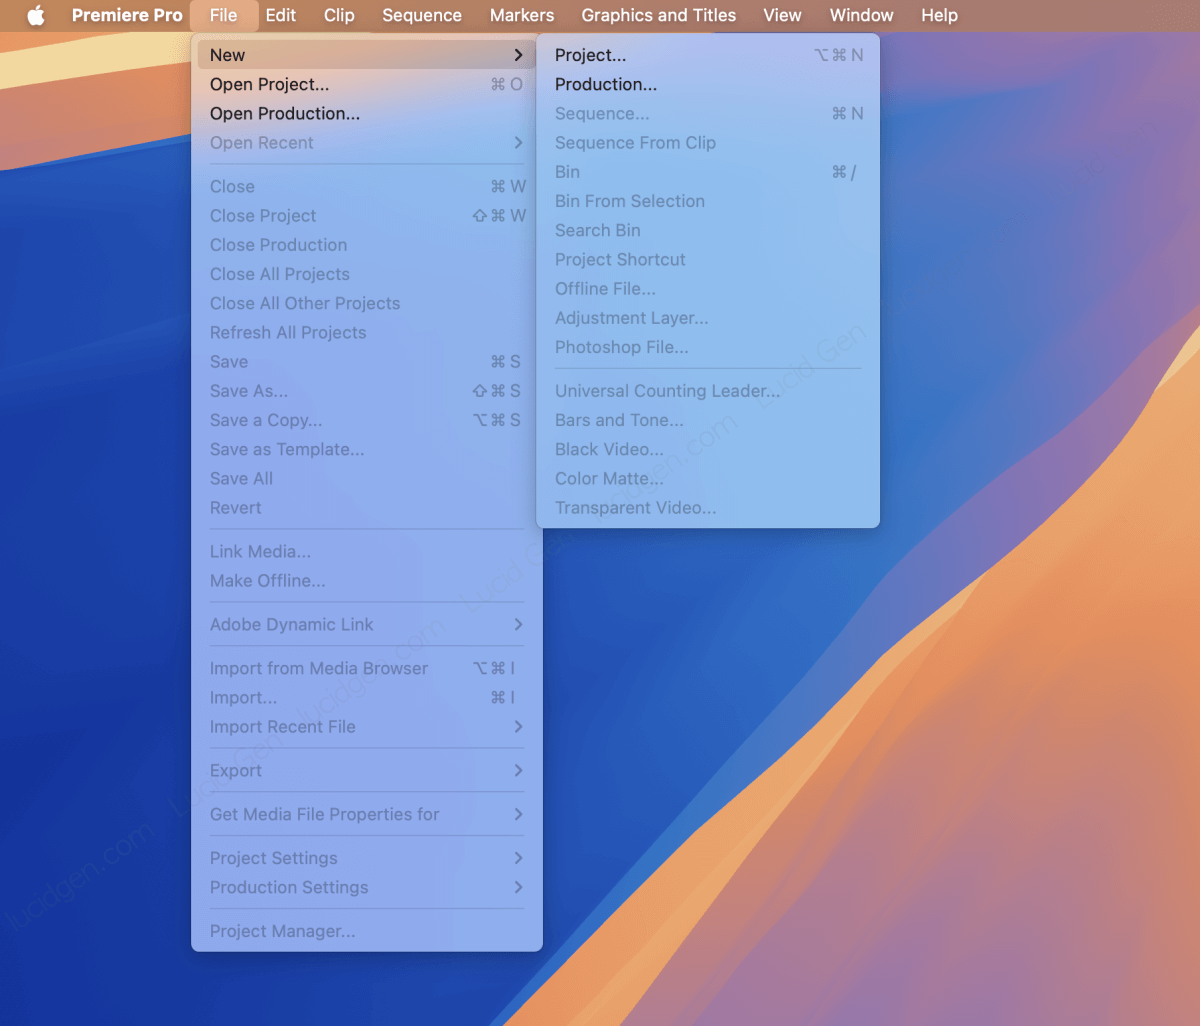
Steps specific to Premiere (click to view)
Premiere won’t have a Welcome screen, but you can still use it by clicking File on the menu bar and opening your project.
How to handle errors during installation
Failed with error code 183.
Delete or rename the Photoshop folder in the Application, restart and reinstall.
Failed with error code 146.
- Vào /Applications/Utilities/Adobe Sync/.
- Rename the CoreSync folder to CoreSync_1.
- Restart your device and reinstall the app installer.
Failed with error code 107.
This error is due to Intel machine not being compatible with the installer, please comment to let me know.
We can’t verify your subscription status.
This error is due to you patching another Adobe application. Restore the host’s file and try to install it again. After successfully logging in to the Adobe applications, then patch each application.
Install files cannot be opened because they are from an unidentified developer.
Disabling Gatekeeper is one way to fix this error.
Alternatively, you can use Terminal with the following command xattr -cr (Don’t forget the space after -cr) Then, drag and drop the file into the Terminal window after the space and press Enter.
Photoshop shows a black window when saving the file.
Press Command Option Shift and start Photoshop, then select Yes.
Damaged and can’t be opened. You should move it to the Trash.
Disabling Gatekeeper is one way to fix this.
Alternatively, you can use Terminal with the command xattr -cr (Note: there must be a space after -cr). Then, drag and drop the file into the Terminal window right after the space, and press Enter.
Conclusion
Older versions of Adobe are no longer free, and the Adobe suite is no longer free on older macOS. So upgrading to macOS 13 (Ventura) or later is a must, and Lucid Gen would like to express our condolences to those who cannot upgrade to macOS. If you want to upgrade macOS, uninstall all Adobe first. Otherwise, you may encounter errors with Adobe applications that you cannot resolve.
After successfully installing the full MacBook Adobe suite and saving a lot of money, consider donating to Lucid Gen to develop and continue updating newer Adobe versions.
If you encounter any problems during the installation process, please read each step carefully in the article, and do not hesitate to leave a comment below the article. Please provide specific information, such as the name of the Adobe application, the chip, and the MacOS, so we can better support you. I wish you a successful installation!


Hi !
i get an error “we are unable to install adobe illustrator this time. (Error code 501)
is there any chance to get this issue solved?
Thank you
Please check your device storage.
Hello. Could you please tell me where the link is?
The blue button in the post
I’m having issue with dynamic link – i can seem to export from after effects or premiere pro via media encoder – HELP!!!!
I don’t understand what is your problem.
Hi,
The premiere pro file that you hav uploaded in the Onedrive is having some issues. I am not able to completely download the file even if I have the storage.
I think this issue from you wifi network. Please try a stronger wifi.
Can you please give me link for dowloading that whole package Adobe Creative Cloud, and patches because i cant find it
Hello, the download all installation files button in the article. It is blue.
I installed Photoshop just fine, but now when I tried to install Illustrator, Lightroom and Premiere I get the following message when trying to open the files after download: “The disk you attached was not readable by this computer”. Why does this come up and how do I fix it?
I haven’t faced this error yet. But there are many video and article about how to fix it. Please do some research on Google.
Hi, thank you for the tutorial. I’m running into a problem and haven’t seen a clear answer in the comments.
I’m using a MacBook Pro (13-inch, 2018) with an Intel Core i7 chip, running macOS Sequoia 15.3.2.
I’ve tried both versions of Lightroom 2024 v13.0.2 and 13.2 that you provided on your website. In both cases, when I try to open the Install.pkg, I get the following error:
“This package is incompatible with this version of macOS. The package was built for a previous version of macOS.”
I also tried installing via Terminal using sudo installer -pkg, but I get the same error. And extracting the .pkg contents manually doesn’t help either — there’s no usable app to launch.
Do you have a solution for this specific issue? Or can you provide a version of the installer that works with macOS Sequoia?
Thanks in advance!
Hmm. I think we need a specific version for Intel. Currently, I have universal versions only (It should work for both Intel and ARM, but I don’t know why this error come with you).
Hi!
Thanks for sharing this.
I installed Ps successfully, but I have trouble when I was trying to install Lightroom.
I’m sure that I completely followed the instructions but it kept failing, is there any potential reasons that might cause this?
Hi. Did you login Lightroom before patching?
Hi !
I installed Ps and Ai and It works perfectly.
Thank you a lot !
Grettings from France 🙂
Beno
Thank for your feedback!
Hi again,
I finally have an issue 🙂
When I launch AI, now I have the popup “Please read and accept the Adobe General Terms of Use”, and AI crash whatever I do (accepting or not)
The only solution I found is to turn off the wifi and lauch AI. (I tried to use the firewall to block every contact between every adobe files I found and internet but I still receive the popup…)
Maybe I missed something. I would like to be able to launch AI without turning off the wifi. Is it possible?
Could you help with this please?
Hello, you can block internet access for only Illustrator, read How to block apps from accessing Internet on Mac. Also go to Network Monitor in Radio Silence, if you see any program appear after open Illustrator, block them immediately. The next time, open Radio Silence before open Illustrator.