

Setting a ringtone on your iPhone with GarageBand, without a computer or iTunes, is very convenient when you don’t have a computer nearby. In this guide, I will show you how to download a ringtone and set it on your iPhone.
Update (October 2026): Starting with iOS 26, Apple lets you set a ringtone straight from an audio file, no GarageBand needed. Open the file in the Files app, tap the Share button, then choose Use as Ringtone. The file has to be under 30 seconds and DRM-free, so songs downloaded from Apple Music won’t work. If your iPhone isn’t on iOS 26 yet, just follow the GarageBand method below.
Why should you set a ringtone on iPhone?
- Give your iPhone a personal touch: Have you ever sat at a table with several iPhone users, and when a phone rings, everyone looks around because nobody knows whose it is? Most people keep the default ringtone, since it already sounds the best. A different ringtone helps you stand out. When it rings, you know it’s yours and not anyone else’s.
- Express your mood: Every melody carries its own emotion, from cheerful and upbeat to calm and gentle. You can pick one that reflects your mood or music taste every time your phone rings.
Steps to set ringtone on iPhone without computer or iTunes
- Step 1: Download the ringtone right on your iPhone.
- Step 2: Set the ringtone using GarageBand.
Download ringtones right on your iPhone
iPhone now has a built-in file manager, and Safari can download and manage files. So there are many ways to download ringtones. Just pick the one that suits you.
Download iPhone ringtones from official websites
If your favorite ringtone is shared on an official website that offers free low-quality downloads, you can use Safari to download it. The important thing is to check that the downloaded file is in MP3 format.
Download iPhone ringtones using sync applications
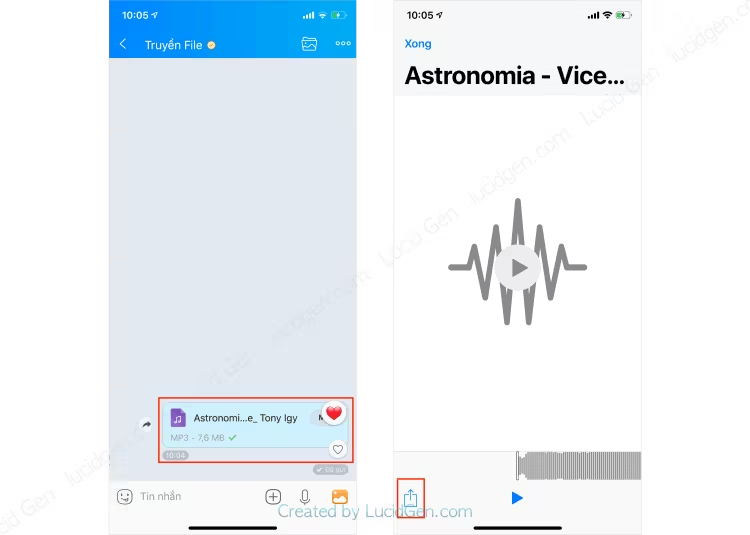
You can also use apps that sync files between your computer and phone, such as OneDrive, Google Drive, or Zalo, to get ringtones onto your iPhone. I will use Zalo as an example so you can follow along easily.
Step 1: Open the MP3 file in the Zalo app on your phone and share it.
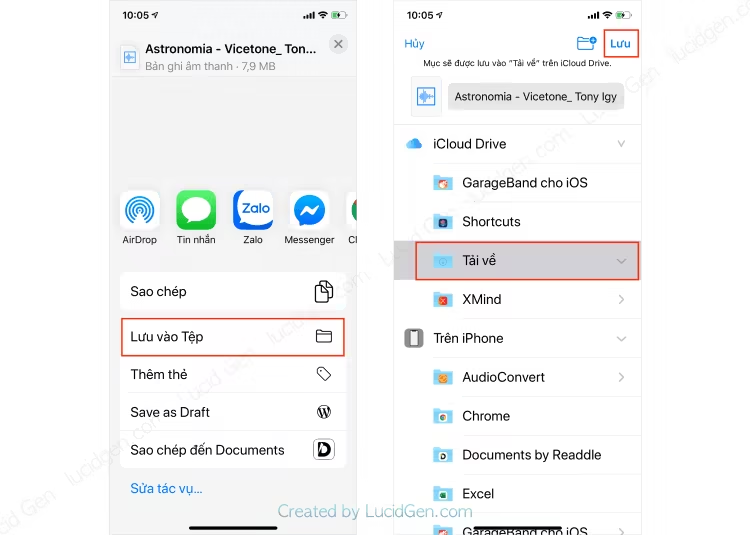
Step 2: Save the MP3 file to the Downloads folder in iCloud Drive.
Set the ringtone using GarageBand
Now comes the main part: setting the ringtone on your iPhone without a computer or iTunes. It may feel a bit tricky the first time, so read each step carefully.
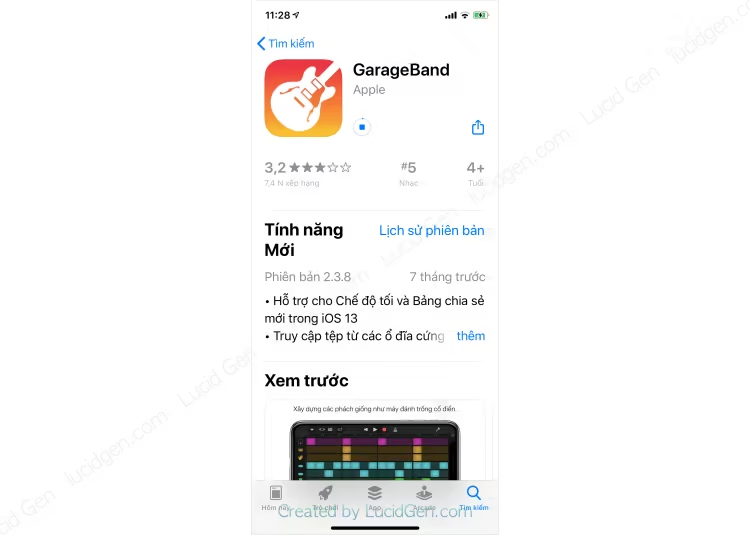
Step 1: Download Apple’s GarageBand app from the App Store.
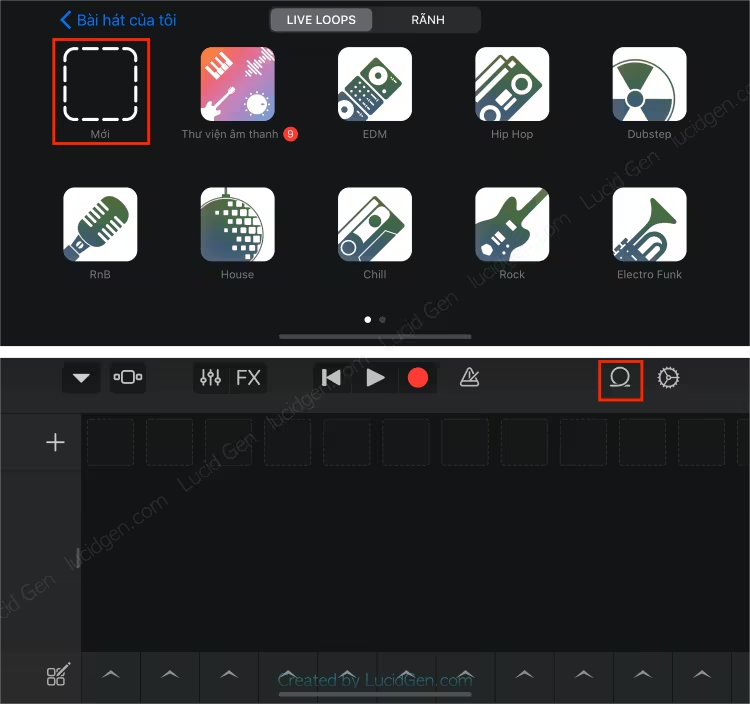
Step 2: Open GarageBand and create a new song. Tap the loop icon (it looks like an O) to add an audio file.
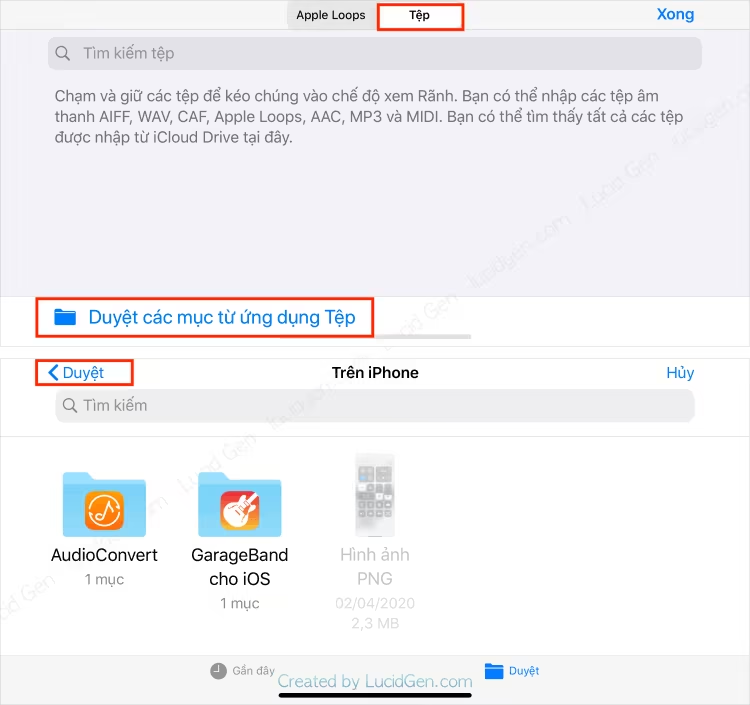
Step 3: Select the Files tab at the top, then tap Browse items from the Files app at the bottom. Next, tap the Browse button in the upper left corner.
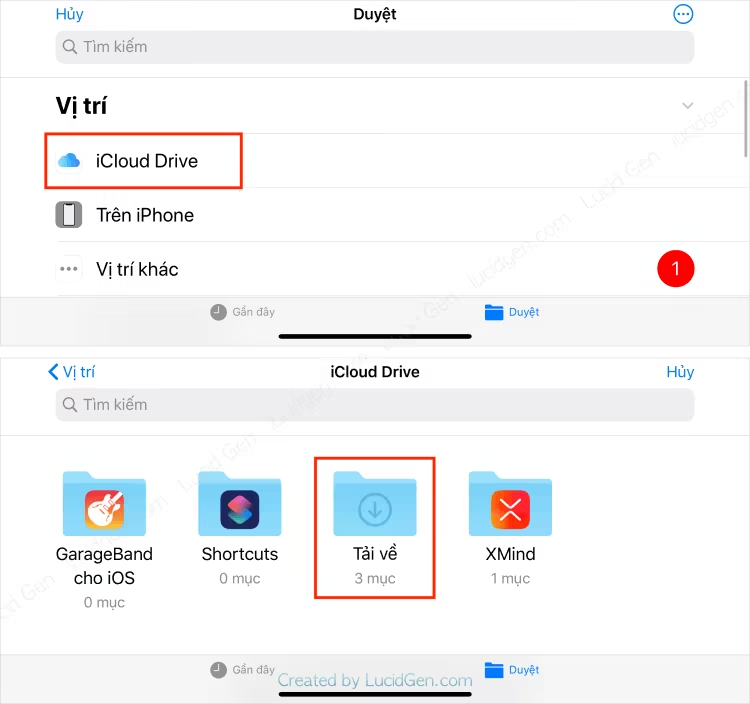
Step 4: Open the folder where you saved the ringtone file earlier. In this example, tap iCloud Drive and select the Downloads folder.
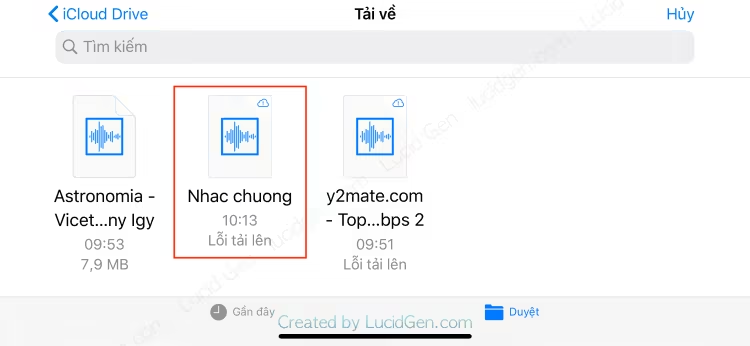
Step 5: Select the ringtone file you downloaded.
Step 6: Press and hold the ringtone file, drag it upward, and drop it into the first track in GarageBand. If the file picker shows up again, tap Done.

Step 7: Tap the Record button, then tap the ringtone track. Tap the track quickly so the recording doesn’t have extra silence at the start.
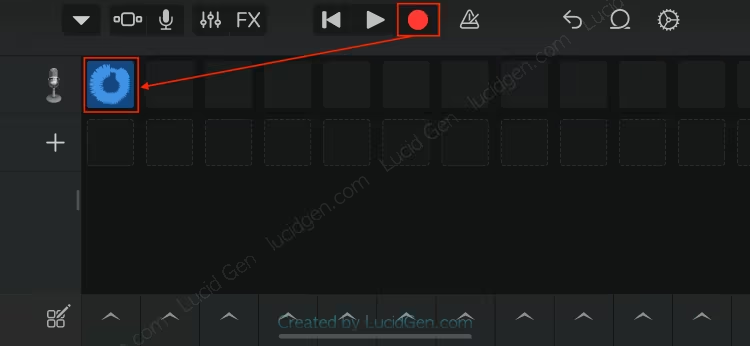
Step 8: When the ringtone is close to its last second, tap Record again to stop recording.
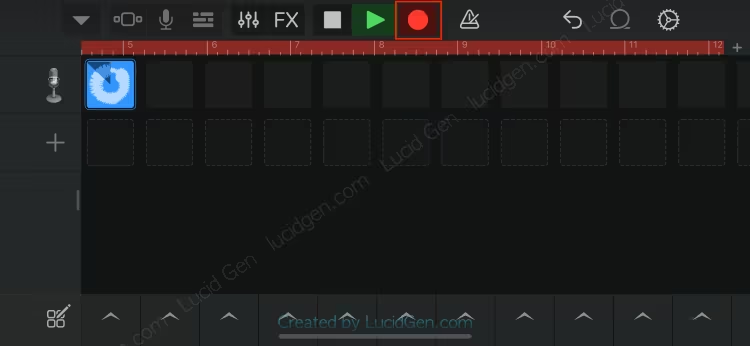
Step 9: Tap the triangle menu button and select My Songs to save the recording.
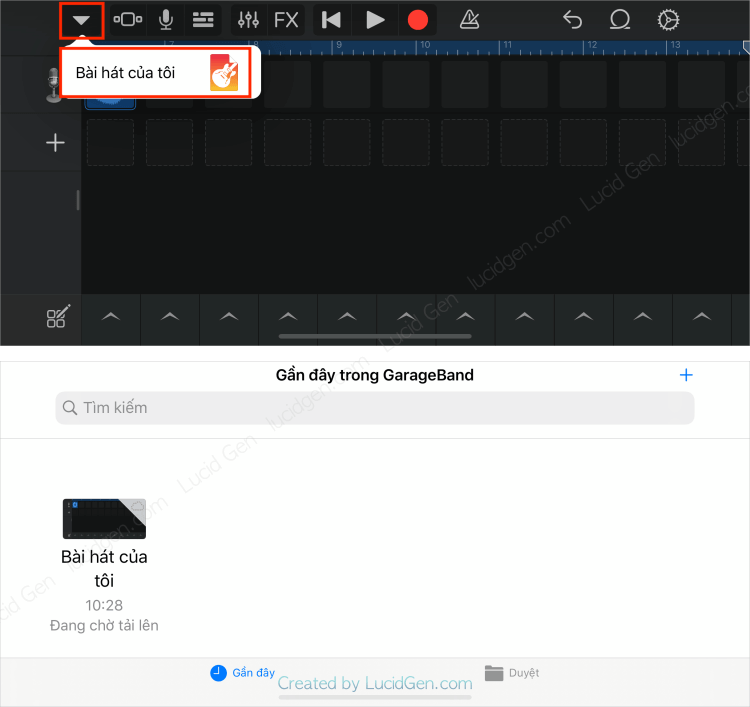
Step 10: In My Songs, press and hold the recording and select Share.

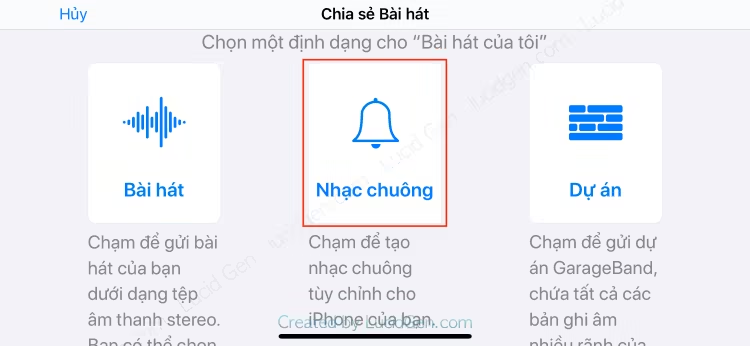
Step 11: Select Ringtone.
Step 12: Name the ringtone and tap Export.
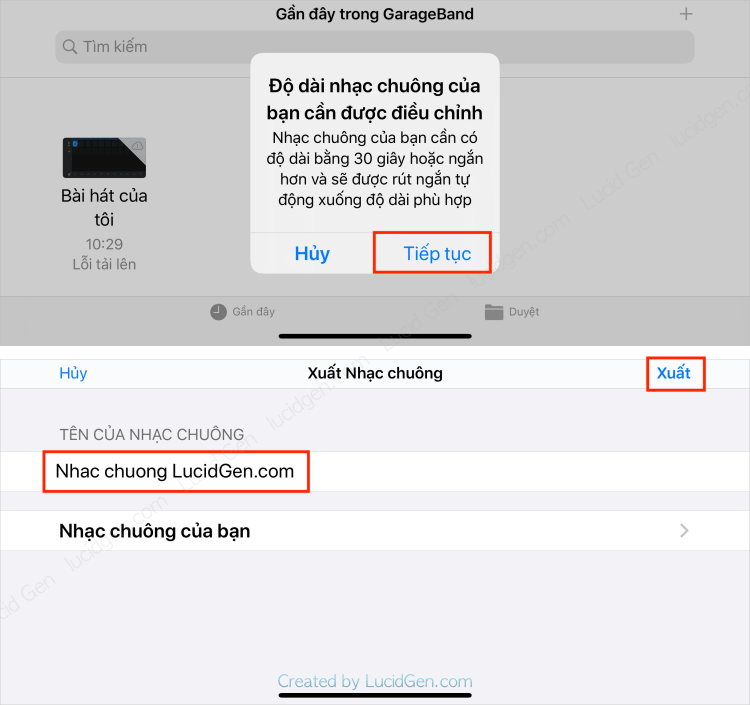
Step 13: After the export finishes, select Use sound as…, then select Standard Ringtone.
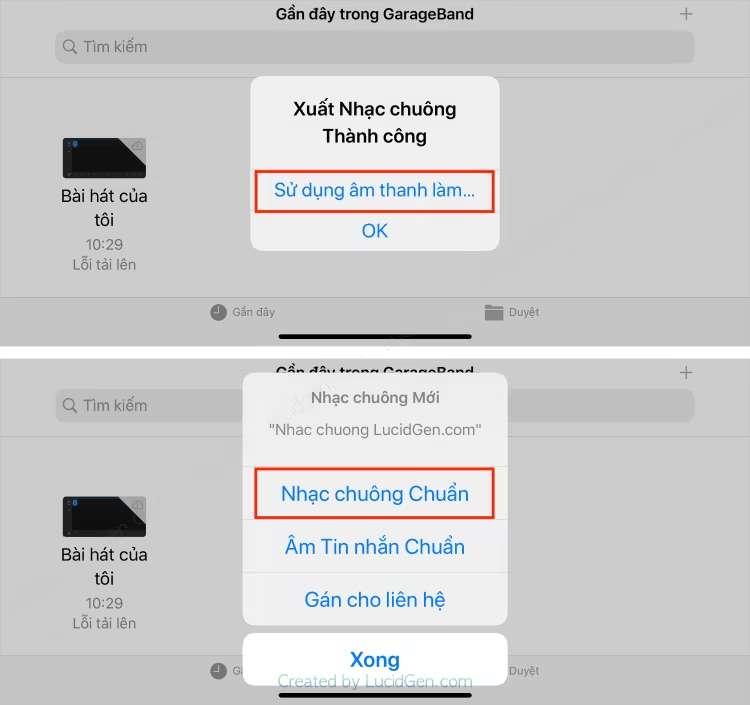
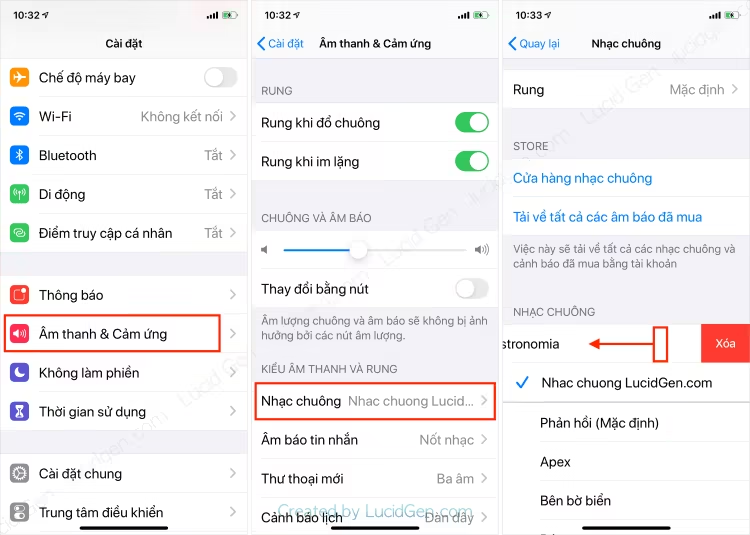
That’s it! You have set a ringtone on your iPhone with GarageBand, no computer or iTunes needed. Go to Settings > Sounds & Haptics > Ringtone to check. To delete a ringtone, swipe it to the left and the Delete button will appear.
Conclusion
Making a ringtone with GarageBand takes quite a few steps, but you end up with the ringtone you want without a computer or iTunes. Whether it worked for you or not, leave a comment below and let’s discuss.


