
Adding fonts to Word and PowerPoint on MacBook is the first thing we think of after installing Office on MacBook. We will need suitable fonts for many purposes, such as drafting contracts and writing essays. The following article will help you add fonts to PowerPoint and Word on MacBook most simply and effectively.
Downloading fonts for MacBook
There are many sources to download beautiful fonts for MacBook, and Lucid Gen often uses Google Fonts because it is genuine, free, and has many Vietnamese fonts. In addition, there are many other sources like dafontvn.com that also have many fonts with nice demos.

Note if you have font errors when typing Vietnamese, see the article on how to fix Vietnamese typing errors on MacBook.
Adding fonts for MacBook
To add fonts for MacBook, open the Font Book application on Mac, and click the plus button.

Select the folder containing the font files you want to add to your MacBook. You can select individual files or select the entire folder.
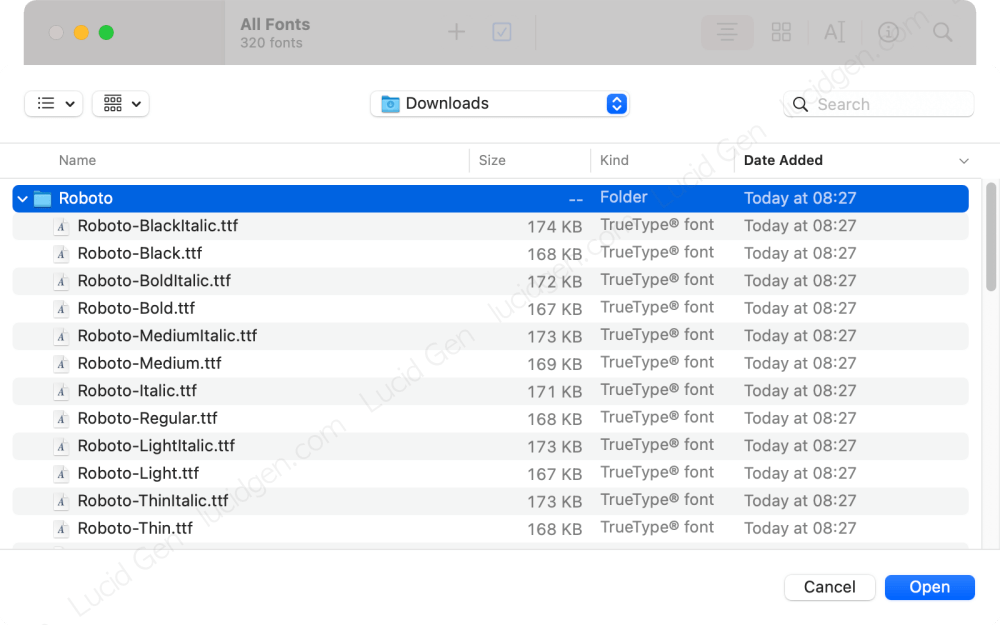
Fonts added to the MacBook will be in the User section. You can now add this font to Word or PowerPoint.

Hint: If you want to add fonts to the content of Facebook posts or social networks, please refer to the article on how to write bold text on Facebook.
Adding fonts to Word on Mac
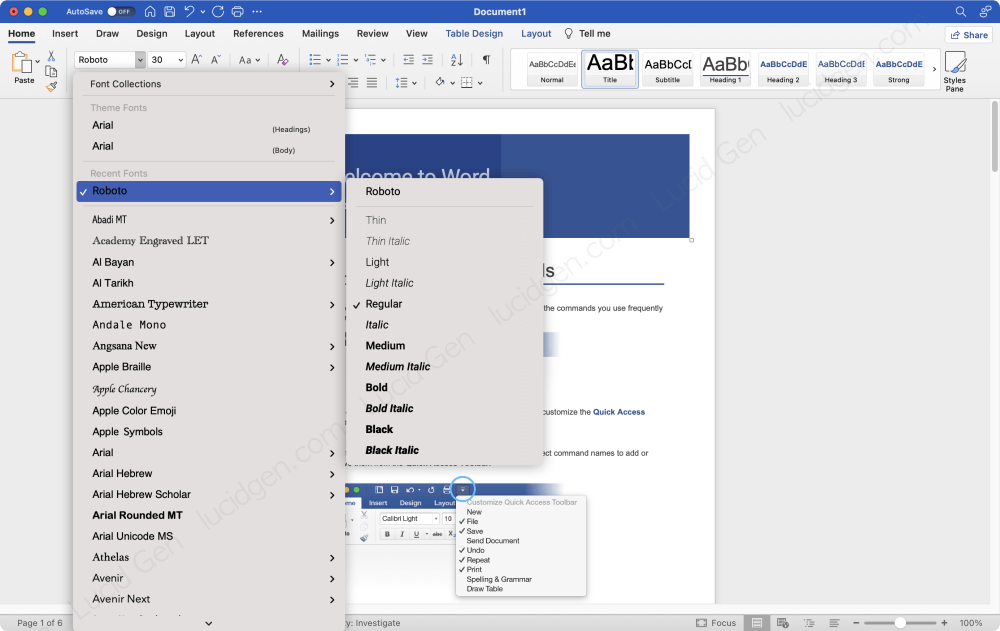
After performing the above steps, you have already added fonts to Word on Mac. Now you need to open Word, select the font you added on Mac, and you’re done.
Install the default font for Word to save time each time you use Word. Open Format > Font > select font, font size, color > click Default button > select All documents based on the Normal template > click OK button.

Adding fonts to PowerPoint on MacBook
Similarly, when you add fonts for Mac, you have already added fonts to PowerPoint. Now you need to go to PowerPoint and choose the font to design.

In addition to fonts, Lucid Gen believes that many other factors make your slides more vivid. You can insert music into PowerPoint or add icons to PowerPoint to have an impressive presentation.
Removing fonts on MacBook
You might want to delete a font on your MacBook for many reasons. Here are some ways to handle it; depending on the purpose and case, you should choose the appropriate application.
Deleting a font
Delete a font on your MacBook if you no longer want to use it. Open Font Book > right-click the font to be deleted > select Remove.

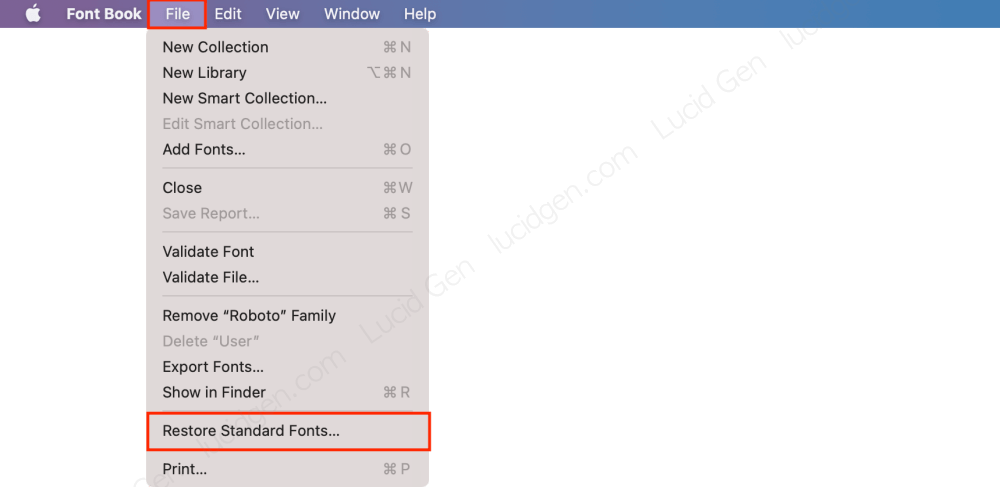
Restoring the default MacBook font
If you accidentally installed a lot of fonts on your MacBook and now you want to clean the fonts on your MacBook, then use this method. Open Font Book > Fine > Restore Standard Fonts.
Hiding fonts on MacBook
In addition to deleting fonts on your MacBook, you can also hide them. This way, you can reuse them in the future without downloading them again. Select Font in Font Book > click the hide font button.

Handling duplicate fonts on MacBook
If you add fonts to your MacBook in bulk, maybe some of the fonts are already in your system. At this point, Mac will warn you of duplicate fonts. To solve this problem, right-click on the duplicated font, select Resolve Duplicates so that the MacBook keeps the best font, and delete the duplicated font.

Frequently asked questions
What font formats does MacBook accept?
MacBook mainly uses fonts with TTF or OTF format. Other formats you should try to install.
Do I need to restart my computer to use the newly added fonts?
No need. You can use it immediately after adding fonts to Word on Mac (add fonts to PowerPoint on MacBook).
Conclusion
After adding the font to Word for Mac, choose it as the default font to save time later. In addition, do not forget to choose a new font when creating the automatic table of contents in Word. Lucid Gen hopes adding fonts to PowerPoint on MacBook or Word has become easier for you after reading this article.


