
Making an automatic table of contents in essays or dissertations seems simple, but not for some of you who are not familiar with Word. Some of your difficulties are.
- Failure to set multiple headings causes the table of contents to be incomplete or the headings to be at the same level.
- How can a table of contents automatically be created on the blank page, and the content starts from page 1? It’s difficult for Hieu to agree with this installation, but through this article, I won’t get there.
- The heading and table of contents are in bad format and hard to see.
- Do not update page numbers and headings when you change content.
Briefly, your difficulties are like that; now let’s get to work.
Setting headings in word
To use headings in Word effectively and save time editing the format, you must create headings with multiple levels from the beginning (usually from 1 to 6). It says it’s created, but it’s available; it just doesn’t show it to you.
Create headings in word
At the Word interface on the home tab, click the Style button or press the Alt Ctrl Shift S key combination to display the Style panel.

You tick the Show Preview button to see how your headings are formatted. To remove the suggestions that are still irrelevant, go to Options and remove all the ticks. Select new documents based on this template to save forever (otherwise, save them in the file you compose).
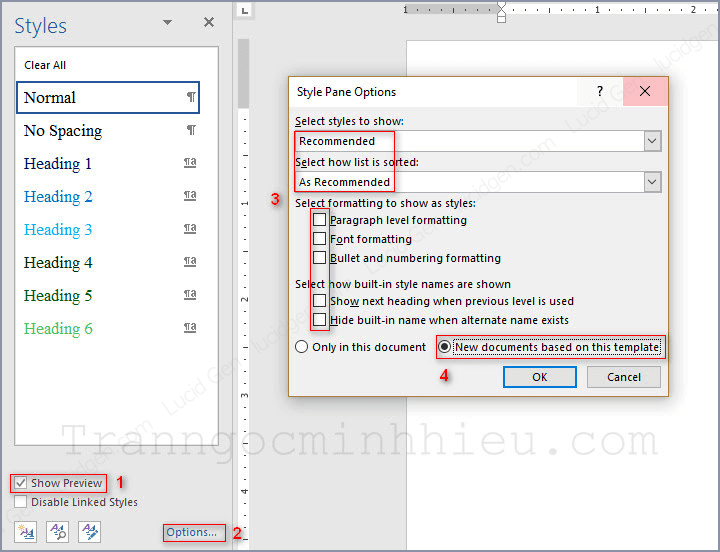
Now you will see that it has fewer suggestions. But some things lack what you need, like headings 3 to 6. You need to adjust the headings you need to show/hide and hide the ones you don’t need, as shown below. Remember to tick New documents based on this template.

Ok, surely now you are more comfortable looking at your Style bar. ^_^ But it’s a bit ugly to draw, not as pretty as Hieu’s picture. You have to format them. The next step is to format them.
Format headings in word
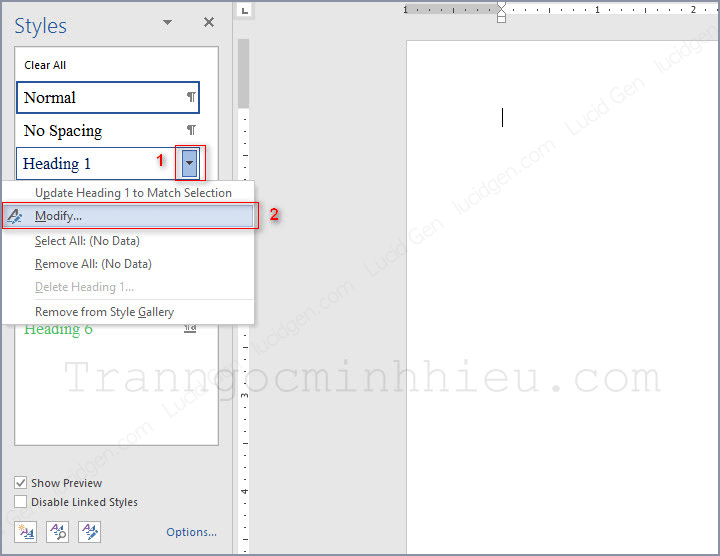
Click the button next to the heading and select Modify to bring up the formatting table for the heading.
You need to know that these headings do not follow the font format, font size, font color, and Paragraph (page) as you pre-formatted for the paragraph content.
It’s best to format them like the style of a normal paragraph; do not italicize anything. The colours you set as you like make it easy to manage when you’re using it, and when you’re done, just Ctrl-A (select all) and choose black.
When you are done with formatting (1), go to Format Paragraph as shown below.

The Paragraph panel that appears shows that it is only different from the paragraph format in the Spacing section. It would be best if you put Line spacing as your paragraph format. As for Before and After, you consider 0 to 2 only.
For the sake of beauty, I recommend that the Paragraphs of the headings are formatted the same. Simple is the best :))

This thing repeats for all headings, and whatever you do, remember to check New documents based on this template. Don’t listen to that toad.
To check if it has been saved forever, press Ctrl N (open a new file) to see if it’s saved like that; if not, turn off the newly opened file and go back to the unsaved place in New Documents based on this template.
Ok fine! Now we do the rest, which has added the table of contents automatically.
Create an automatic table of contents in Word
Creating a table of contents in Word with the image below will help you free :)) You need to follow the order of the steps below.
Add headings to headings
To easily manage headings, turn on Navigation by Ctrl F (find) as shown.

In the Navigation bar, select the Heading tab to see how they represent the headings arranged.
For example, below, chapter 1 is the highest level; I chose it as heading 1 (leave the mouse on that line and click on heading 1). Immediately on the Heading tab of the Navigation bar, Chapter 1 appears, as shown below. In the other headings, you do the same and observe the Heading tab to see if they are in the right place.

To delete headings, click Normal. When you’re done, remember to Ctrl-A and change the text color to black so the headings are less gaudy!!
After attaching all headings to the headings, you will have a beautiful table of contents; continue reading the following steps.
White page break in Word
Usually, the content will start from page 1. And you have trouble inserting the table of contents where the content starts from another page number while the table of contents or other introductions eat from page 1 🙂 )
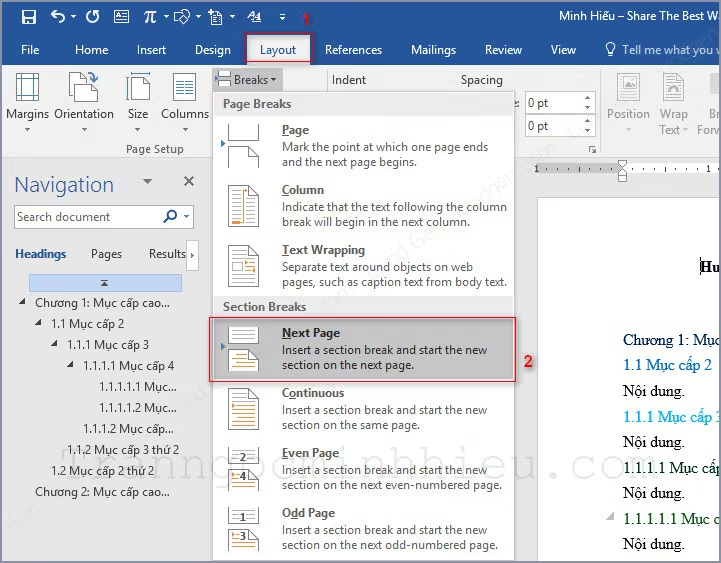
Put the mouse where you want to break it, go to the Layout tab, and select “Next Page.” Why?
- Select Page: break the pages in a Section (section); the number of pages in a section is consecutive.
- Select Next Page: Break the page into a new section, and you can edit the page number of 2 sections. The goal is for the body to have a page starting at 1. The opening of the essay should not have a page number or otherwise.
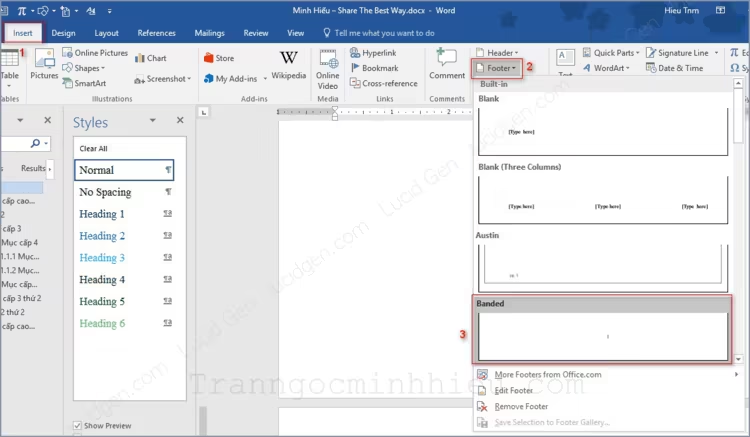
Now you add the page to the Footer by making sure everyone knows it:v go to the Insert tab and select Footer as shown below.
Then you see that the page number in the content section and the part you break are still linked together, right? Please do the steps below to let them exchange their hands :))
To the middle of the 2 pages of the 2 Sections, double-click on the page’s Footer to display the edit; now you see the Footer Section 1 and Header Section 2 appear.
You hover one click on the Header of the page below, then hover your mouse to click on the Footer of the page above one, Then click the Link to the Previous button (let go of each other’s hands).
When it is still linked, the button background will be dark, returning to light colour, and that’s it.

Now, you need to make the first content page start from number 1. Double-click on the Footer of the Essay Body Section. On the Insert tab, click Page Number and select Format Page Numbers.
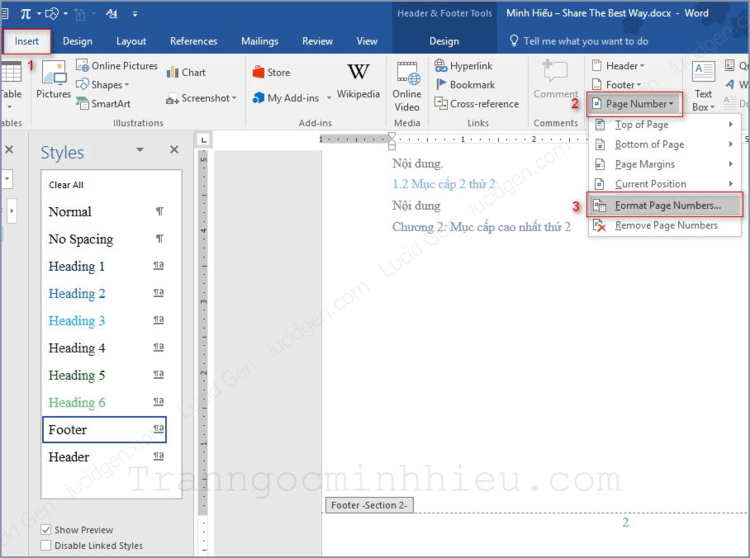
Select Sart at 1 as shown below and then Ok. As for the page number of the remaining Section, you need to double-click on its Footer and delete that number.

That’s it; the page break step is done. It’s a bit confusing, but I’ll get used to it ^^
Insert a table of contents in Word
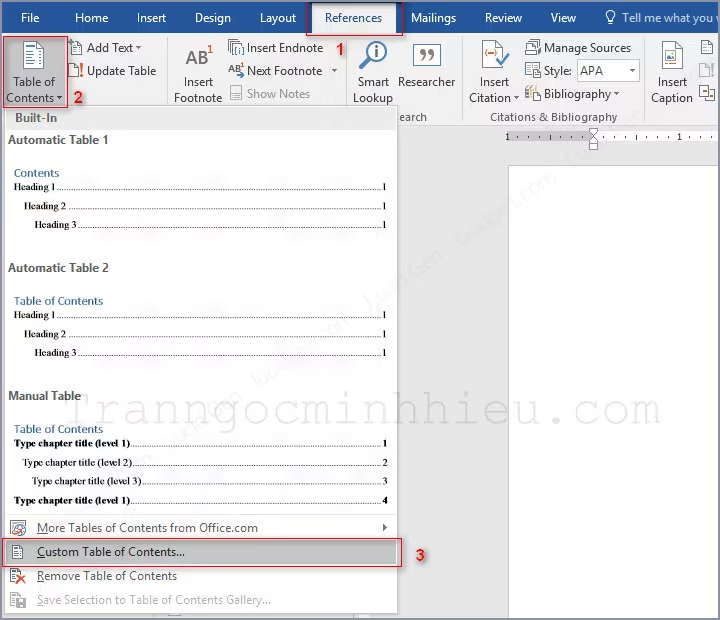
Leave the cursor where you want to insert the table of contents, then go to the References tab and click Table of Contents.
The important thing here is that you don’t choose the available templates because it is minimal. Please select Custom Table of Contents as shown below to make the table of contents more beautiful.
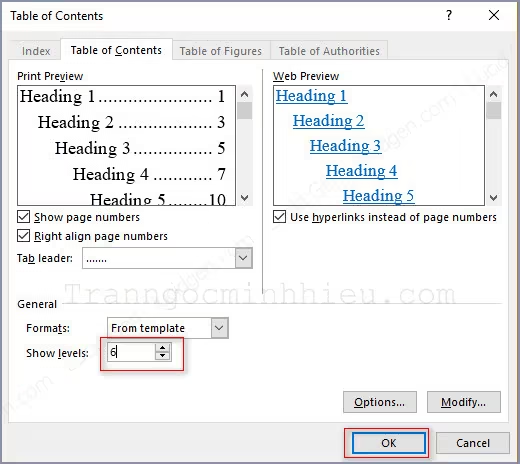
The Table of Contents table appears; here, you are only interested in the smallest heading level in your essay. For example, the smallest level Hieu uses is 6; Lucid Gen fills in 6 in Show levels and clicks Ok.
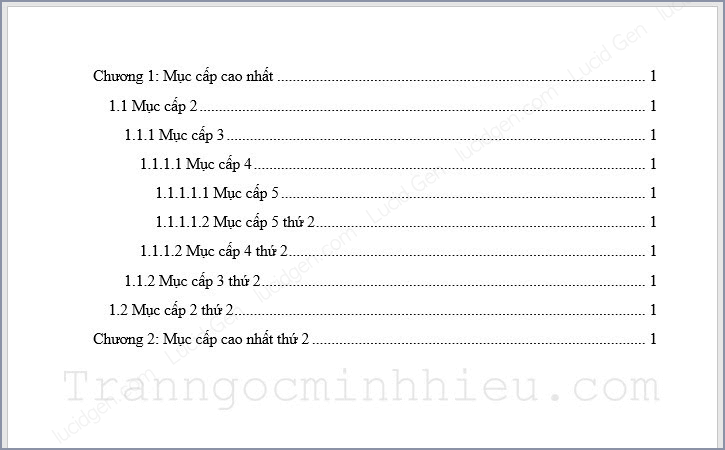
And here is the result. Equal levels will stand in the same position. The lower the level, the more inwards it is to make it easier to observe.
If you edit, the title or your content has moved to another page. You need to update the table of contents by clicking the References tab and clicking Update Table.
- Select Update page numbers only if you are only updating page numbers.
- Select Update entire table if you want to update the page number and the heading name.

Video tutorial to make a table of contents with headings
I also ventured to make a short clip for the tutorial to be more lively, hihi. Just look at the actual process instructions, but the content is still in this article.
Conclusion
Hieu knows the best way to use headings and automatic table of contents. Do you have any suggestions on where to optimize or not understand? Would you mind leaving a comment below?
This article is based on Word 2016. The way to create a table of contents in Word 2010 or other versions is the same.
Maybe the path to it is a bit different, but as long as we get there, right ^_^.
Good luck!


Hello!
This is by far the most straight forward, easily explained tutorial I have come across. Thank you 🙂
Yeah, I’m happy to see your comment.