

When people contact you through your website, an email address on your own domain looks much more professional. If your business can afford a paid email service from Google or Microsoft, that’s great. But if you’re on a tight budget or only need a domain email to talk to a few partners, this article shows you how to use your domain email with Gmail for free.
To do this, you need a regular Gmail account. You keep signing in to Gmail with that account, but you can send mail as your domain address and receive domain mail in the same inbox. You also need access to the cPanel of the hosting you are using.
Update (October 2026): The receiving part of this guide used to rely on Gmail’s “Check mail from other accounts” (POP) feature. Google has retired it on Gmail for the web: new users can no longer add accounts after the first quarter of 2026, and existing connections only work until January 2027. I’ve rewritten that part to use email forwarding from cPanel instead. The sending part (SMTP) still works as before.
Create a domain email on your hosting
Most hosting providers let you create domain email accounts as part of your hosting plan. To create one, log in to cPanel, scroll to the Email section, and click Email Accounts.
If you can’t find it, contact your hosting provider’s support team, since each provider customizes cPanel a little differently.
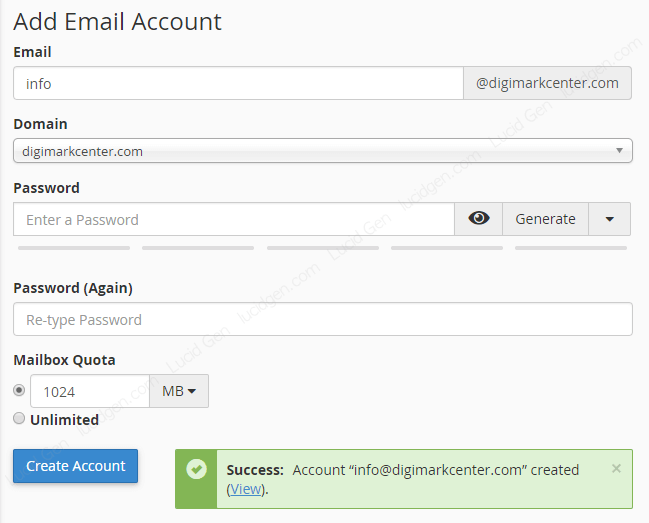
In Email Accounts, click Add Email Account and fill in the details of the new address. Here is how I set it up for Lucid Gen.
Note down the email password, because you will need it later.
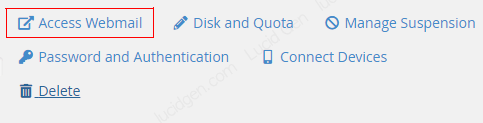
Once it’s created, the new address appears in the Email Accounts list. Click Access Webmail to open its mailbox.
The first time, it asks which webmail app you want to use. Choose Roundcube as the default, since I find it the easiest to use.

Now you have a working domain email. You can already send and receive mail, but only through your hosting’s webmail in cPanel.

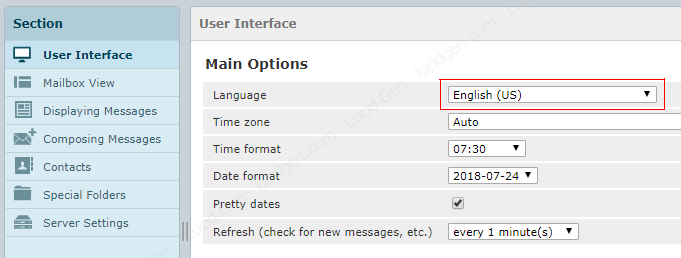
If you prefer another interface language, click the Settings button in the upper right corner, go to the User Interface section, pick your language, and save.
That’s it for this part. If you want to send and receive your domain email in Gmail, follow the two sections below.
Use domain email with Gmail for free
Send mail as your domain email
Sign in to your Gmail account and open Settings. Switch to the Accounts and Import tab and click Add another email address as shown below.

In the window that appears, fill in the information as shown below, then click Add Account.
For the password, use the domain email password you noted down when creating the account.

If the details are correct, Gmail takes you to the email verification step.

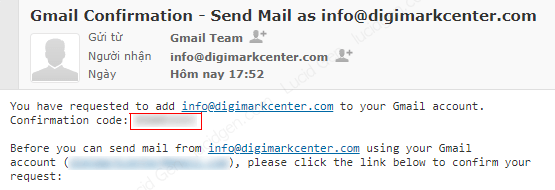
Go back to your domain mailbox in cPanel and refresh the inbox until the message from Gmail arrives. Open it, copy the code, and enter it to verify.
Once connected, set the domain email as your default sending address. For replies, choose Reply from the same address the message was sent to. That way, Gmail replies from whichever address received the message, while new messages are sent from your domain email by default.

Now click Compose to check the result. The From field should show your domain email by default.

You can now send mail from your domain address in Gmail. To receive domain mail in Gmail as well, continue with the next step.
Receive domain email in Gmail
The old version of this guide used Check mail from other accounts in the Accounts and Import tab to fetch domain mail over POP (port 995). According to Google’s announcement, this feature no longer accepts new users after the first quarter of 2026, and existing users can only keep it until January 2027. Google suggests setting up automatic forwarding at your other email provider instead, so that’s what we’ll do in cPanel.
Step 1: Open the forwarder settings. In cPanel, go to the Email section and click Forwarders, then click Add Forwarder under email account forwarders.
Step 2: Fill in the forwarder. Enter the part before the @ of your domain email in Address to Forward, choose your domain in Domain, select Forward to Email Address and enter your Gmail address. Then click Add Forwarder.
cPanel keeps a copy of each forwarded message in the original domain mailbox, so you can still find it in Roundcube. Remember to clean that mailbox once in a while so it doesn’t fill up your hosting storage.
Step 3: Test and label the messages. Send a test email from another account to your domain email and check that it arrives in Gmail. If it doesn’t show up in the inbox, look in the Spam folder and mark it as Not spam. To tell domain mail apart from your other messages, create a Gmail filter with your domain email in the To field and apply a label to it.
Note: If your hosting doesn’t use cPanel, look for a similar option called Forwarders or Email forwarding in its control panel. On your phone, you can also add the domain email directly to the Gmail app for Android or iOS using IMAP, which Google still supports.
Conclusion
This free setup works well if you only need a domain email to contact a few partners. With the old POP method, new mail used to arrive in Gmail 2 to 5 minutes late; forwarding passes mail on as soon as your hosting receives it. The trade-off is that it depends on your hosting’s mail server, so delivery and spam filtering won’t be as reliable as a paid service. In the past, Lucid Gen also used this method, but later on, I invested a bit to use Google Workspace.
If you run into any problems while setting this up, leave a comment below with your hosting provider and the step where you got stuck, and I’ll try to help. Thank you!


