To work with Google’s API, we must create a Service Account in the Google Cloud Platform and download a JSON file containing account information. After creating the account, we need to enable Google Cloud API to use the Service Account in Python programming and applications. Follow the instructions in this article to help you reach the fastest.
What is Service Account?
A service Account is a particular type of account often used to call APIs in applications and programming. This account is authorized as the primary account of the user of the Google service. It can do many things for you, many operations with Google products that you are using.
| Password | No, it can’t log in with a browser or cookies. |
| Accuracy | Not for authentication, only public/private RSA key pairs. |
| Authority | It can authorize as a user account. |
| Google Workspace | They are not counted when sharing assets in Google Workspace. |
Create Service Account
Step 1: You need to create a Project to contain one or more Service Accounts. Try going to console.cloud.google.com/projectcreate to create a new Project.
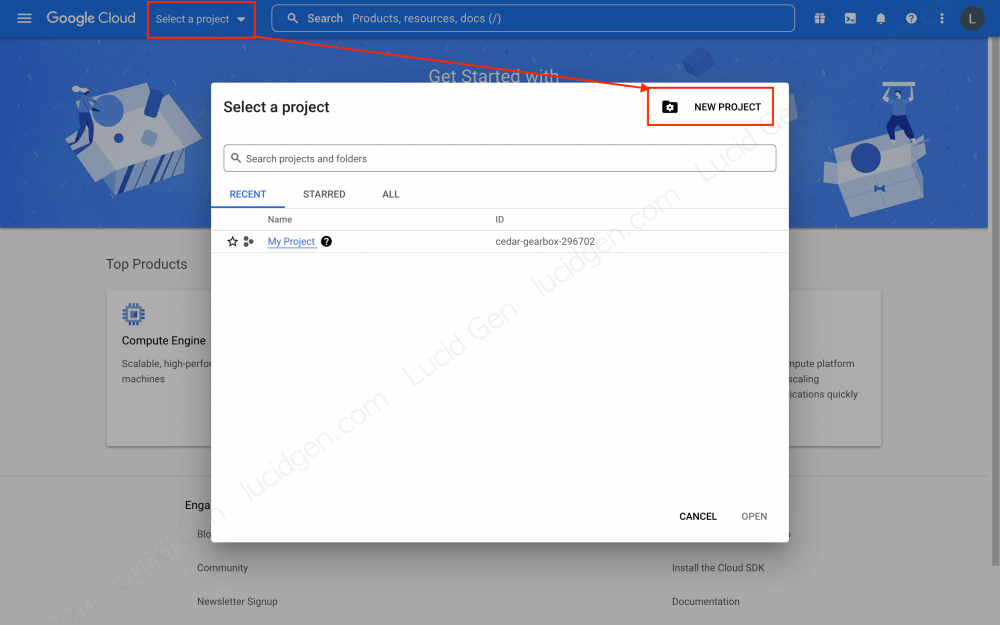

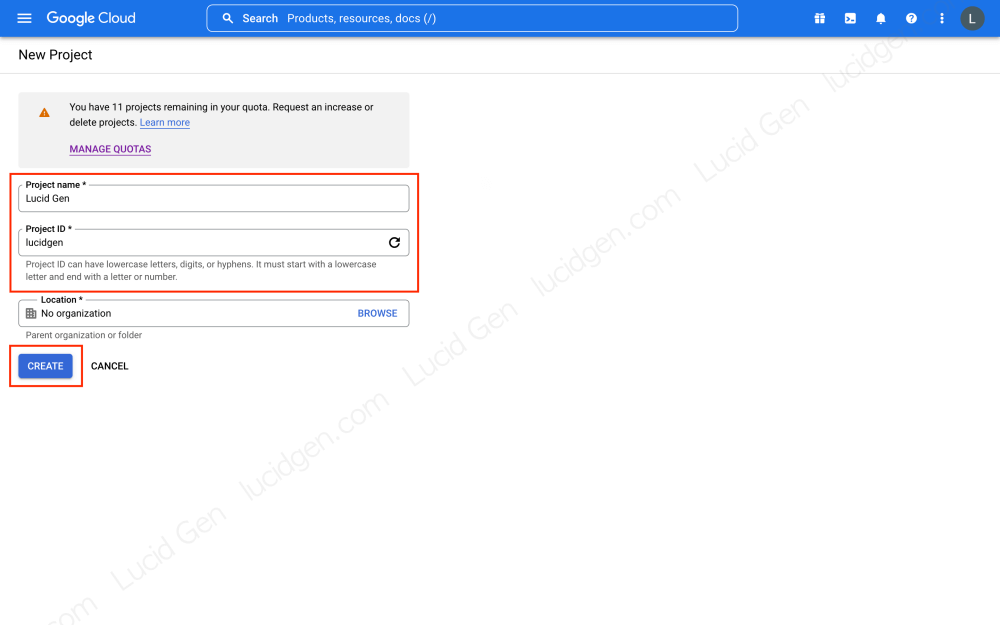
Step 2: You fill in the essential information to create a Project. Note that the Project ID will be fixed and cannot be changed later. If you don’t have any location, leave No organization.

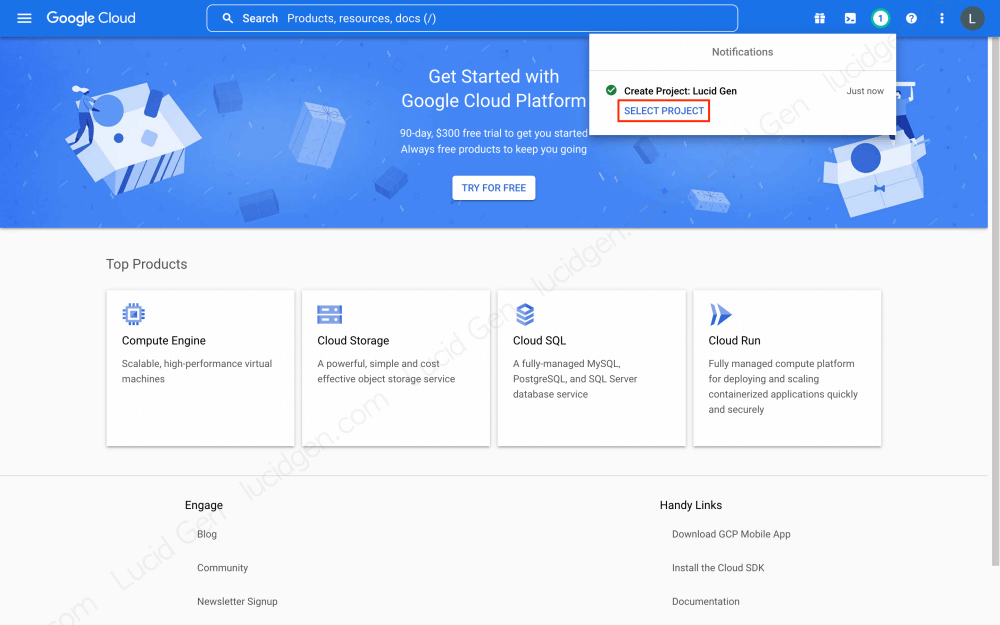
Step 3: After creating a Project, select the exact Project that you want to use to create the Service Account.

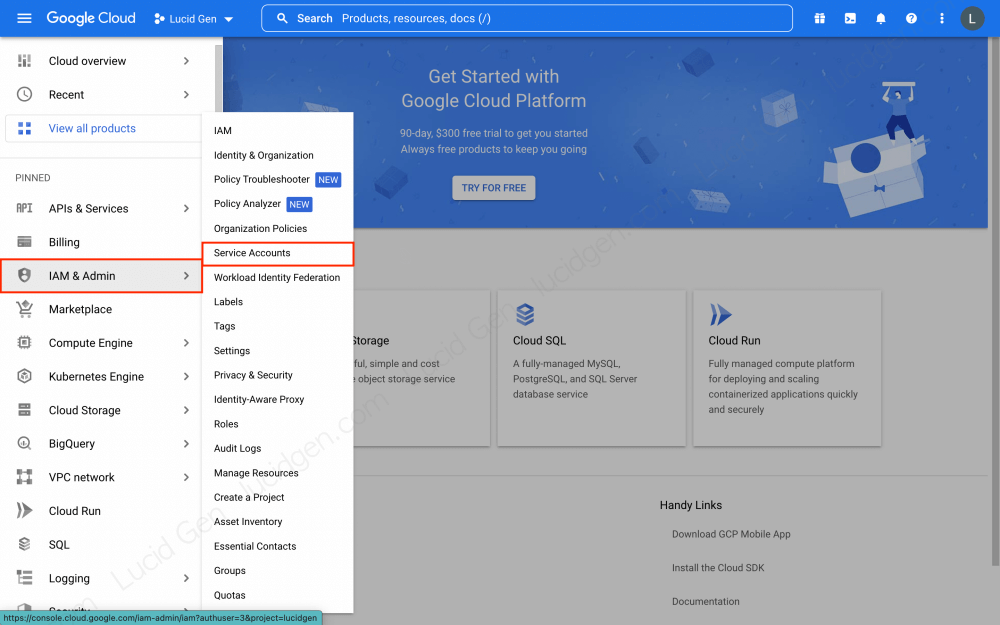
Step 4: Access the Service Account management page by clicking IAM & Admin > Service Accounts.

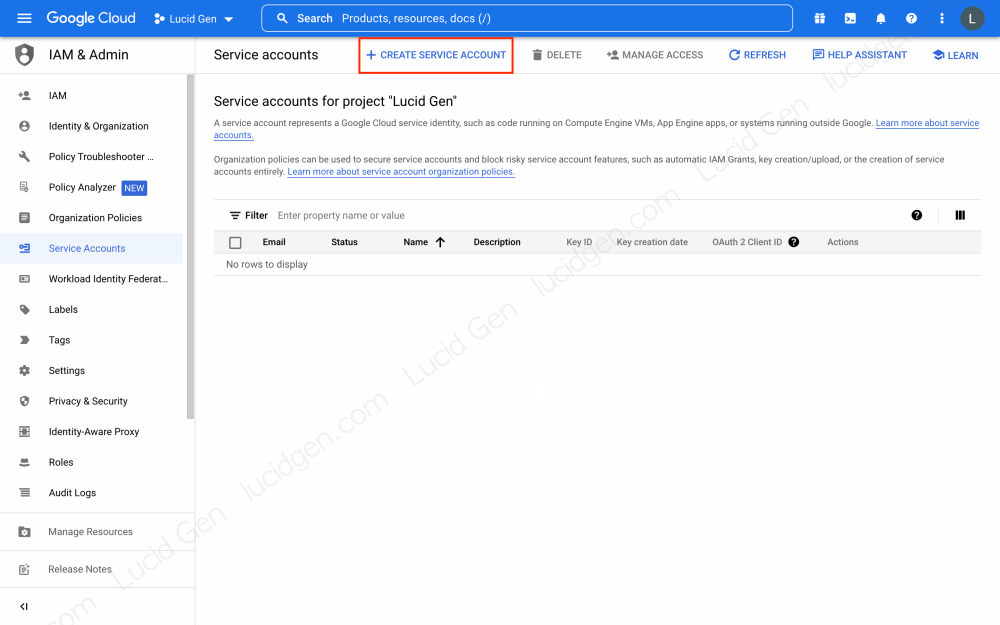
Step 5: Click the Create Service Account button to create an account.

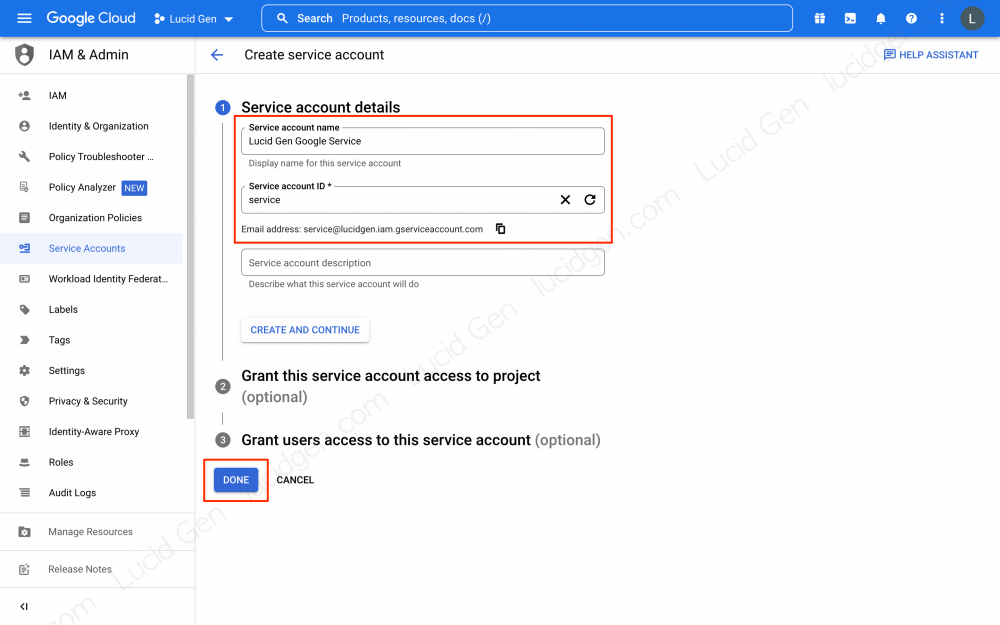
Step 6: Fill in the information to create Service Account. Note that you should keep the Service account ID short and friendly because it will generate an email address you can use later. You can grant Owner rights to this account or not grant them later, which does not affect the use of APIs.

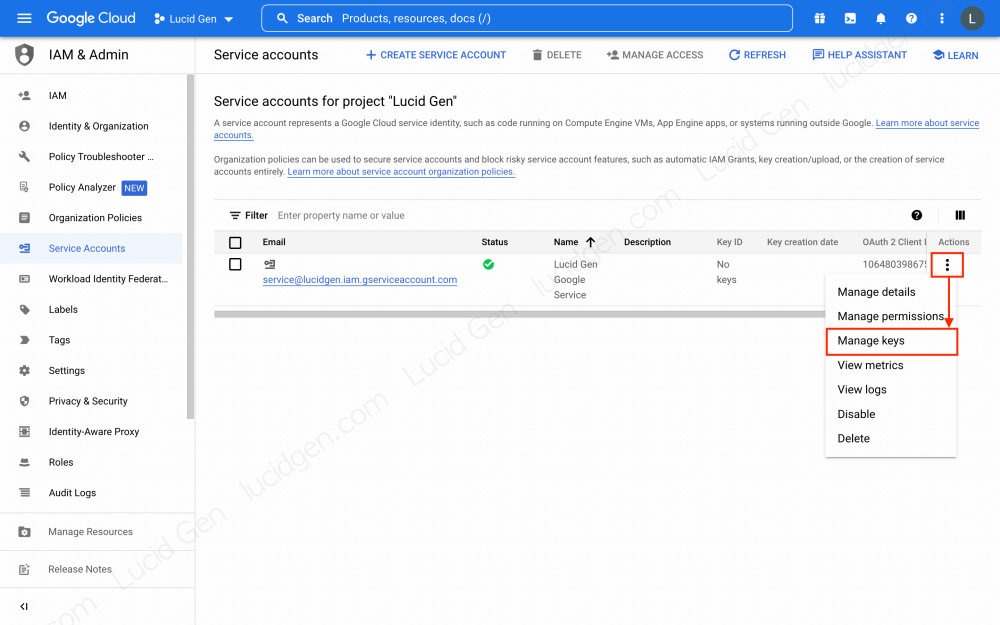
Step 7: Try accessing Manage keys for your Service Account by clicking the options button. This is the step to create a JSON file containing the account information.

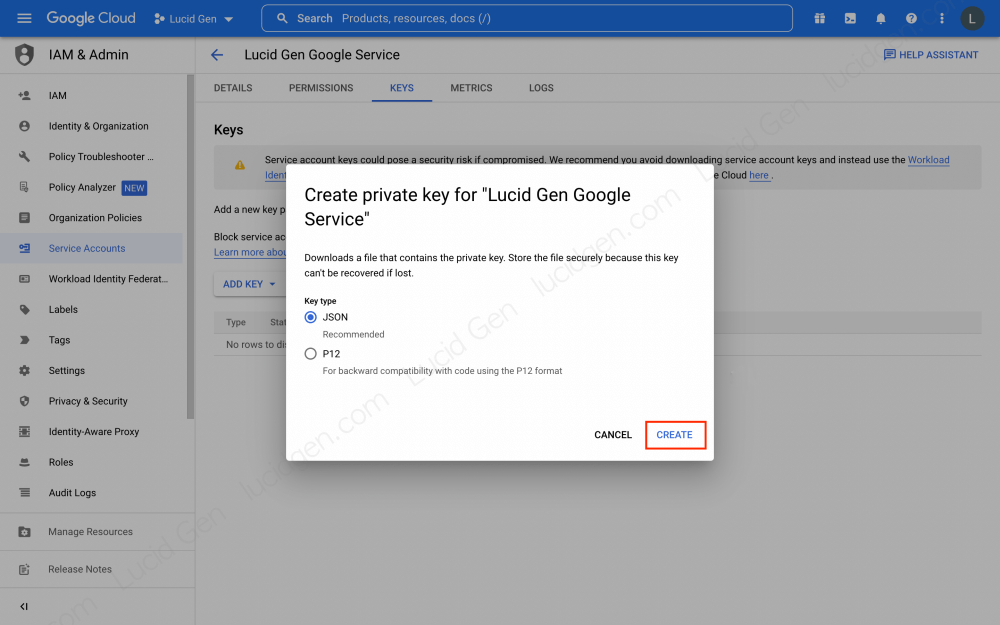
Step 8: Click Add Key and select Create new key to generate a private key.


Step 9: Select JSON and click Create to create a JSON file for your Service Account.

Step 10: Your browser will immediately download the JSON file to your computer. Click the Close button to finish.


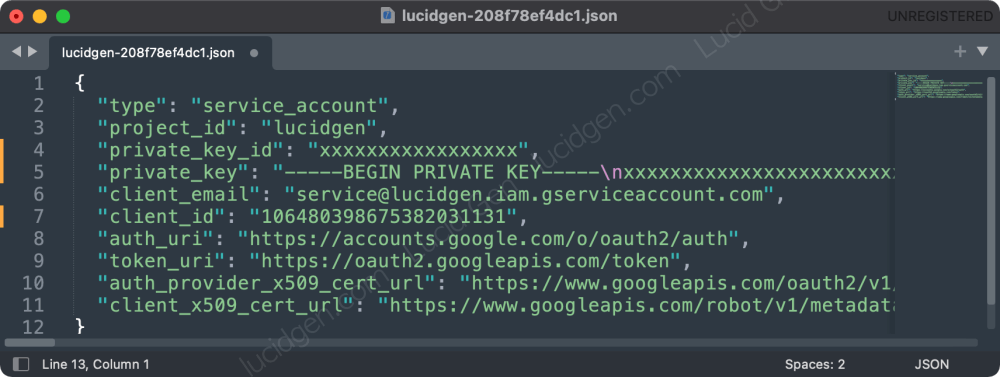
And the wire is the example content in the JSON file containing the access information to your Service Account account. Please keep it safe, and only share it with people you trust. Using Python, you can create a dictionary variable with the same content in this JSON file to work with Google’s API.

Enable Google Cloud API
Once you’ve created a Service Account, you must enable the necessary APIs to work with your API calls.
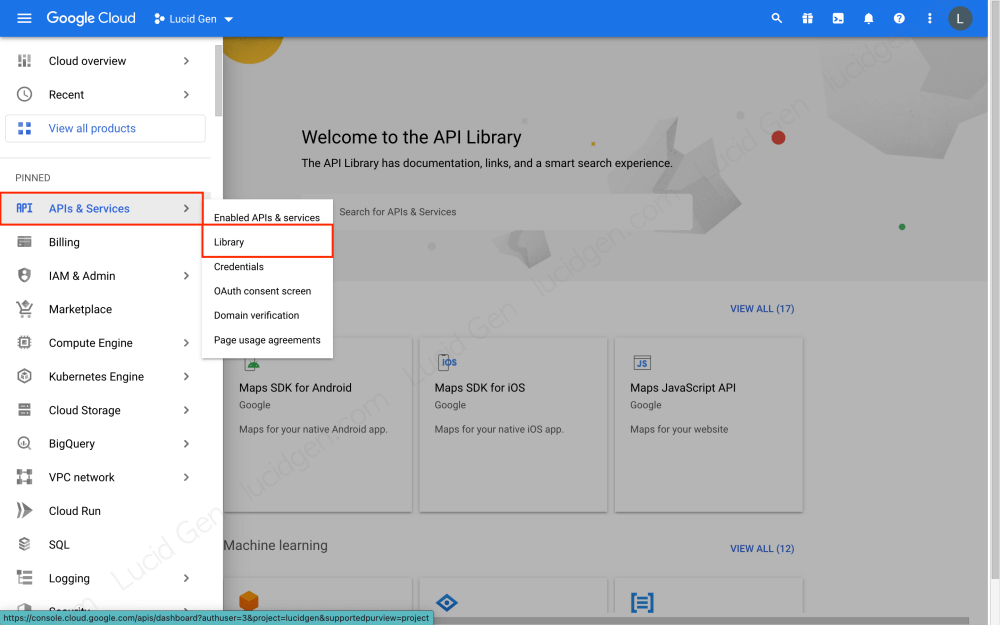
Step 1: Access the Google Cloud API library by clicking APIs & Services > Library.

Step 2: Search for the APIs you want to use. The function of each API is specified below the description. Lucid Gen will show you some famous API examples below.
- Google Drive API will help you create files, manage file sharing, and search files and folders.
- Google Sheet API will help you edit the content and get the content of the worksheets.


Bước 3: Bật API mà bạn đã chọn.


Step 4: View the overview of the data you used with the API. You can disable an API by clicking the Disable API button.


Finally, depending on the API use case, you may have to share editing permissions for this Service Account. For example, Google Drive or Google Sheets. This Service Account’s email is the client_email in the JSON file on your computer.


Frequently asked questions
Why is the API enabled but still getting an error when calling the API?
Some APIs require you to share editing permissions with the client email to work. Check if you have shared permissions for the Service Account client email.
What should I do when I lose the Service Account JSON file?
You cannot request a re-issue of the JSON file containing the Private key of the created Service Account. But you can delete the old key and create a new one.
Conclusion
Lucid Gen hopes this article will help you quickly and effectively create a Google service account quickly and effectively. I am also learning and working with Google Cloud, hope to have many experiences to share with you in the future. Please leave a message below the comment section to ask questions or chat with me.


Clear and actionable guide! This tutorial simplifies creating a service account and enabling Google Cloud APIs with step-by-step precision excellent work!
Hello Peol, thank your for feedback!