

Adding Google Analytics to a website is something almost every webmaster needs to do. On July 1, 2023, Google stopped processing data in the old Universal Analytics (IDs starting with UA-), so Google Analytics 4 (GA4) is now the only version. In this article, I’ll show you how to create GA4, get the Google tag or Measurement ID, and add it to the platforms most popular in Vietnam, such as WordPress, LadiPage and Haravan, as well as hand-coded websites and Google Tag Manager.
A quick intro to Google Analytics
Google Analytics is the granddaddy of website measurement and statistics tools. And since Google Ads came along, Google Analytics has also become a great helper for measuring conversions and building remarketing audiences.
The usual metrics we will be interested in are as follows:
- Views
- Users
- Traffic sources
- Engagement time
- …
More advanced metrics require event tracking:
- Events
- Key events (formerly Goals and Conversions)
- Funnels and user paths
- …
But in this article I’ll focus only on getting Google Analytics onto your website. Measurement in Analytics is a big topic, so I’ll probably need a separate article for it.
When adding GA4 to a website, you will use one of these two things:
- Measurement ID: Looks like G-XXXXXXXXXX. You paste it into LadiPage, Haravan, Google Tag Manager or any plugin that has a Google Analytics ID field.
- Google tag (gtag.js): The full script snippet that contains your Measurement ID. You paste it into WordPress or a hand-coded website.
If you come across a guide that mentions a tracking ID like UA-XXXXXXXX-X, that’s Universal Analytics. It no longer collects data, so there’s no need to install it.
Now, let’s start adding Google Analytics to your website.
How to create and get the Google Analytics code
The first thing we need is the Google Analytics code. If you have never created a Google Analytics account, follow the instructions below.
Create a Google Analytics account
Your Google (Gmail) account is your Analytics account, so you only need to create one if you don’t have Gmail yet. Sign in with your Gmail and follow along.
Step 1: Go to analytics.google.com and click the Start measuring button.

Step 2: Enter any Account name you like, then click Next.
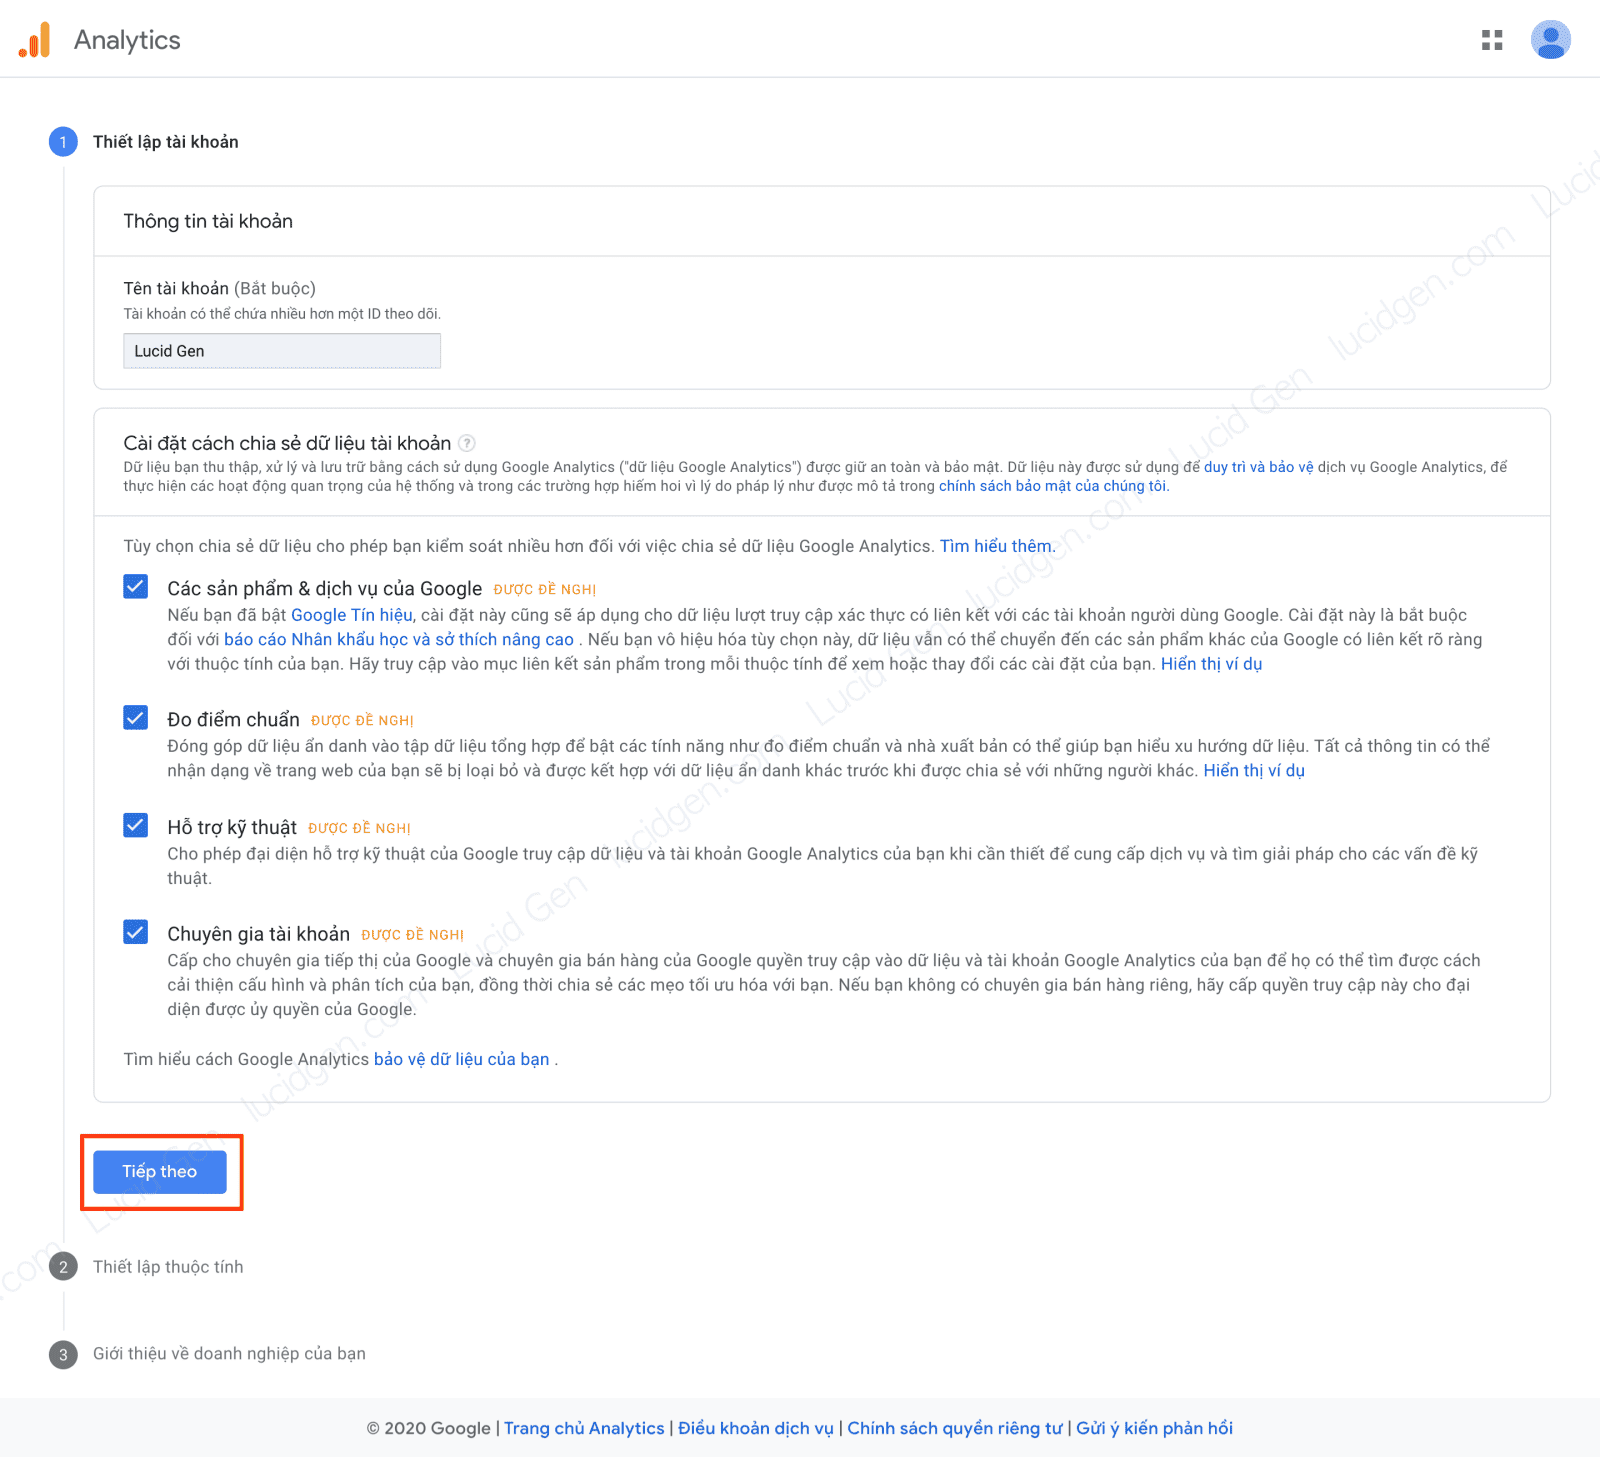
Step 3: Enter a Property name, select your time zone and currency, then click Next. New properties are GA4 by default; the option to create a Universal Analytics property is gone.

Step 4: Select the Industry category and Business size that fit your website, then click Next.

Step 5: Choose the business objectives that match your website (for example, generate leads or drive online sales), then click Create. This only decides which reports GA4 suggests by default, and you can change it later, so don’t overthink it.
Step 6: Tick the terms checkboxes and click the I Accept button.
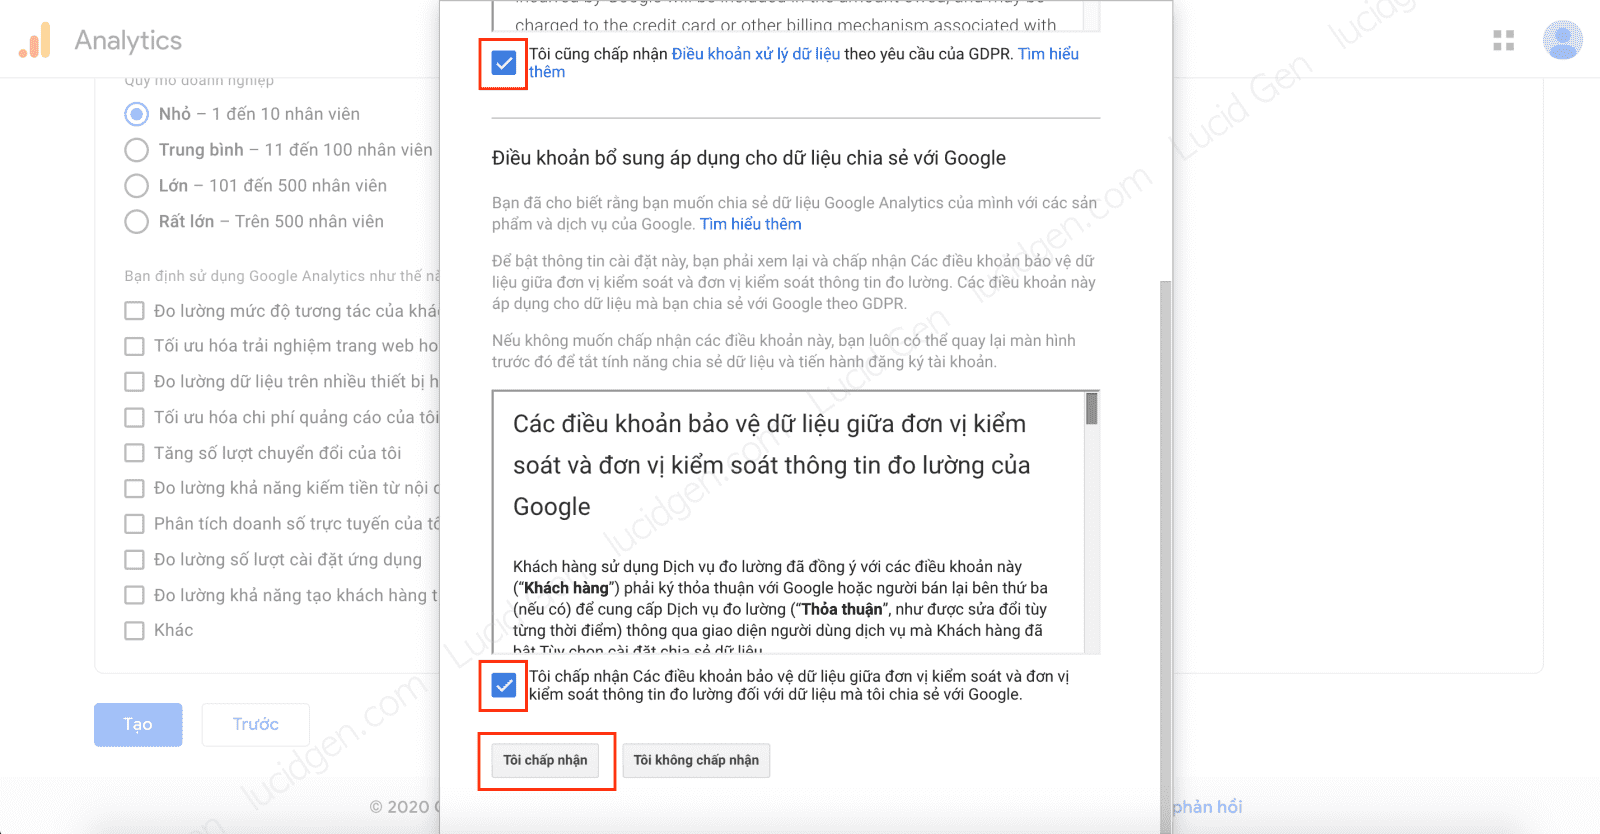
After this step, Google Analytics usually asks where you want to collect data from. Choose Web and continue with the data stream setup below.
Get the Google Analytics GA4 code
Step 1: If you’re not already on the stream setup screen, go to Admin (the gear icon at the bottom left), and under Data collection and modification click Data streams. Then choose Web.

Step 2: Enter your website domain in Website URL and give the stream any Stream name you like. Then click Create stream.
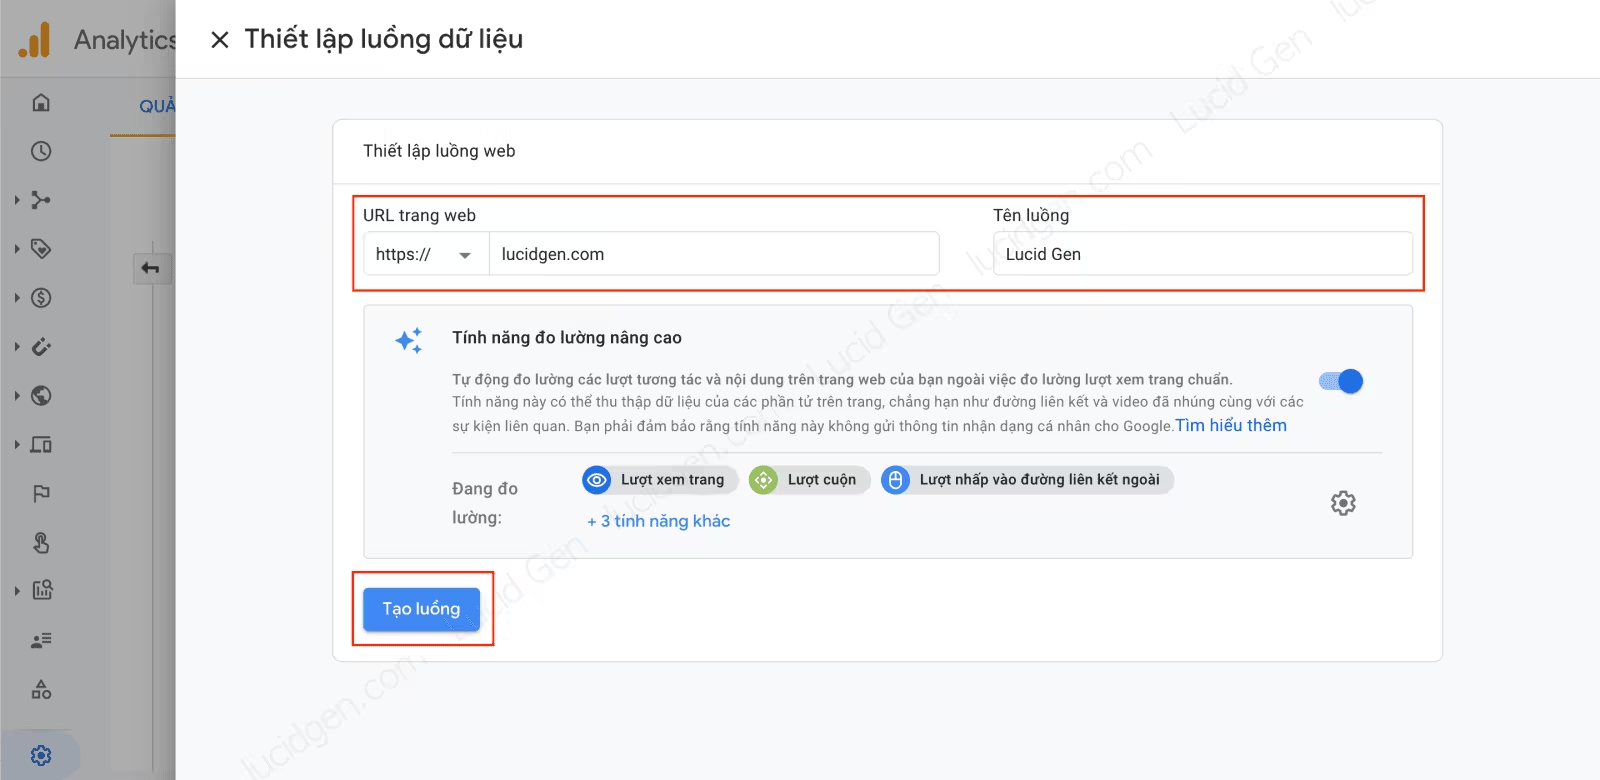
Step 3: This is the data stream you just created. Click on it to get the Measurement ID and the Google tag.

Step 4: On the stream details page, the Measurement ID is at the top right. To get the Google tag, open View tag instructions, choose Install manually and copy the snippet. Use one of the two depending on how you add Google Analytics to your website:
- Google tag: To add Google Analytics to a WordPress or hand-coded website.
- Measurement ID: To add Google Analytics to a LadiPage or Haravan website, or to Google Tag Manager.
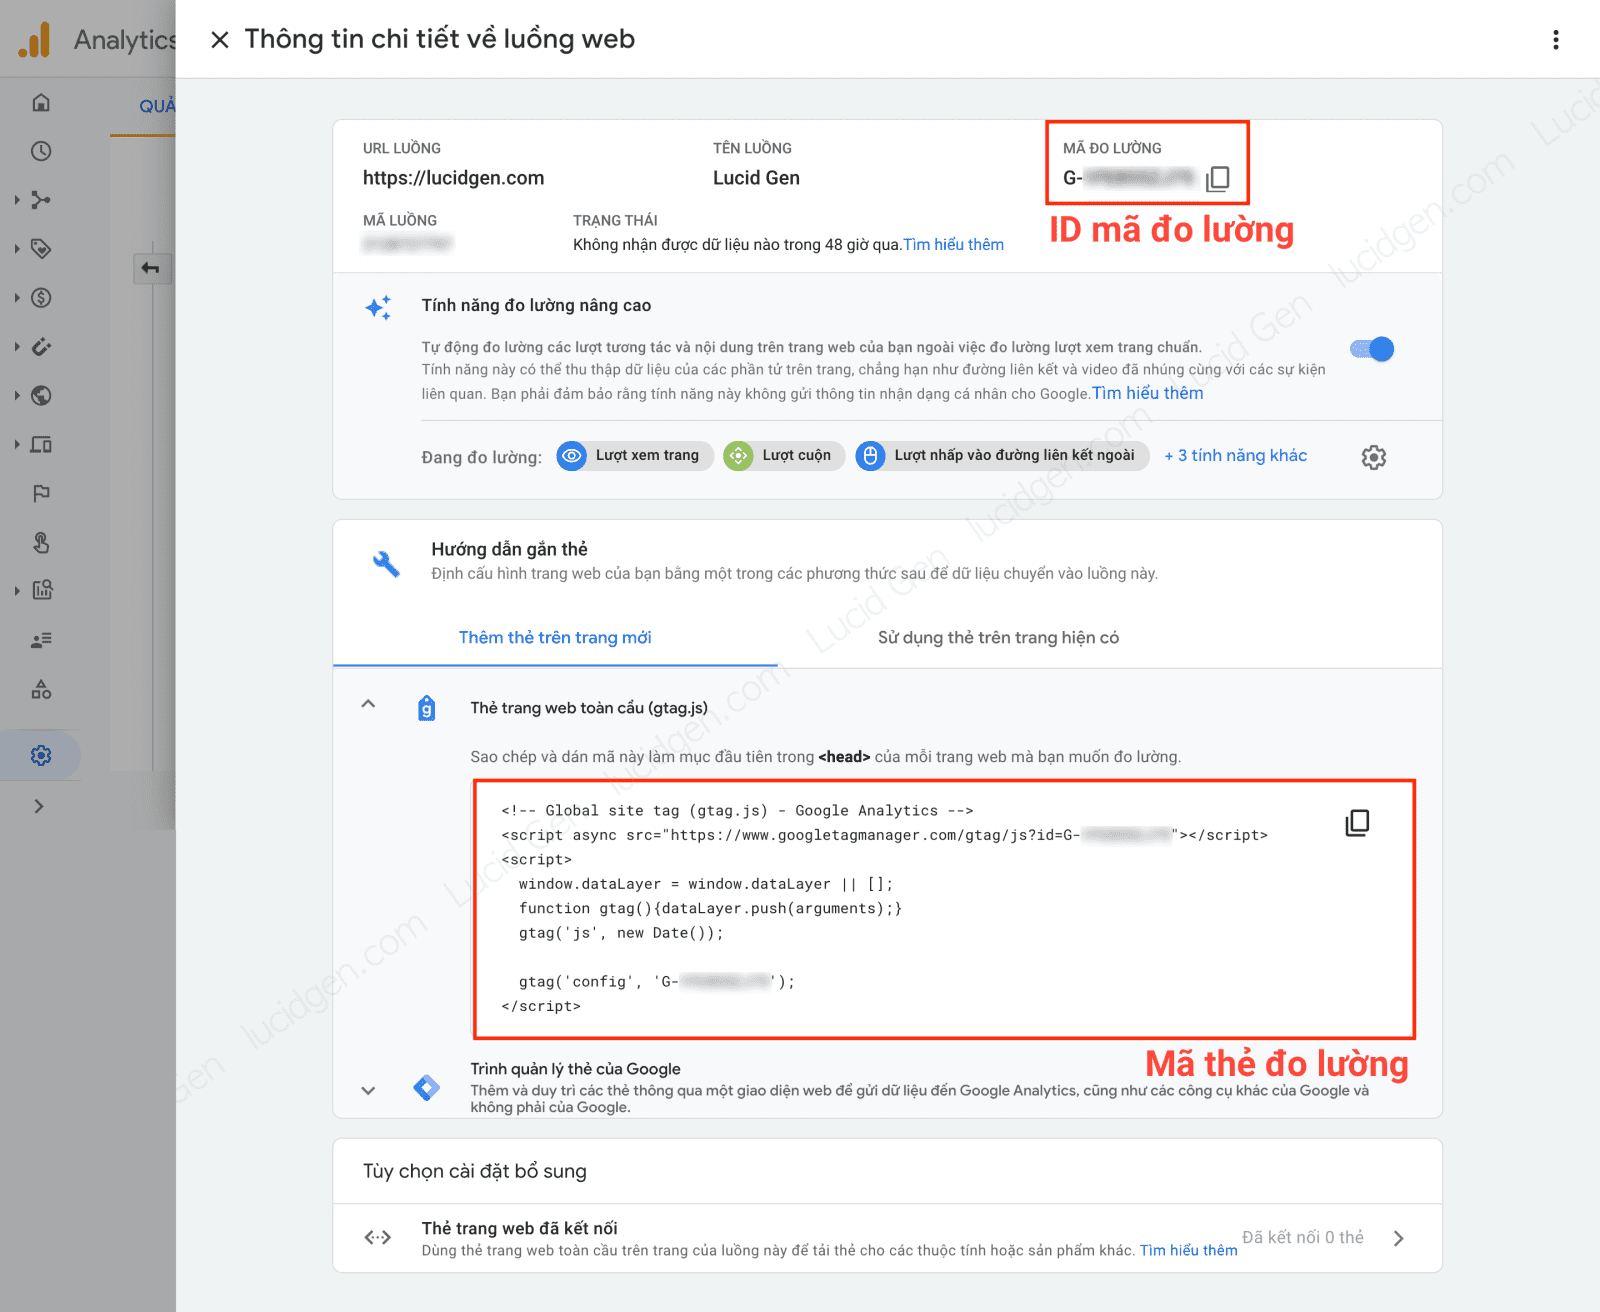
I took the screenshot above when GA4 had just launched, so the layout is a bit different now, but the Measurement ID still looks like G-XXXXXXXXXX and the Google tag snippet has the same structure. Once you have the code, jump to the section for your website platform below.
How to add Google Analytics to a WordPress website
You should not put the code into your theme files, because you will lose Google Analytics when the theme updates (unless you use a child theme). Use a simple plugin instead, as in this tutorial.
Step 1: Go to your WordPress admin and install the WPCode plugin. It used to be called Insert Headers and Footers, and searching for the old name still finds it.
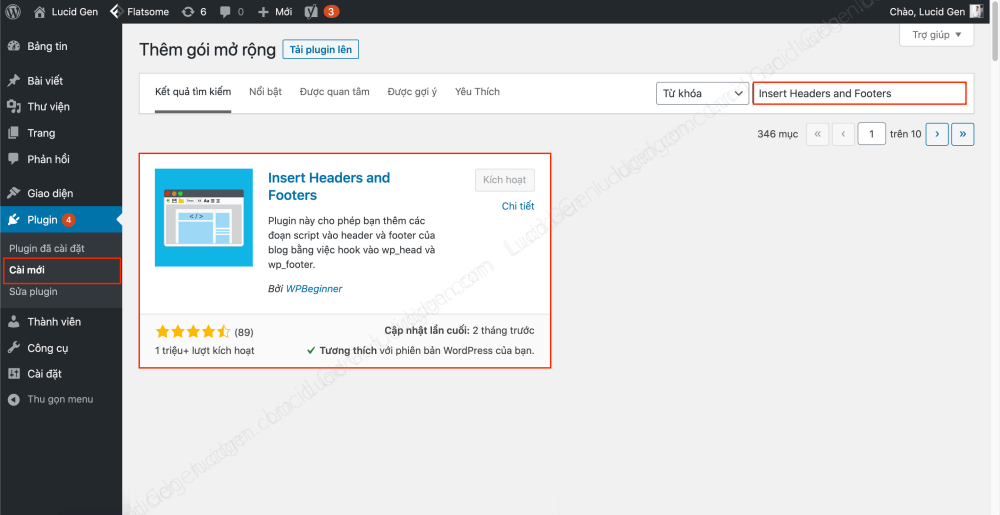
Step 2: Go to Code Snippets, then Header & Footer. Paste the Google tag into the Header box and click Save Changes.
Note: I used to paste it into the Body box to reduce the impact on page load (as in the screenshot below, which shows the plugin’s old interface). But the Google tag loads asynchronously, so placing it in the Header barely slows the page, captures visitors who leave very quickly, and matches Google’s recommendation. If your theme or SEO plugin already has a Google Analytics ID field, you can use that instead, just don’t add it in two places, or every page view will be counted twice.

How to add Google Analytics to a LadiPage website
To add Google Analytics to a LadiPage website, open the page in the LadiPage editor. Click Thiết lập (Settings) and select Mã chuyển đổi (Conversion code). Finally, paste your Measurement ID (G-XXXXXXXXXX) into the Google Analytics ID box and click Xuất bản (Publish).
Note: I recommend this method because LadiPage then sends more event and conversion data for better measurement. Many people paste the whole Google tag into the Javascript/CSS code section instead, which only measures page views and basic data, not events and conversions.

How to add Google Analytics to a Haravan website
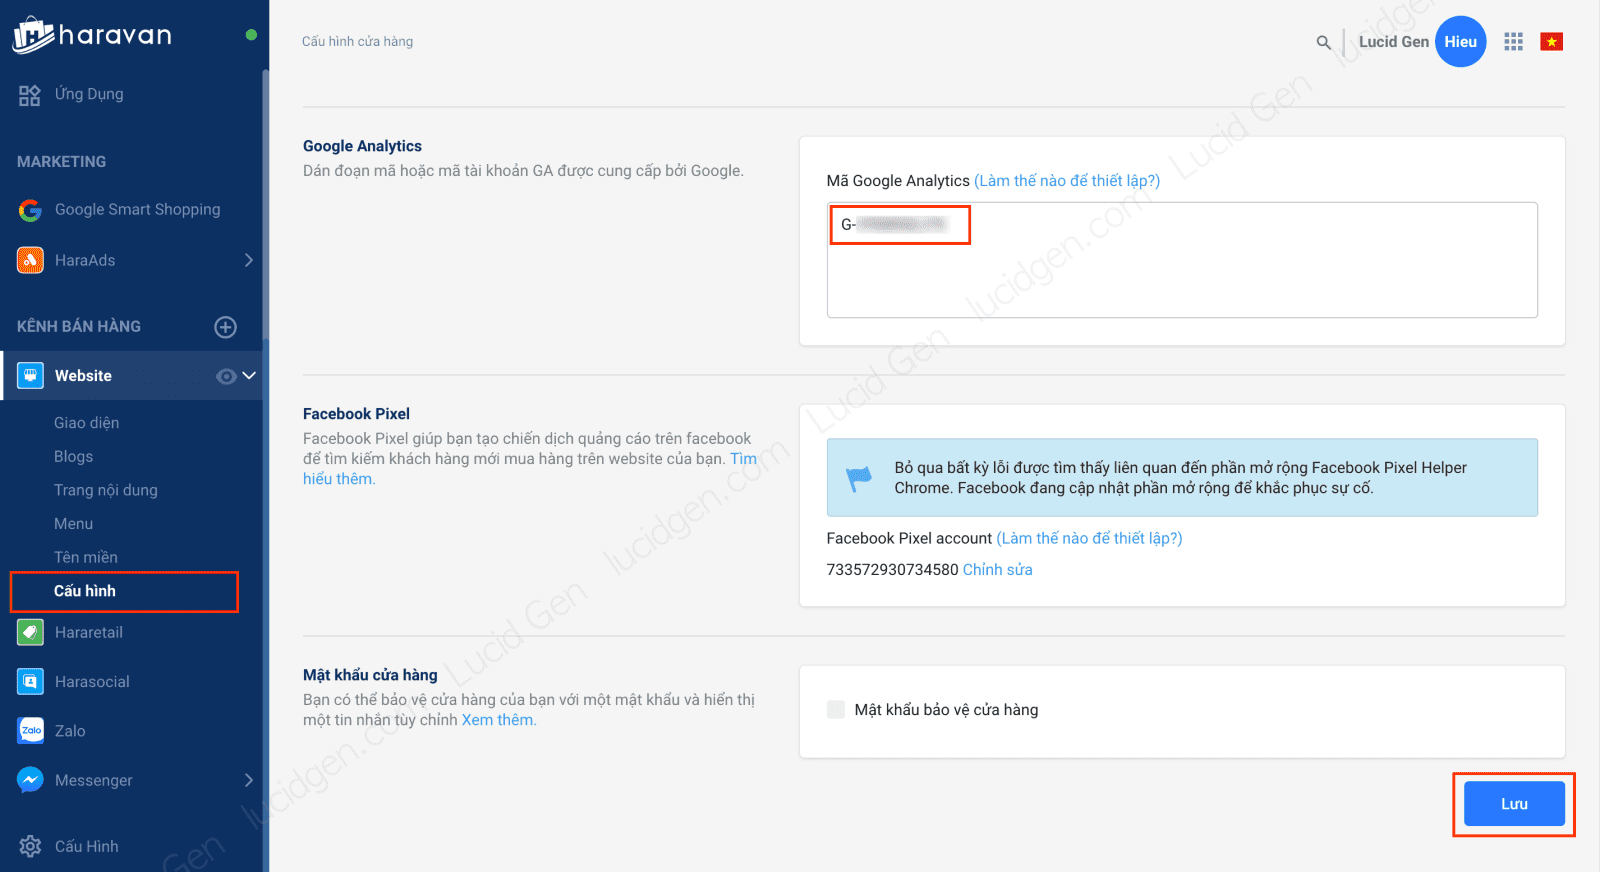
To add Google Analytics to a Haravan website, you need an account with permission to edit the website. Click Website and select Cấu hình (Configuration) in the left menu. Then paste your Measurement ID into the Google Analytics box and click Lưu (Save).
How to add Google Analytics to a hand-coded website
For a hand-coded website, find the file that is shared by every page, usually the header file. Google recommends placing the Google tag right after the opening <head> tag. It will look like this (G-XXXXXXXXXX is your Measurement ID):
<head>
<!-- Google tag (gtag.js) -->
<script async src="https://www.googletagmanager.com/gtag/js?id=G-XXXXXXXXXX"></script>
<script>
window.dataLayer = window.dataLayer || [];
function gtag(){dataLayer.push(arguments);}
gtag('js', new Date());
gtag('config', 'G-XXXXXXXXXX');
</script>
...
</head>Note: Insert it only once. It’s better to copy the exact snippet from GA4 than to retype the example above, so you don’t get the ID wrong.
How to add Google Analytics to a website with Tag Manager
If you have already added Google Tag Manager to your website, follow these instructions to add Google Analytics through Google Tag Manager.
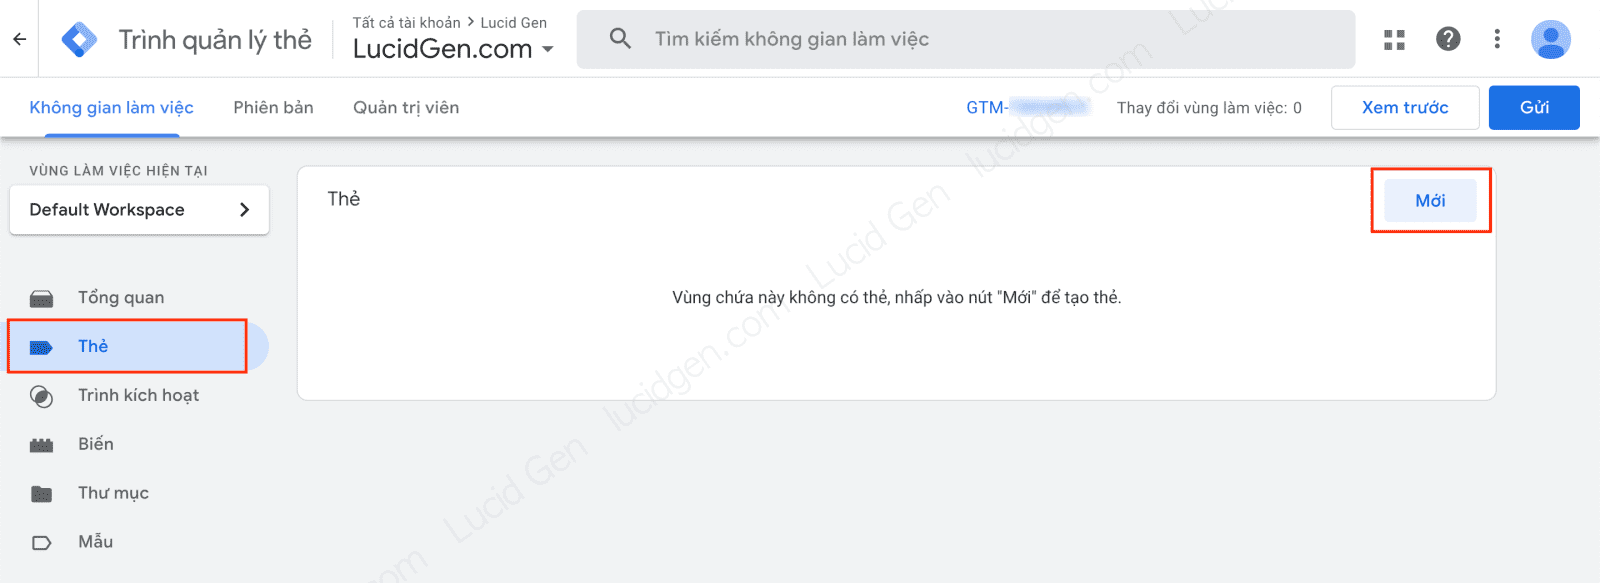
Step 1: Go to tagmanager.google.com and select the container installed on your website. Then click Tags in the left menu and click the New button to add a tag.
Step 2: In the tag settings window, click Triggering at the bottom.
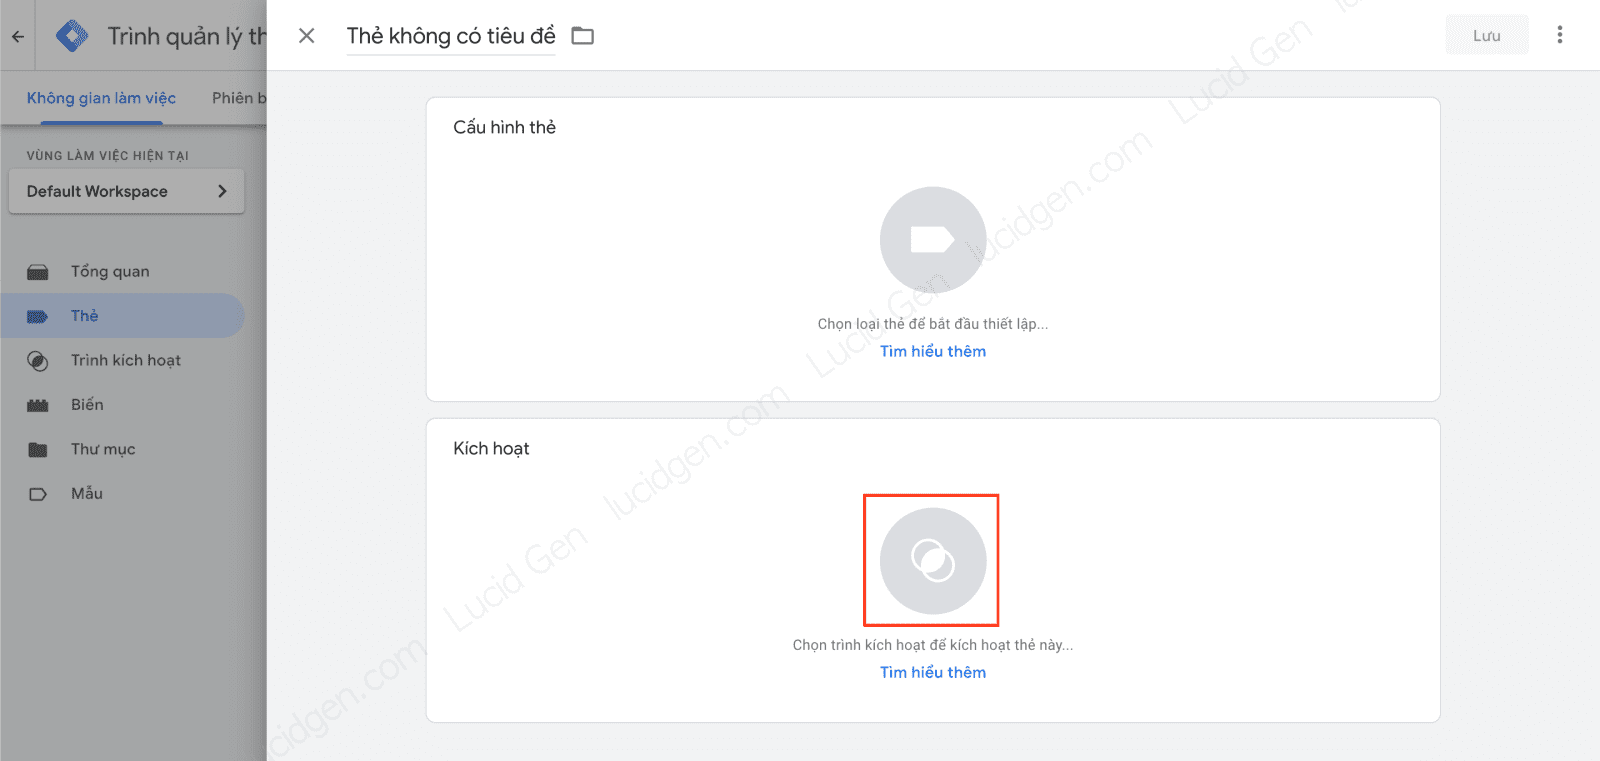
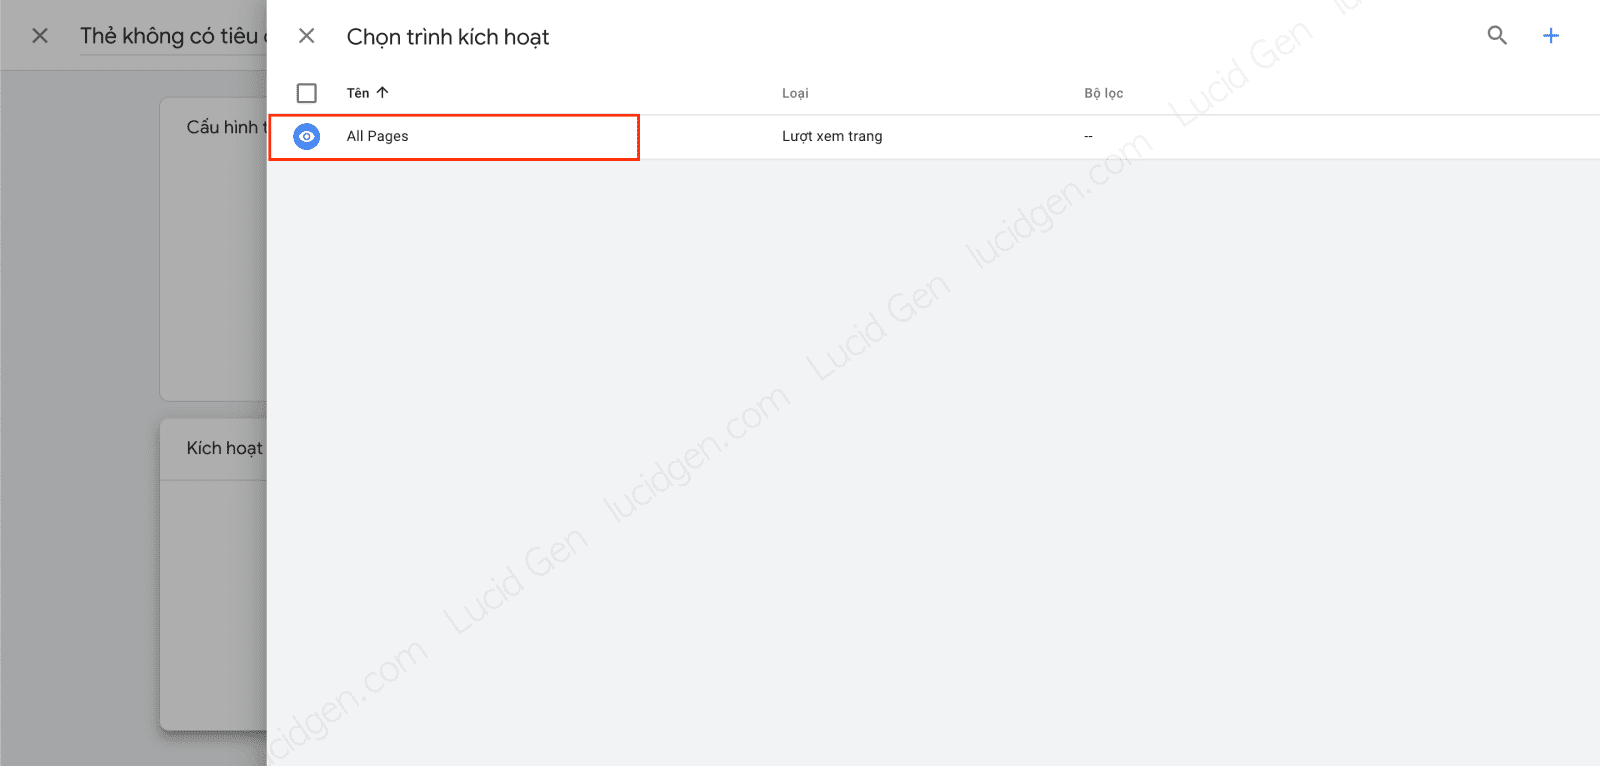
Step 3: Select All Pages.
Step 4: With the trigger set, click Tag Configuration above to choose a tag type.
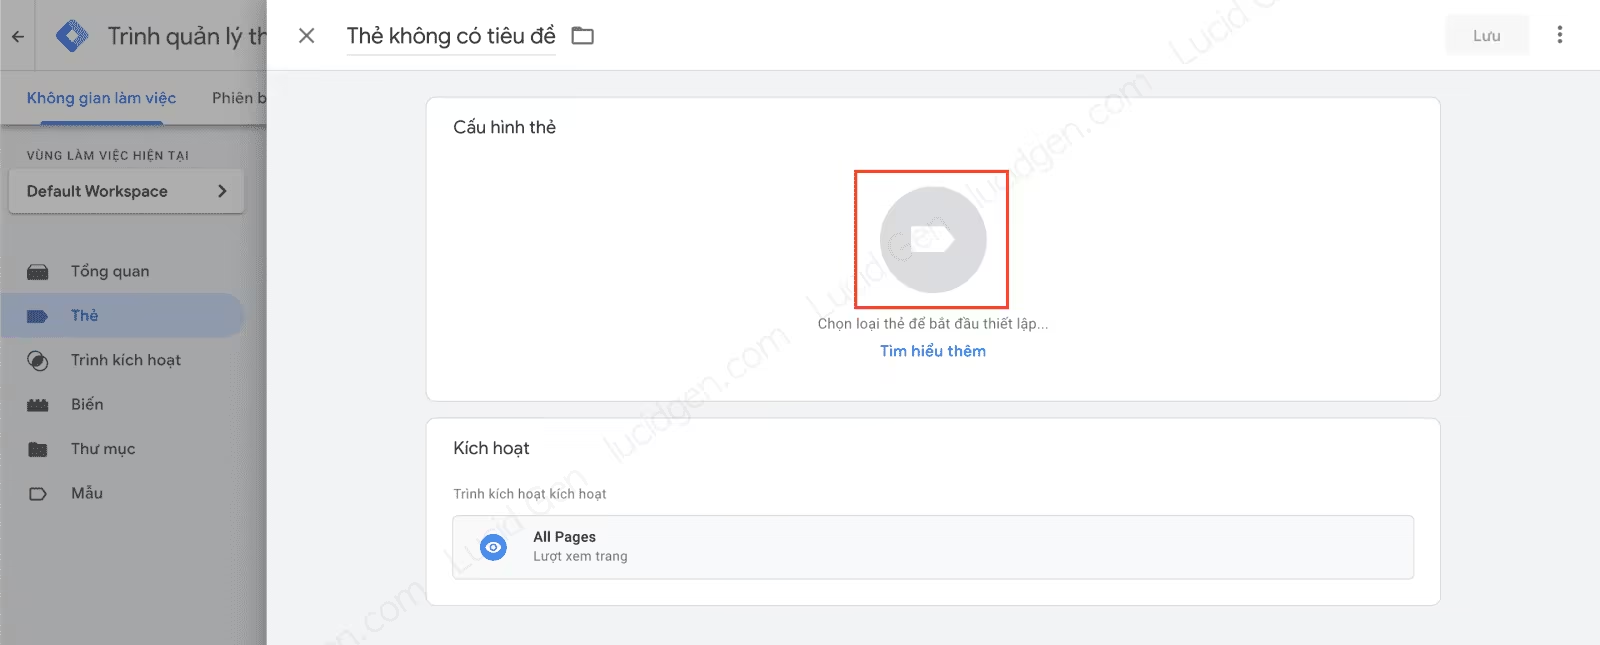
Step 5: Choose Google Tag. Since September 2023, Tag Manager has replaced the old Google Analytics: GA4 Configuration tag type with the Google Tag, and existing GA4 Configuration tags were migrated automatically, so you don’t need to redo them.
Step 6: Paste your Measurement ID (G-XXXXXXXXXX) into the Tag ID field. Then give the tag any name you like and click Save.
Step 7: After creating the Google Analytics tag in Tag Manager, click the Submit button on the workspace screen.

Step 8: You don’t need to fill in anything; just click Publish and you’re done.

How to check if Google Analytics is working
Open your website in another tab, then in Google Analytics click Reports and choose Realtime. As long as the charts show numbers, you have successfully added Google Analytics to your website.

If nothing shows up after a few minutes, go to tagassistant.google.com, click Add domain, enter your website address and click Connect. Tag Assistant shows whether the Google tag is firing on the page and which Measurement ID it sends data to, which makes it easy to spot a wrong ID or a duplicate installation.
Conclusion
After adding Google Analytics to your website, you can add users to Google Analytics for your employees or agencies. If you are interested in website measurement, take a look at the other articles in this category.
Whether you managed to install Google Analytics or not, leave a comment below and I’ll reply to help you get it working. Good luck with your installation!


